Configuring KDQ workspace access
Configuring KDQ Workspaces
Use the following steps to configure access new KDQ workspaces to specific users/user groups.
Require KDQ and K Admin access.
Requires Entra Admin access if Entra groups are used to manage workspace access
Step 1. Workspace role
When a workspace is created in KDQ a role is created for that workspace will be created. This role needs to be added to K User Administration portal
Log into KDQ
Select all Workspaces in the Workspace selector.
Select menu onthe workspace you want to configure access to
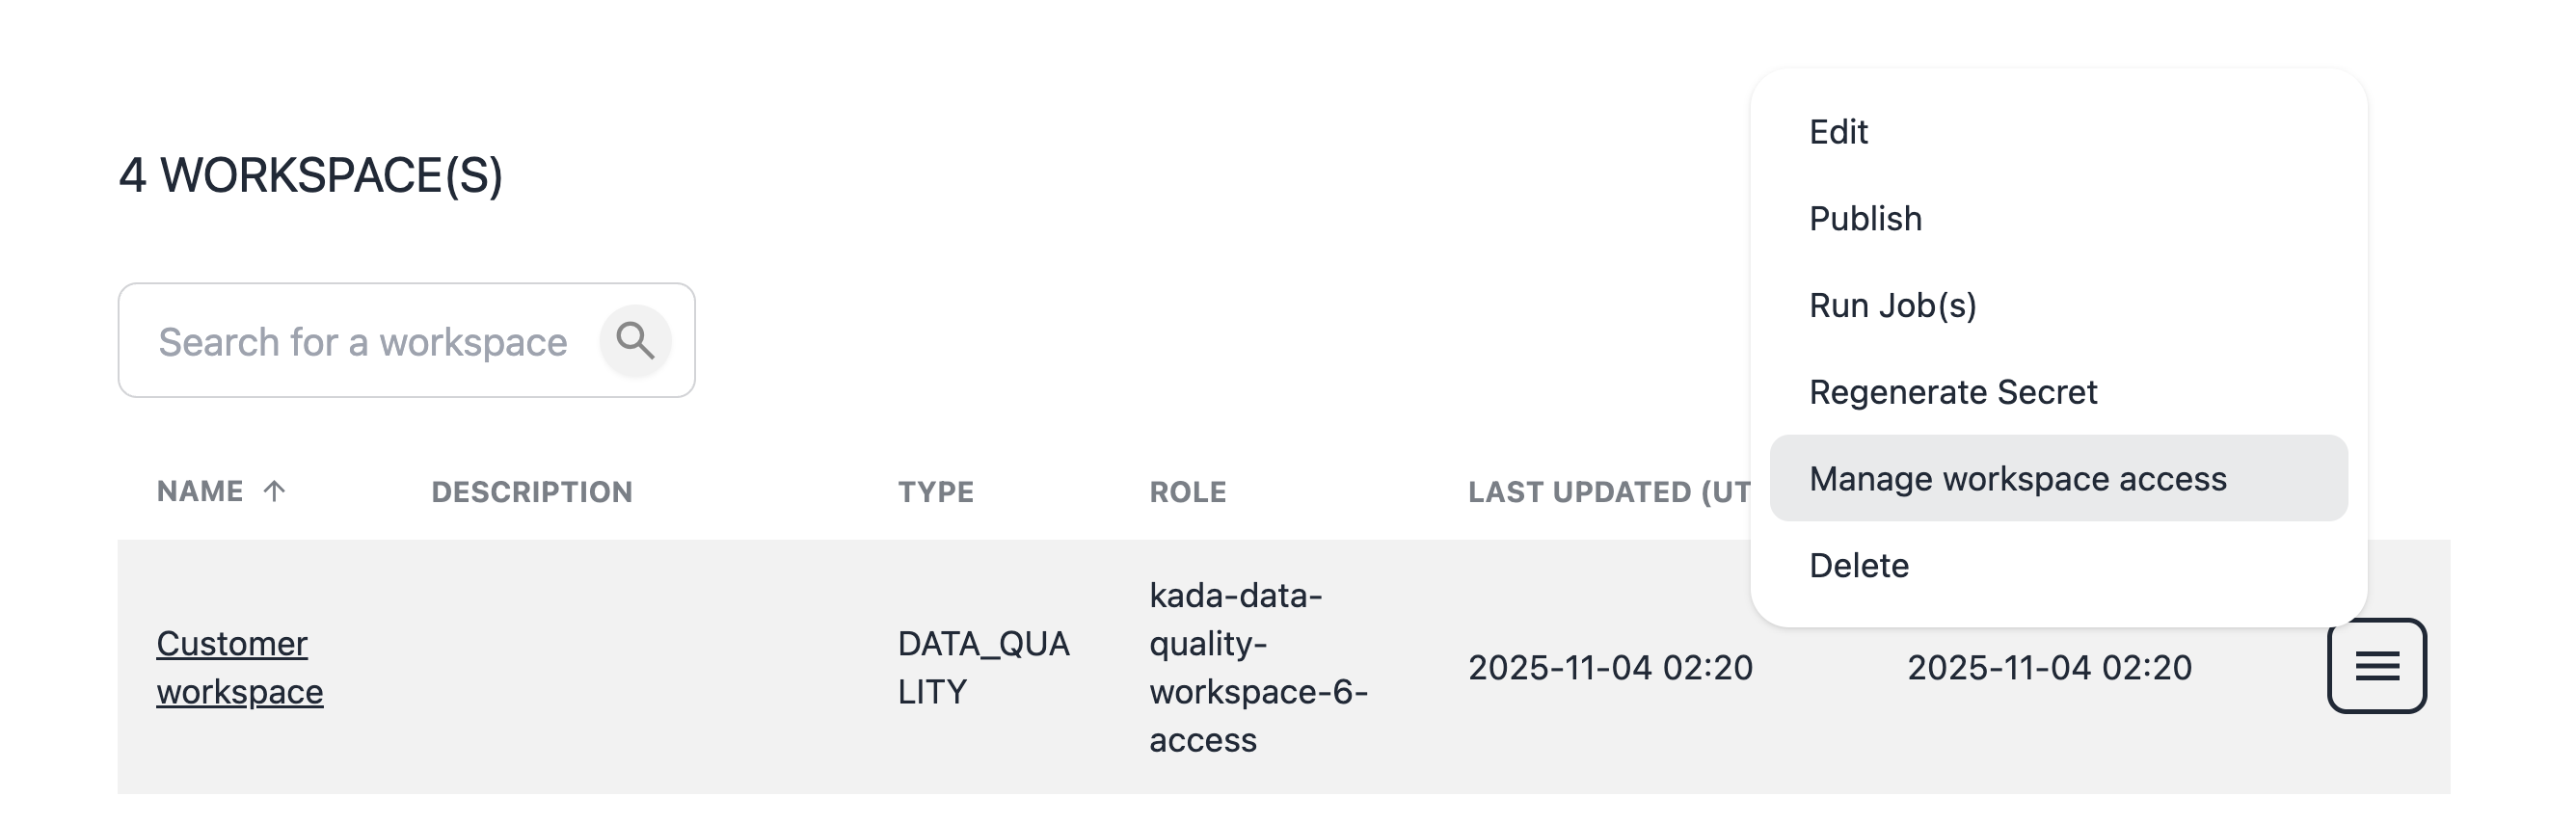
Note down the workspace role e.g. kada-data-quality-workspace-1-access
Step 2. Configure the role in K User Administration (Keycloak)
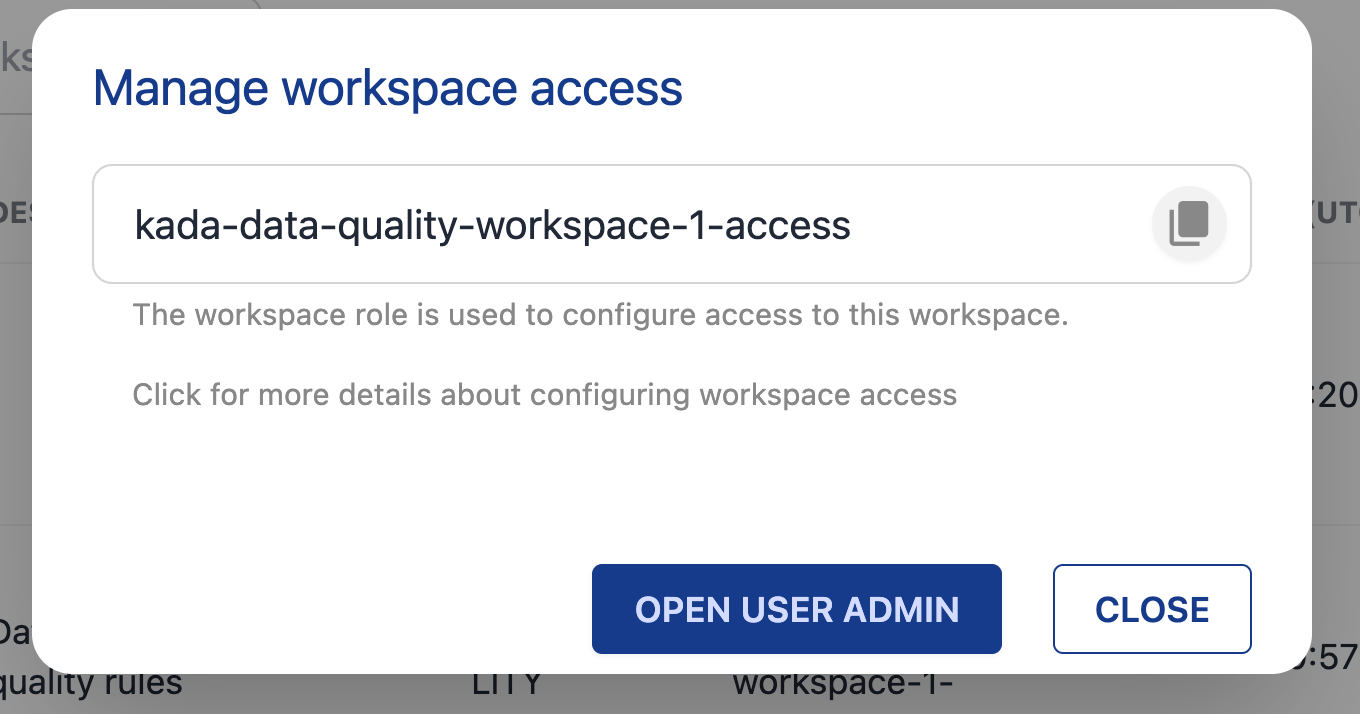
Go to the User Admin portal
Use the Open User Admin button from KDW or
Log into K, select Platform Settings. Go to Customisations. Select Configure Single Sign On
2.1 Create a Client Scope
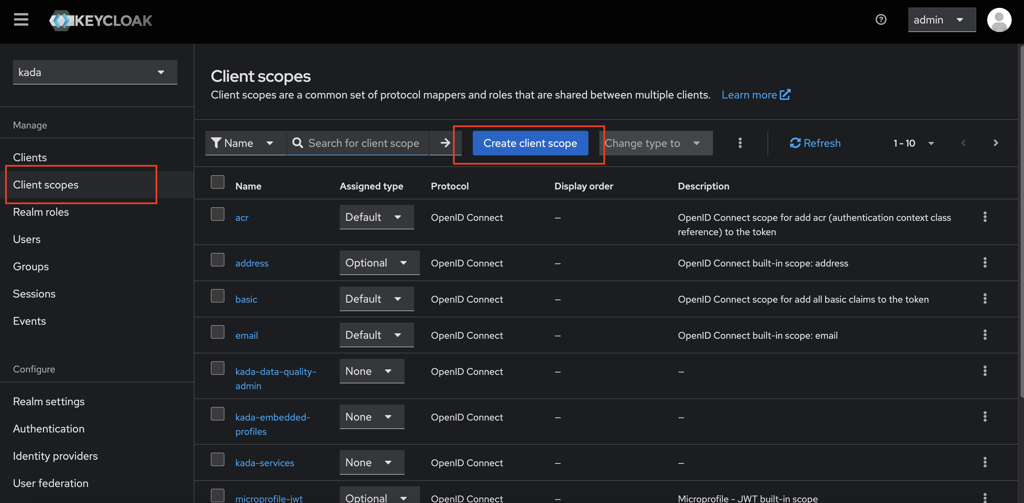
Navigate to Client Scopes in the menu.
Click on Create Client Scope button.
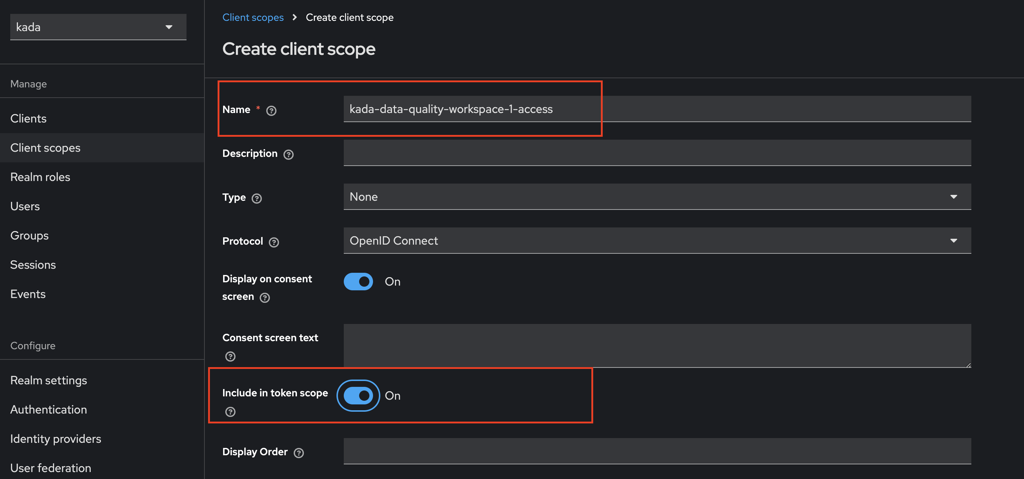
Set the Client Scope Name as the role name from Step 1 e.g.
kada-data-quality-workspace-1-access.Ensure you set Include in Token Scope to ON.
Click Save
2.2 Add the Client Scope to the Client
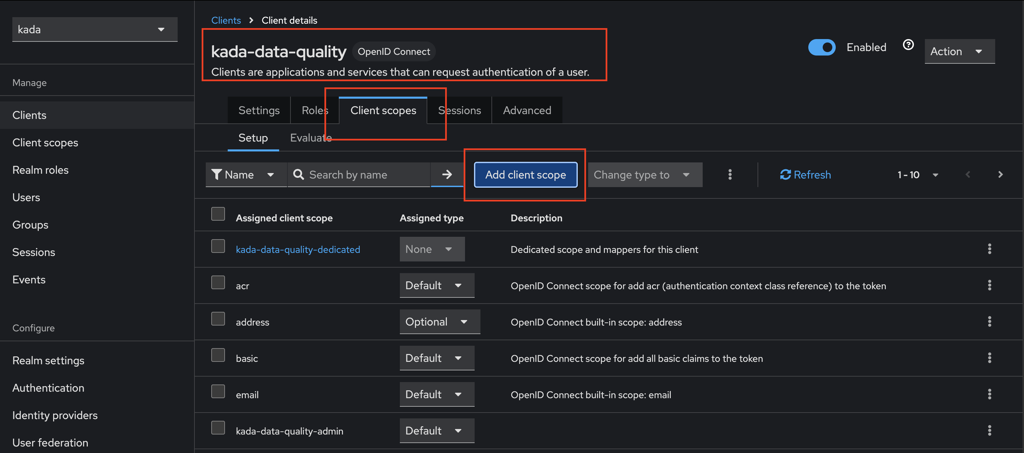
Navigate to Client in the menu. Click on kada-data-quality client.
Go to the Client Scopes tab.
Click on Add Client Scope.
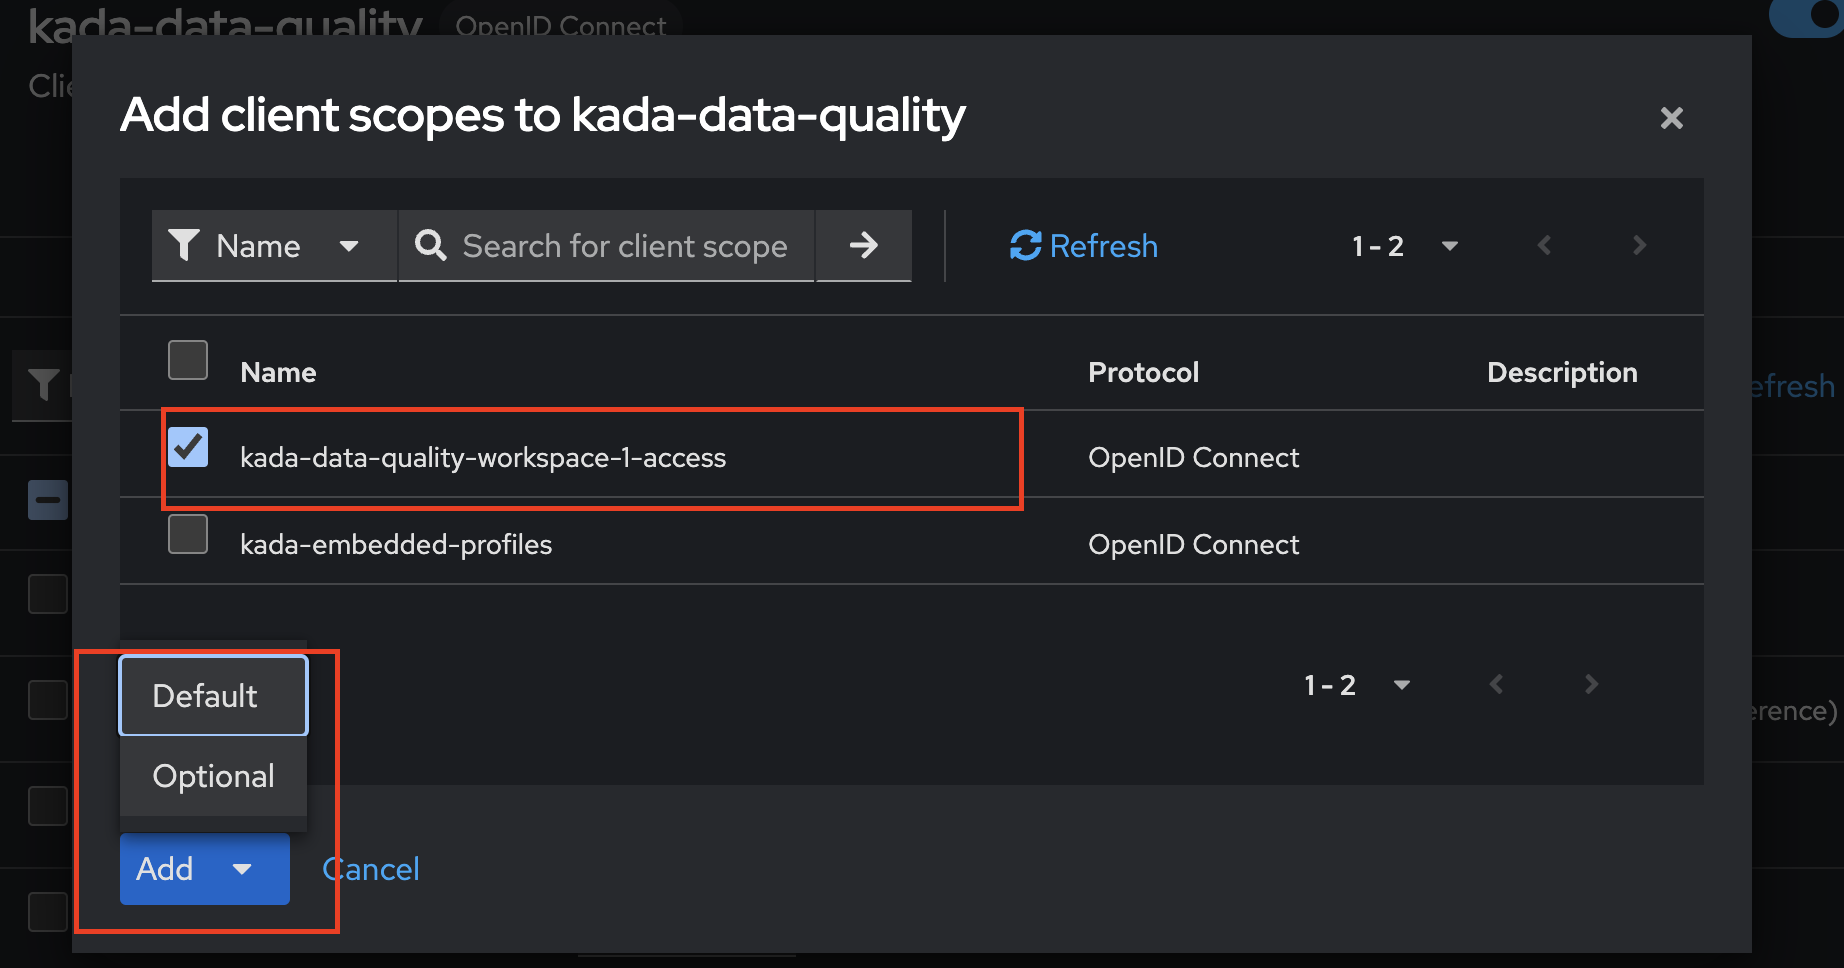
Select the newly created client scope,
kada-data-quality-workspace-1-access, and add it to the client. Click Add and select Default as the Assigned type.
2.3 Create a role
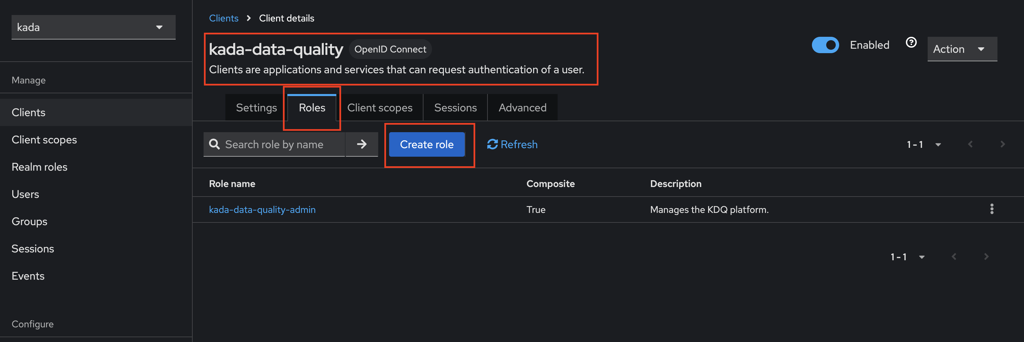
Navigate to the Client tab. Select the kada-data-quality client.
Click on the Roles tab.
Click Create Role.
Enter the Role Name as the same name as the role from Step 1
kada-data-quality-workspace-1-access.Go back to Client Scopes and select the scope
kada-data-quality-workspace-1-access.Click on the Scope tab.
Click Assign Role.
Search for the role
kada-data-quality-workspace-1-accessand assign it to the client scope.Click Save to create the role
3. Assign the role to users
There are several options to assign roles to user:
Direct role assignment
Via Groups (e.g. Entra Group)
3.1 Direct Role Assignment
Navigate to the Users tab
Select a user e.g.
isculpher.Go to the Role Mapping tab.
Assign the role
kada-data-quality-workspace-1-accessto the user.
Note: Users may need to log back in to KDQ to see the new workspace
3.2 Via Entra Groups
3.2.1 Entra
Requires Entra Admin access
Follow these steps to Create a new Entra Group and assign it to an App role in the same App registration created for Single Sign On
Configuring SSO with Azure Active Directory / Entra ID | Step-4.-Create-AD-Groups-in-Azure-[inlineExtension]
Set the App role value to a relevant value and take note of it for the next step in K
Display Name | Value |
|---|---|
KDQ Finance | kdq_finance_user |
3.2.2 K Platform
Link the roles you created in Step 4 to the roles in the K platform.
Log into to your K platform instance ([customer].kada.ai)
Select Platform Settings in the side bar
In the pop-out side panel, under Administration click on Customisation
Click on Configure Single Sign On
Go to Identity Providers
Select the newly created Identify Provider you created in Step 2 and click on the Mappers tab
You will need click Add Mapper to create a mapping for each role. You will need to complete this step 5 times.
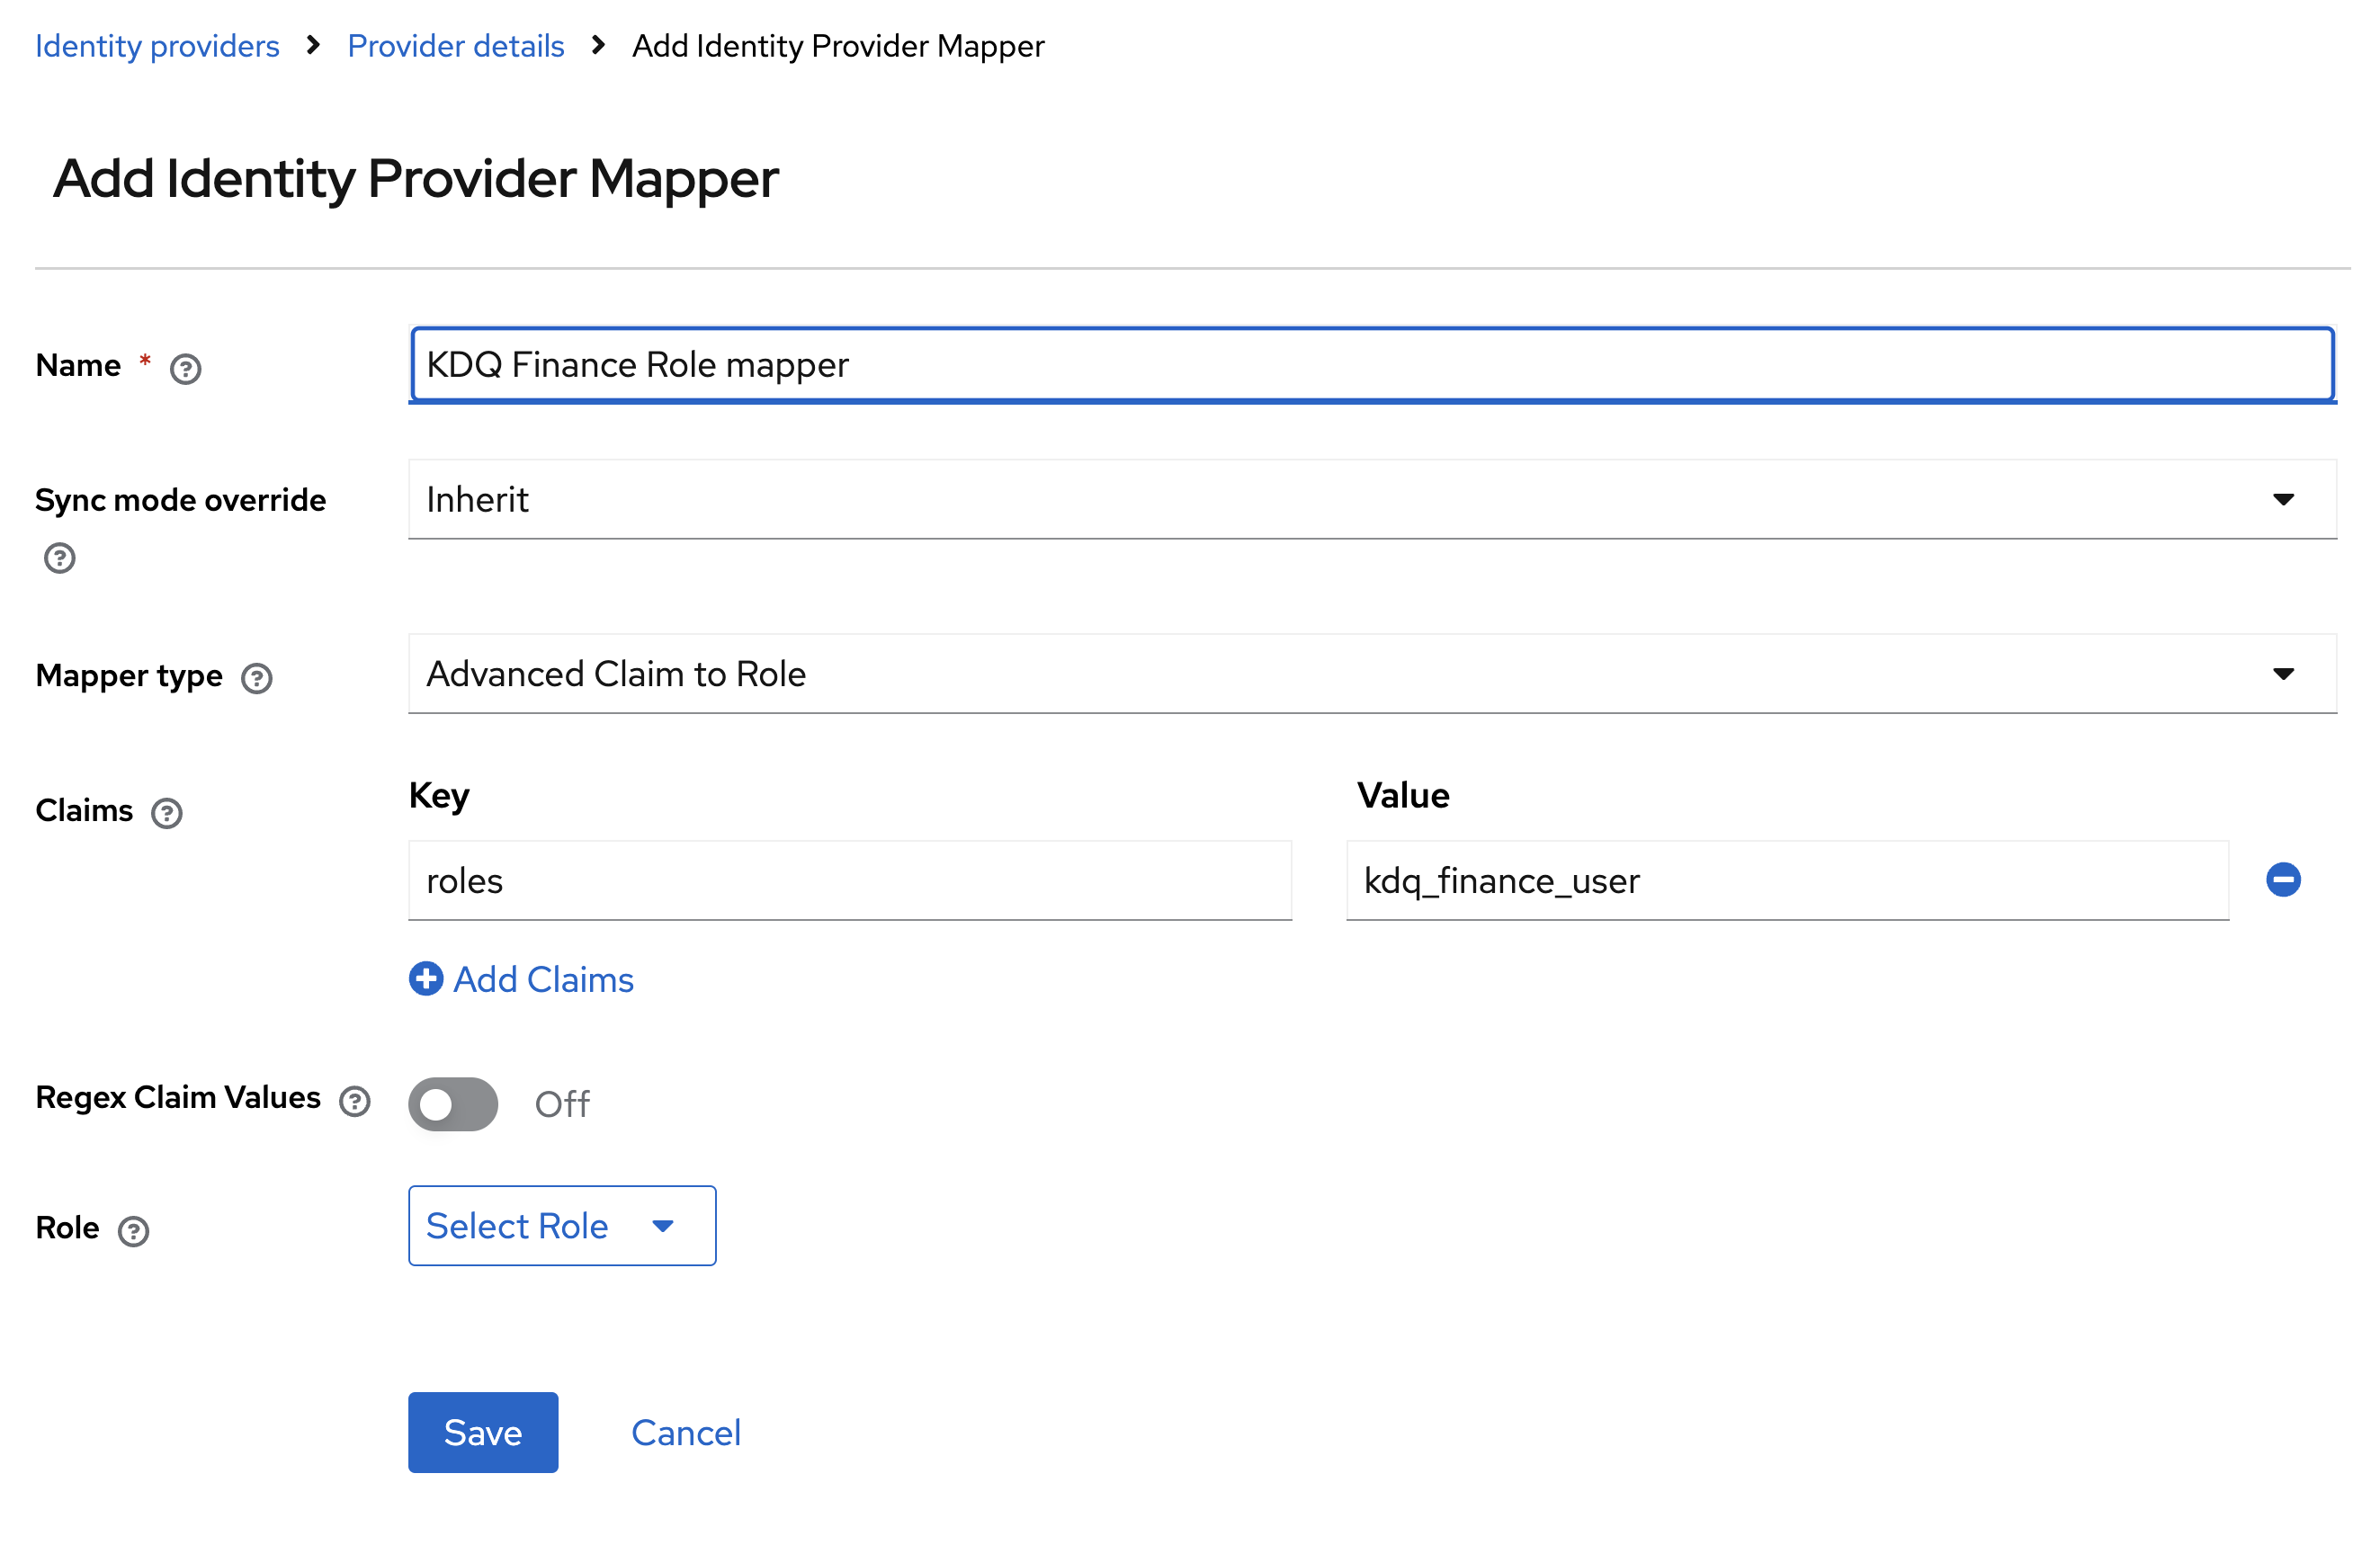
For each role
Set the mapper name: kdq_finance_role_mapper
Set Mapper Type to Advanced Claim to Role
Add roles to the Key field. Add Value from the Step above
For example: For the KDQ Finance the value is kdq_finance_user
Select Client Roles
Select the role you previously created in Step 2.3
Click Save
Users will now be able to access KDQ directly and access workspaces they belong to via Entra groups.