Configuring SSO with Okta
This is a draft integration guide for Okta. Some steps may require further requirement. Any feedback is appreciated.
This page will explain how to enable Single Sign On (SSO) via Okta and use groups to manage roles in KADA. The authentication method used is Open ID connect (Oauth 2.0)
There are 5 keys steps to enable SSO.
Add Okta as an OpenID Connect Identity Provider in K
Add an OpenID Connection application in Okta (using the Keycloak redirect URL value from Step 1)
Finalise Okta configuration in the Keycloak OpenID Connext Identity provider
Create role groups in Okta
Map role groups to K Keycloak
This function is restricted to K Administrators and Okta Administrators
Step 1. Add Okta as an OpenID Connect Identity Provider in K
Log into to your K platform instance ([customer].kada.ai)
Select Platform Settings in the side bar
In the pop-out side panel, under Administrations, click on Customisation
Under Platform Setup, toggle on Enable Single Sign On
Click on Configure Single Sign On

Select Identity Providers in the side panel and click Add Provider
Choose OpenIDConnect v1.0 from the drop down list
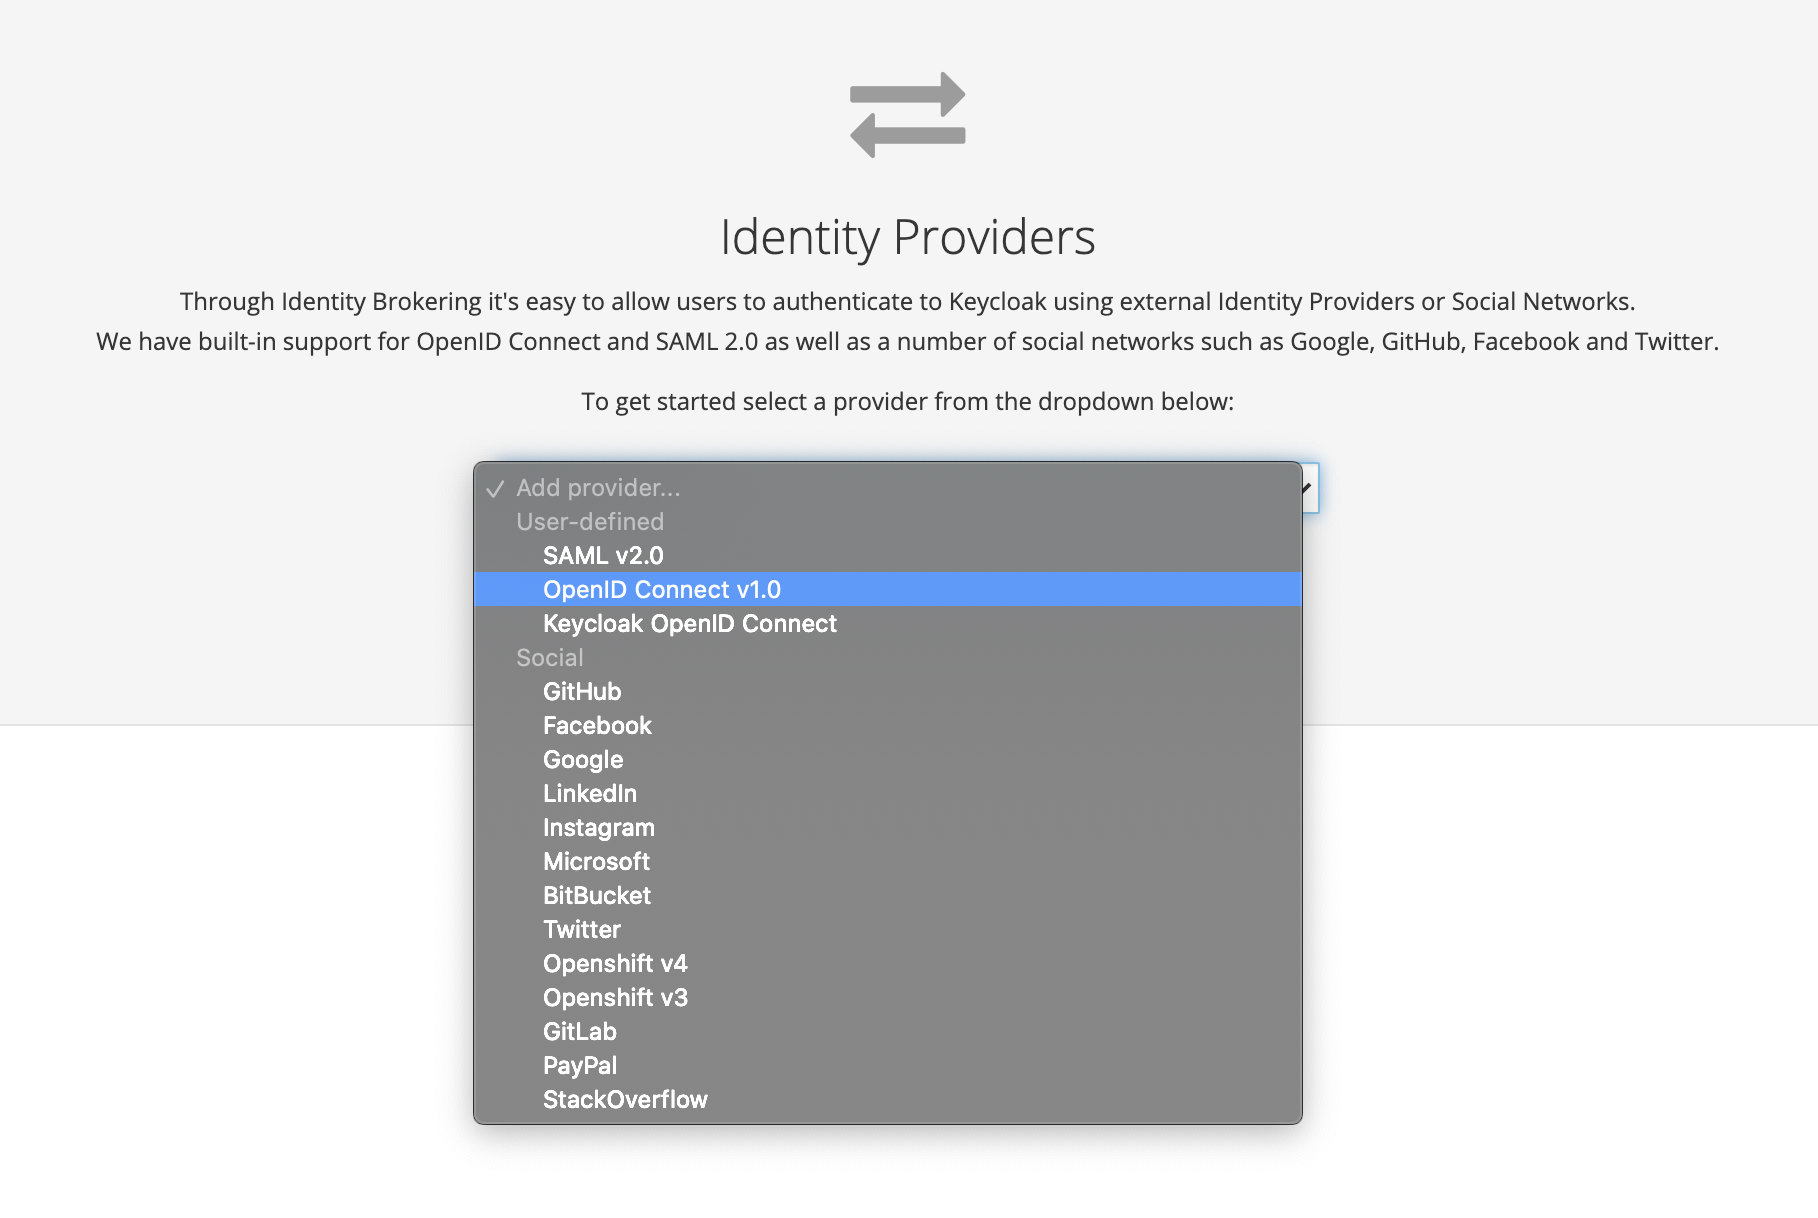
Complete the Alias field
The alias is part of the redirect URL and cannot have any characters that require url encoding eg spaces.
Copy this name if you plan to only allow SSO identities and disable local user logins.
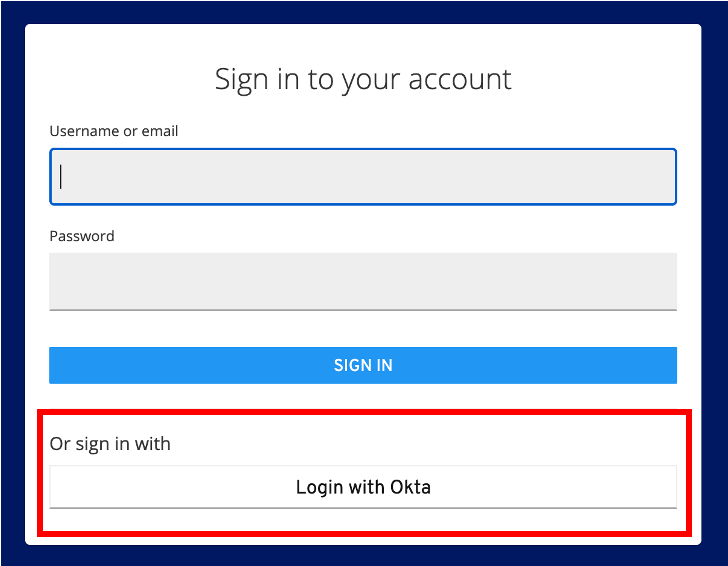
Enter a Display Name - This is the name of the button that users will click on to access SSO

Copy the Redirect URL for use in the next step
Sync Mode - Select Force

Keep this page open while you finalise you obtain the missing details from OKTA to finalise the OpenID in Step 2.
In a new browser window continue to step 2
Step 2. Create a new application integration in Okta
Open a new window and log in to your company’s Okta account. Go to the Admin portal
Go to Applications in the sidebar. Select Applications. Click Create App Integration

Select Open IDConnect & Web Application. Click Next
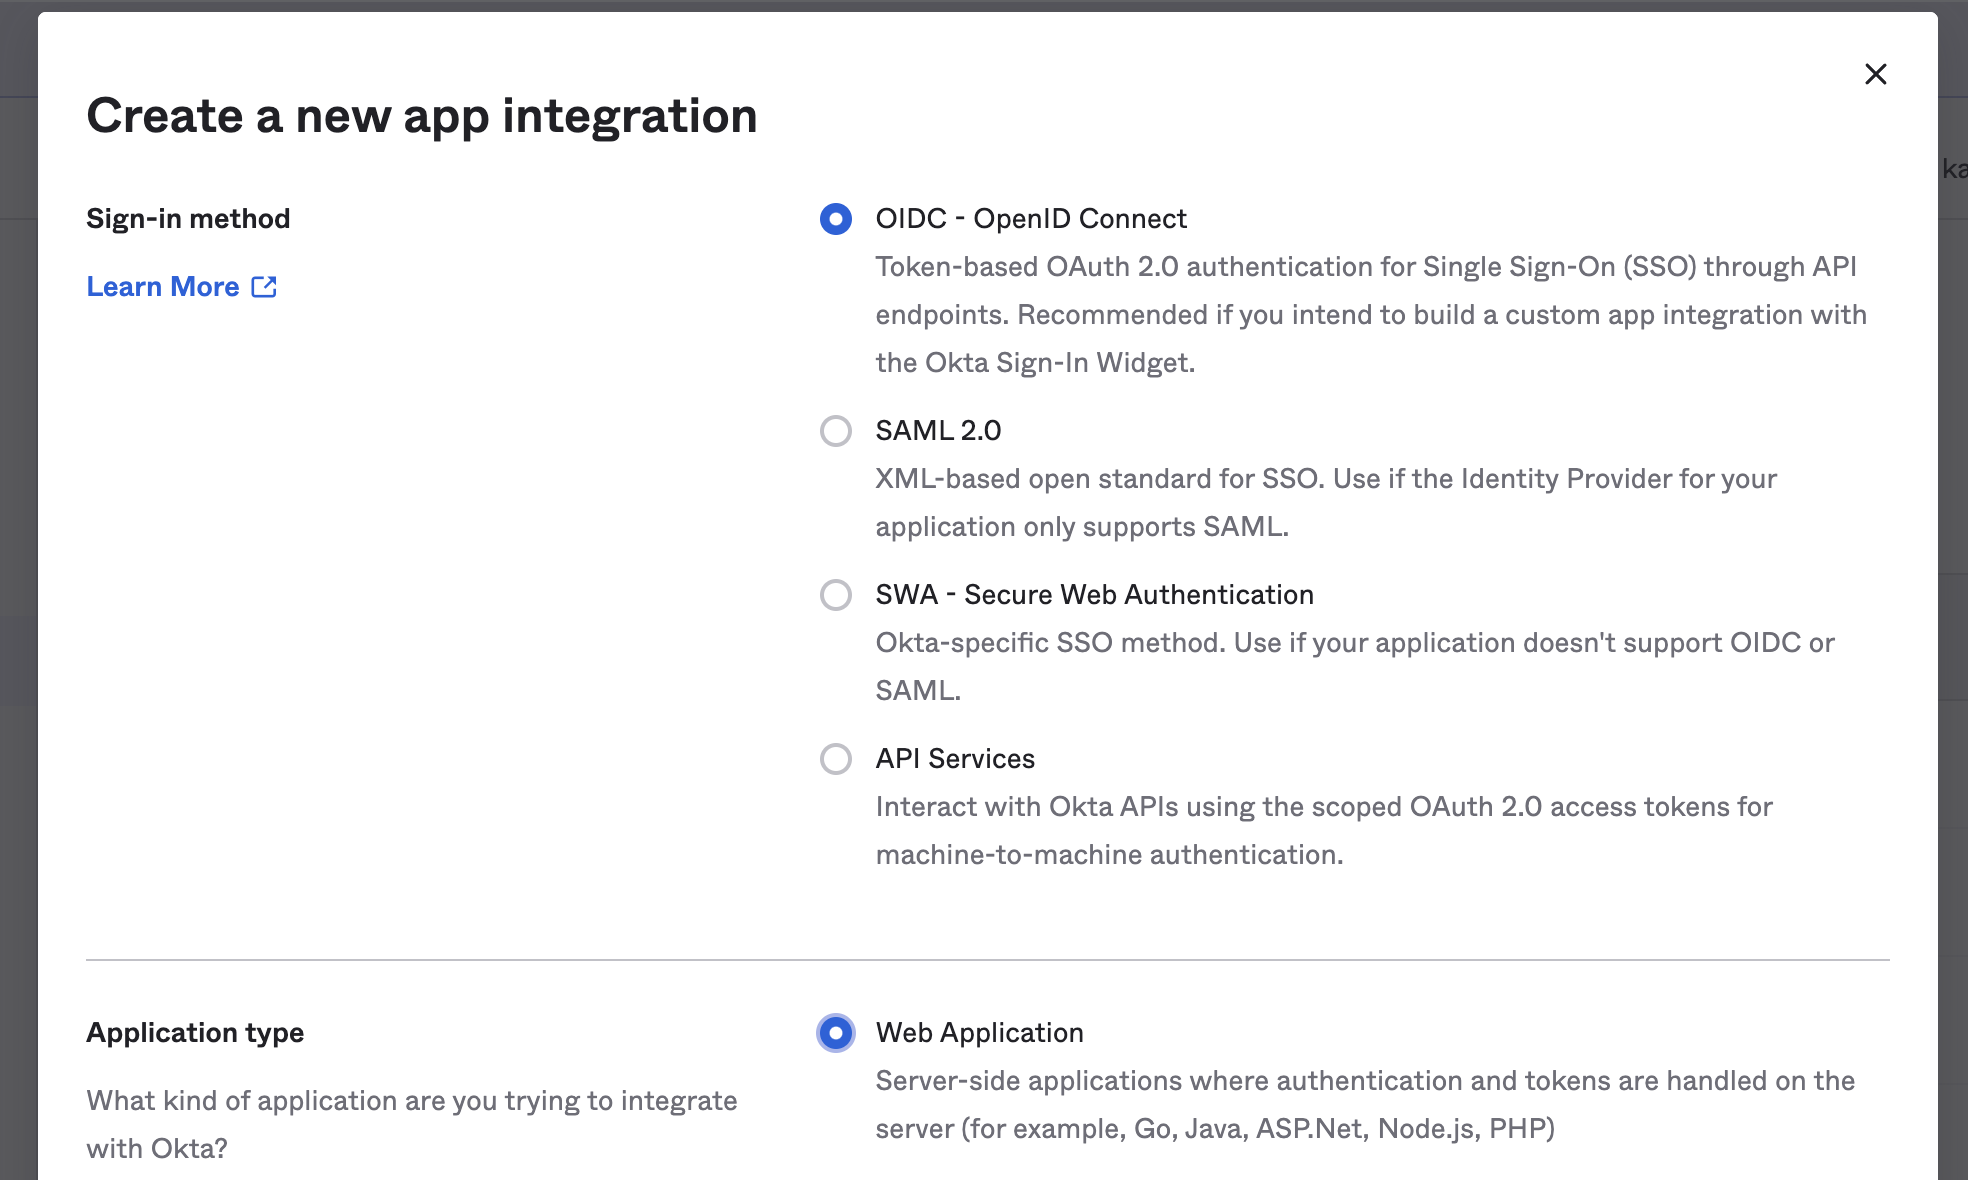
Under General Settings fill in the below and click Save
App integration name: Enter K Data Catalog
Application Logo: Use the image below or request the K Logo file from support@kada.ai

Sign-in redirect URIs: Paste the redirect URL from Step 1 in the Login redirect URLs field
Controlled Access: select Skip group assignment for now
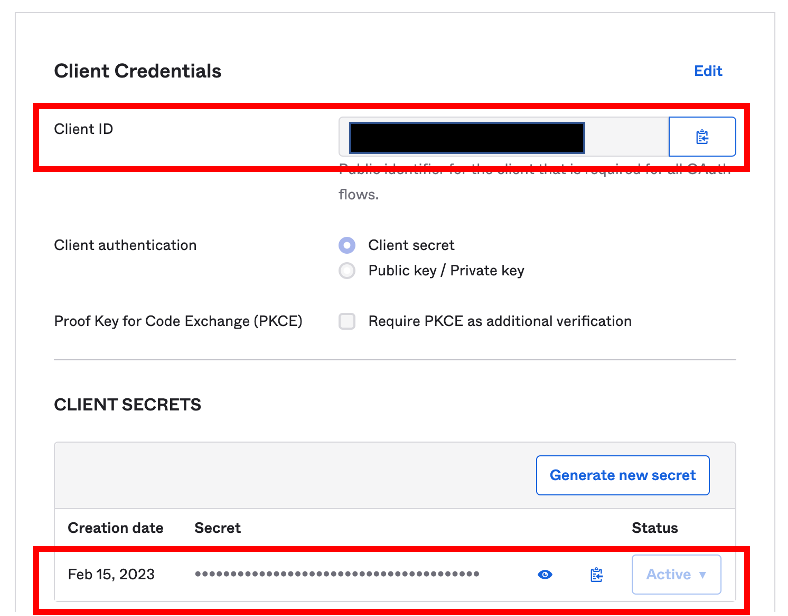
In the General Tab, copy the Client ID and Client Secret for use in Step 3
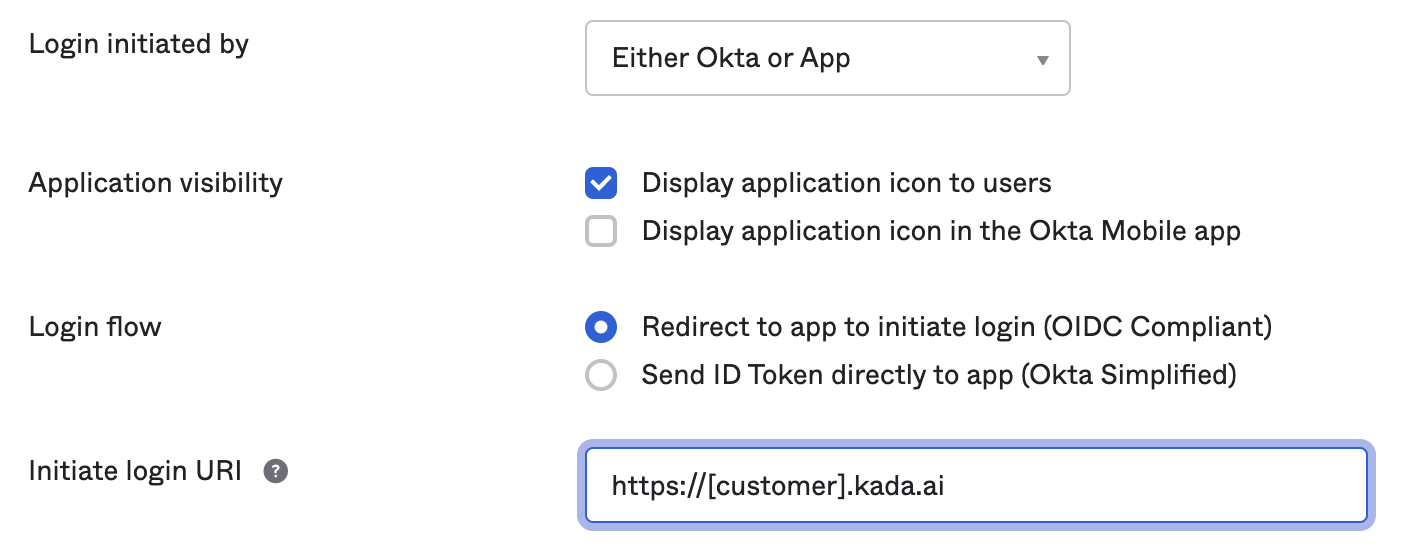
Go down to General Settings and click Edit. Go to the Login section and update the following. Click Save
Login initiated by: Either Okta or App
Application visibility: Display application icon to users
Login flow: Redirect to app to initiate login (OIDC Compliant)
Initiate login URI: Enter your K instance URL e.g. https://[customer].kada.ai
Go to Security in the sidebar. Select API. Click on the Authentication Server to be used for SSO
Copy the Metadata URI for use in Step 3
Make sure you’ve saved the following information for easy access in the next process. If a different team is responsible to completing the Keycloak steps, make sure you forward the below information to the K Admin.
Client ID
Client Secret
Metadata URI
Step 3. Finalise Okta configuration in the Keycloak OpenID Connext Identity provider
Return to the Keycloak window from Step 1
Scroll to the bottom of the list and paste the Metadata URI that you copied in the previous step into the Import from URL and click Import
Some information will pre-populate from OKTA. Complete the missing information and click Save
Logout URL: Set this to your Okta login URL (e.g. https://abc123.okta.com/login/default) or any other URL
Client Authentication - Set to Client secret sent as basic auth
Client ID - Paste the Client ID saved from the previous step
Client Secret - Paste the Client Secret saved from the previous step
Default Scopes - Add openid email profile
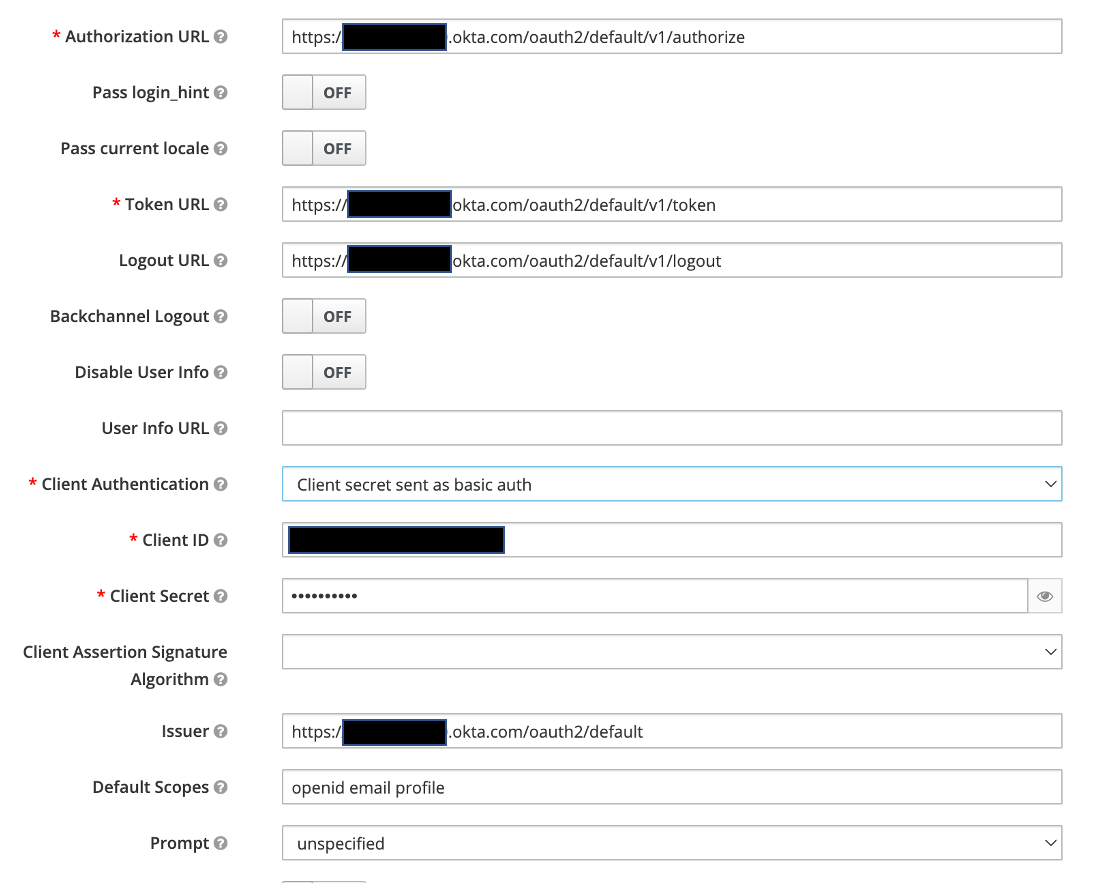
Click Save
The Okta Log In option will now appear the next time you try to log in to KADA
Step 4. Create role Groups in Okta
To manage user access by roles, we need to create 5 new Groups in Okta and 5 new roles to align with the KADA role groups:
Go back to your company’s Okta account. Go to the Admin portal
Go to Directory in the sidebar. Select Groups
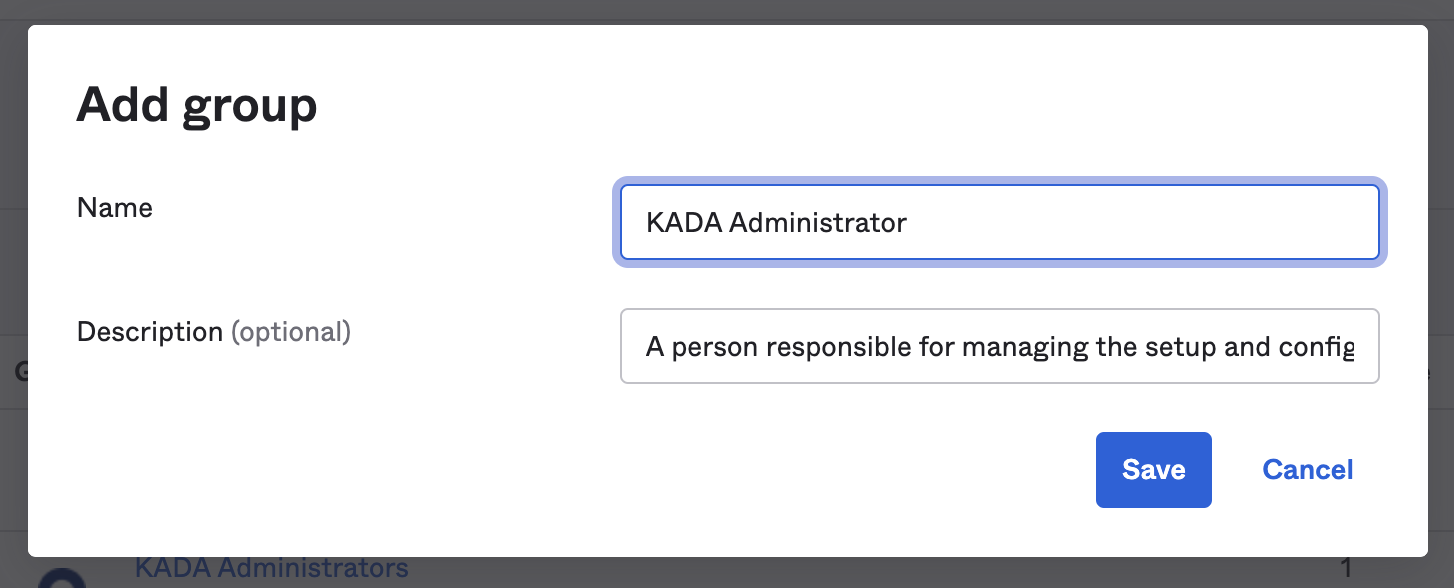
Click Add Group
Create 5 Groups and attach users based on the type of group they belong to:
Group Name | Description |
|---|---|
KADA Administrator | A person responsible for managing the setup and configuration of the K platform. |
KADA Business User | Anyone that is not a data worker (data analyst, scientist, engineer etc) |
KADA Data User | A data worker (data analyst, scientist, engineer etc) |
KADA Data Manager | Person(s) responsible for the oversight of the data platforms in your organisation |
KADA Date Governance Manager | A person responsible for managing and governing the use, classification, description and access to data |
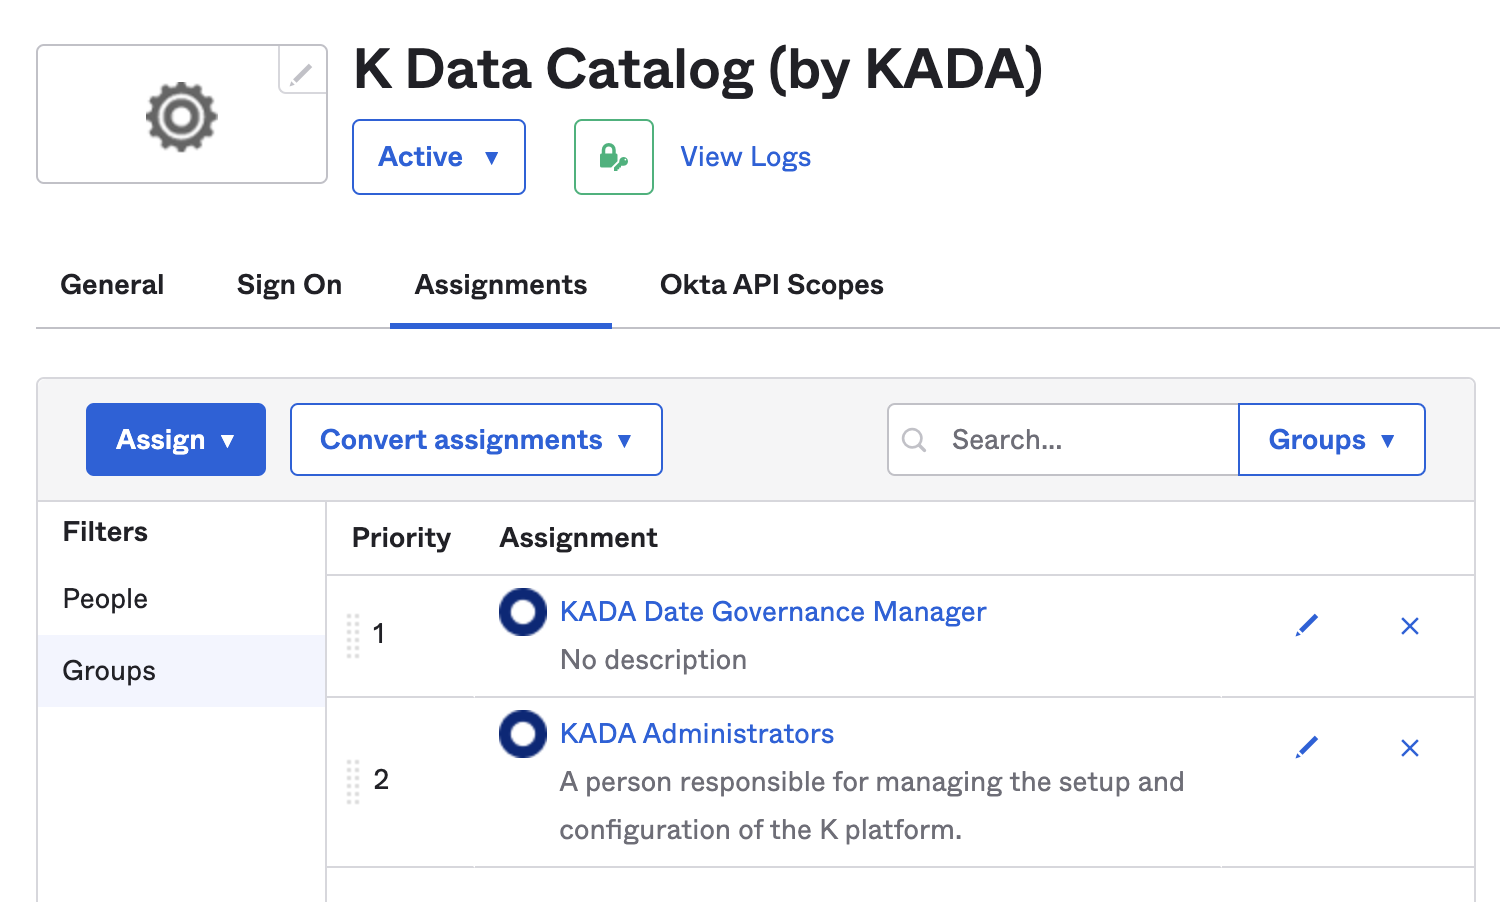
Go to Applications in the sidebar. Select Applications. Click on the K Data Catalog application.
Go to Assignments tab and add the above groups to the application
Go to Security in the sidebar. Select API. Click on the Authentication Server that was used in Step 2
Go to the Claims tab. Click Add Claim. Fill in the following information and click Create
Name: add a unique name to identify the kada groups to be added to the Token
Include in token type: Select ID Token & Always
Value type: Select Groups
Filter: Select Starts with & KADA - this matches the groups created above
Include in: Select Any scope
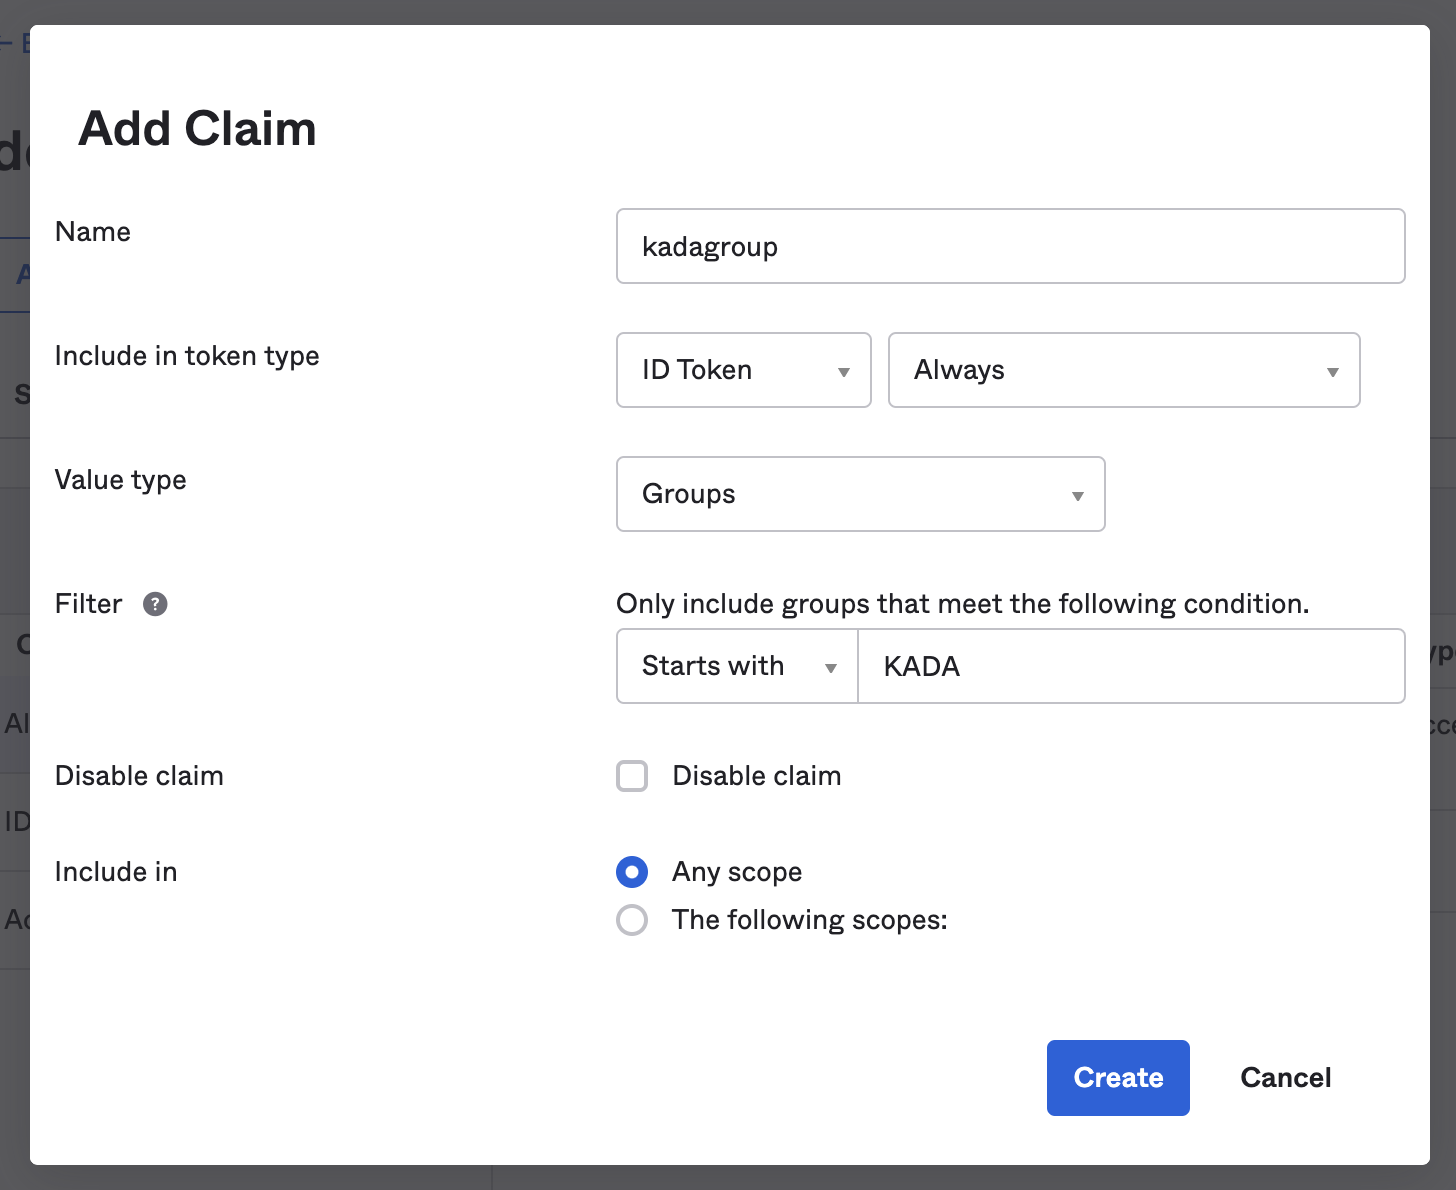
Make sure you’ve recorded down the following information for the next step
Claim name
The name of the 5 KADA groups you created
Step 5: Map role groups to K Keycloak
We now need to link the groups you created in Step 4 to the roles in the K platform.
Log into to your K platform instance ([customer].kada.ai)
Select Platform Settings in the side bar
In the pop-out side panel, under Administration click on Customisation
Click on Configure Single Sign On
Go to Identity Providers
Select the newly created Identify Provider you created in Step 2 and click on the Mappers tab

You will need to create a mapping for each role. Click Create.
For each role
Set the mapper name: e.g. KADA Admin mapper
Set Mapper Type to Advanced Claim to Group
Add the claim name to the Key field.
Add Value from the table below. For the kada_admin_group_mapper the value is KADA Administrator (same as the Okta Group name)
Select the appropriate role for the group. See table below
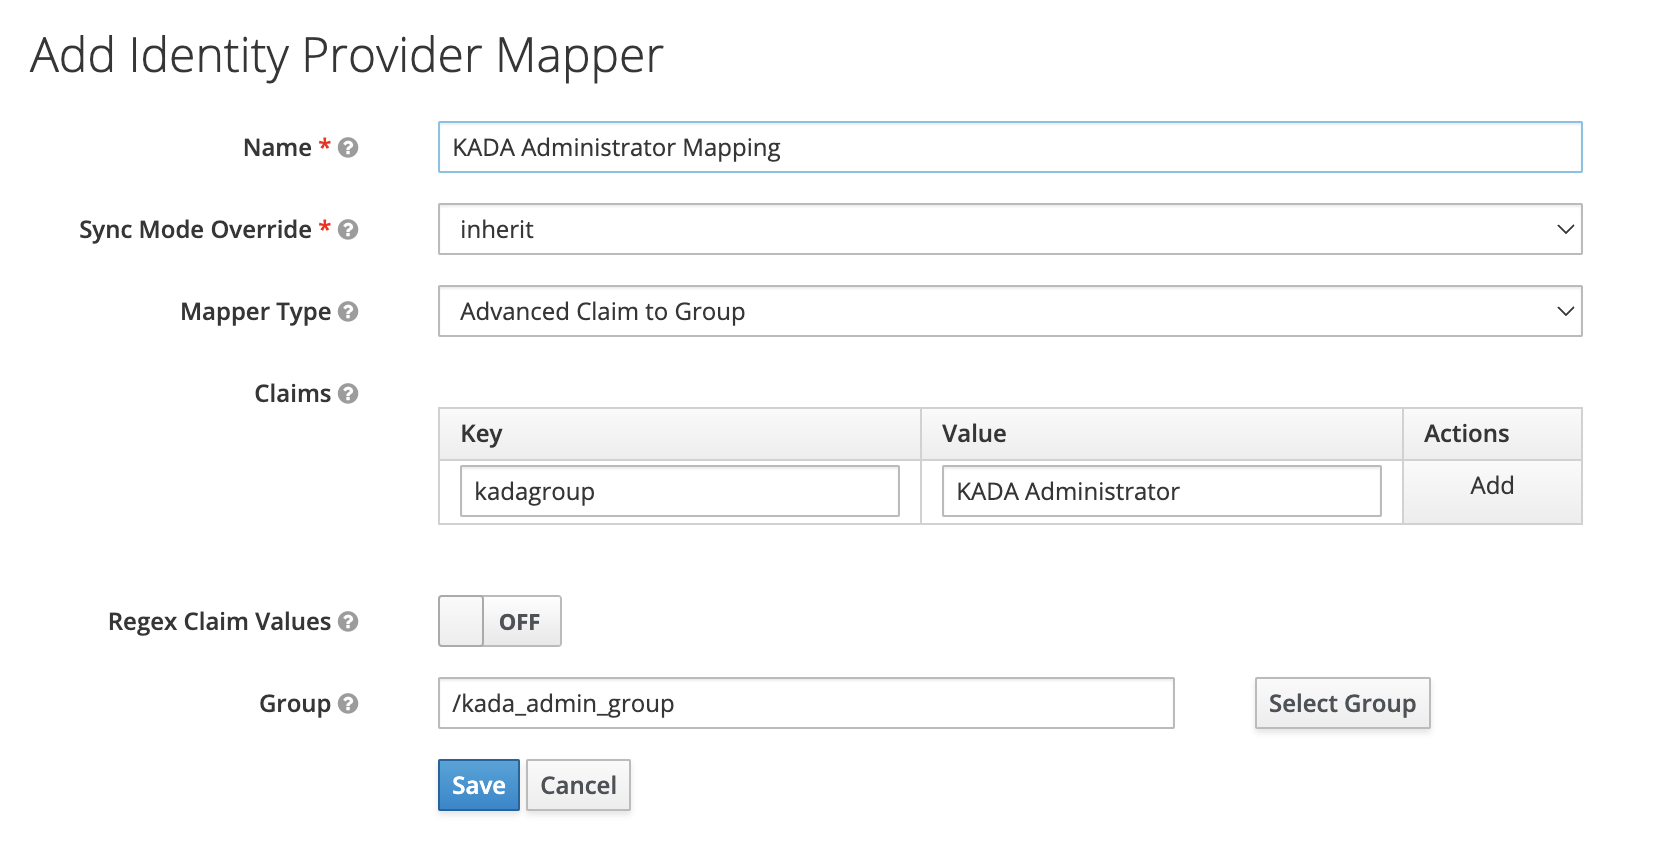
Key | Value | Group |
|---|---|---|
Claim name above | KADA Administrator | kada_admin |
Claim name above | KADA Business User | kada_business_user |
Claim name above | KADA Data User | kada_user |
Claim name above | KADA Data Manager | kada_data_manager |
Claim name above | KADA Date Governance Manager | kada_data_gov_user |
Check after each mapping is completed. It should look like the below
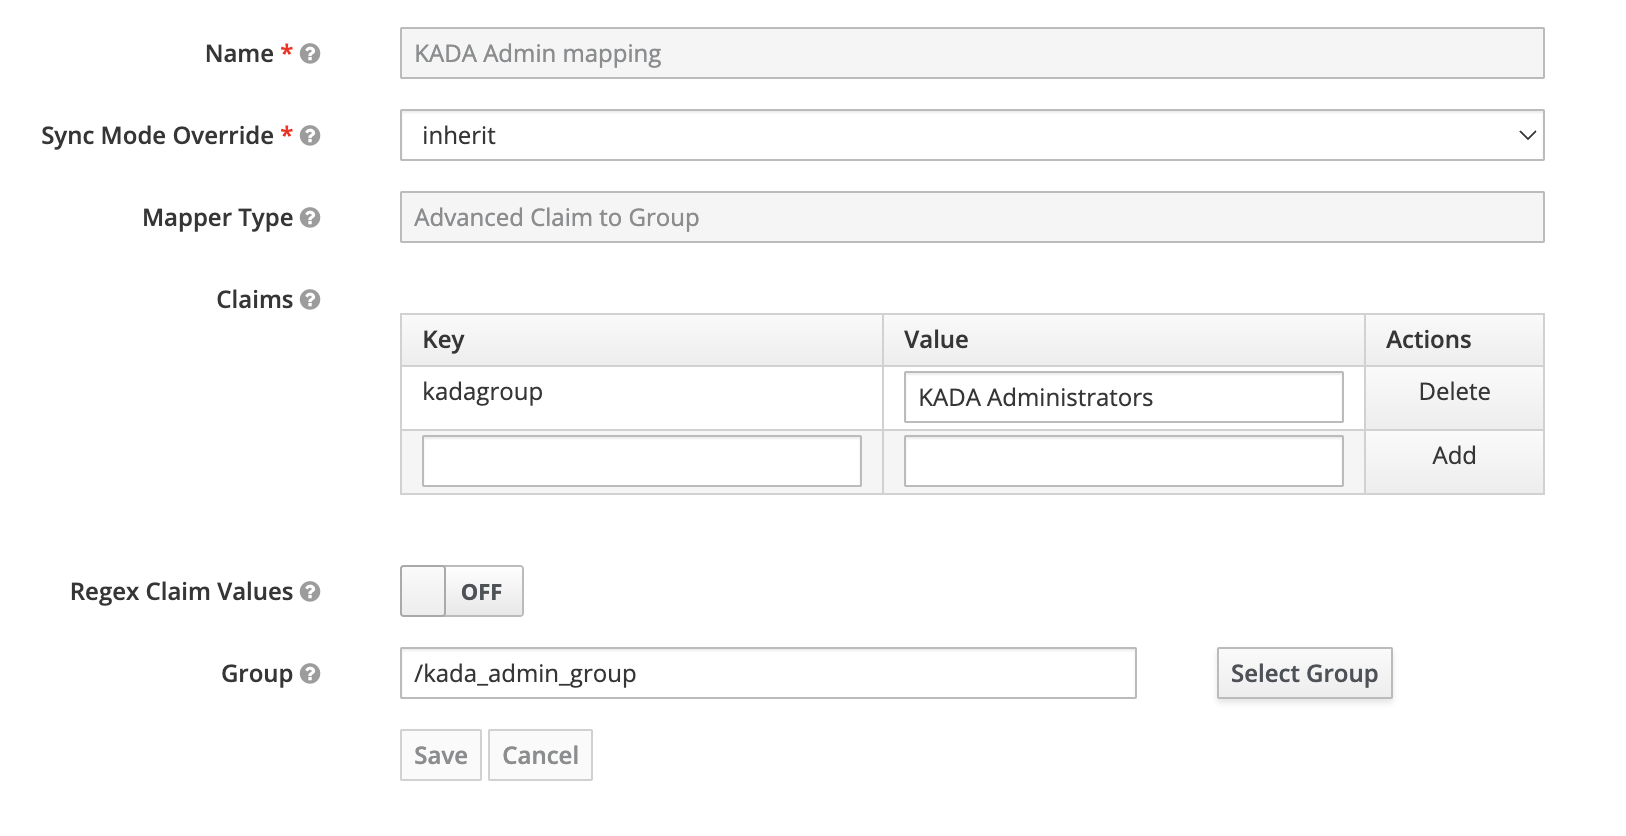
The SSO Setup is now completed.
You can now add users to the various Oktra groups as per your usual processes.
Other information
K uses Keycloak to manage SSO. If Keycloak application is running behind some proxy server then it won’t allow you to import this configuration.
To enable the configuration to be imported, set path for X.509 Client Certificate. Here is link to guide you through this from keycloak.
