JIRA Issue Management
This page will walk through how to integrate K with JIRA via API.
Step 1) Set up your Jira Project to enable K integration
Step 2) Connect K to JIRA
Step 3) Create Access Key for Jira integration
Step 4) Synchronise JIRA updates with K through a WebHook
We recommend creating a single Jira project to capture Data related issues from K.
You will need a Jira administrator access to complete the following steps in JIRA
We recommend setting up a new Jira user for the Kada integration. The API Key is linked to an individual and will be recorded as the Issue creator for all Jira’s created via the K issue integration. Using a personal account will create notifications for the account every time an issue is created.
The user will need to have the following Jira permissions:
1. BROWSE_PROJECTS: Ability to browse projects and the issues within them.
2. EDIT_ISSUE: Ability to edit issues.
3. CREATE_ISSUE: Ability to create issues.
Step 1) Set up your Jira Project to enable K integration
To integrate into K you will need to:
Obtain Jira project details to setup the integration
Create a custom field to enable K to connect with
Create a new API Key
We recommend using a ‘Company-managed' project’. Reach out for additional guidance on configuring ‘Team-managed’ projects.

Obtaining Project Jira Details required for integration
Project ID (5 digit reference)
Take note of the Project ID of the project you want to use. This is available in the URL
e.g. The project Key is KNOW

Go to the following URL and Search for the Project Key
https://<customer name>.atlassian.net/rest/api/2/project
Record down the ID as the Project ID
e.g. The project Key is KADA and Project ID is 10000

Work Type (5 digit reference)
Click on the Settings icon in the top right corner. Click on Work items (may be called Issues as Atlassian is renaming Issues to Work items).
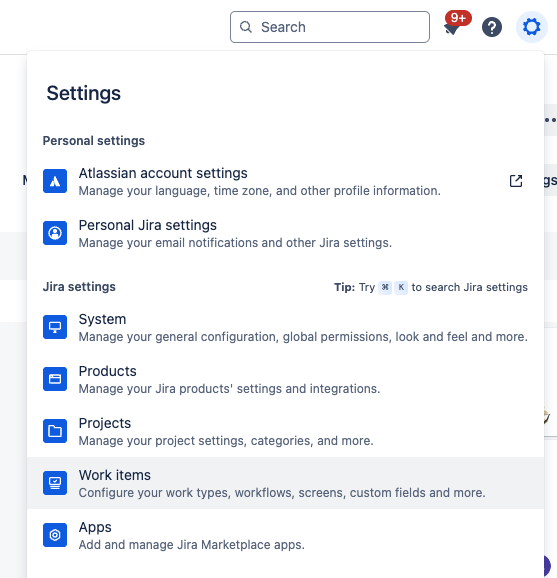
In the side panel click on Work Types
Click Edit on the Work Type you want K to create Issues as e.g. Bug or Task
Record the Work Type ID found in the URL
E.g. Work (or Issue) Type ID is 10100

Creating a custom field for K integration
While you are still in the Work Type page, click on Custom Fields
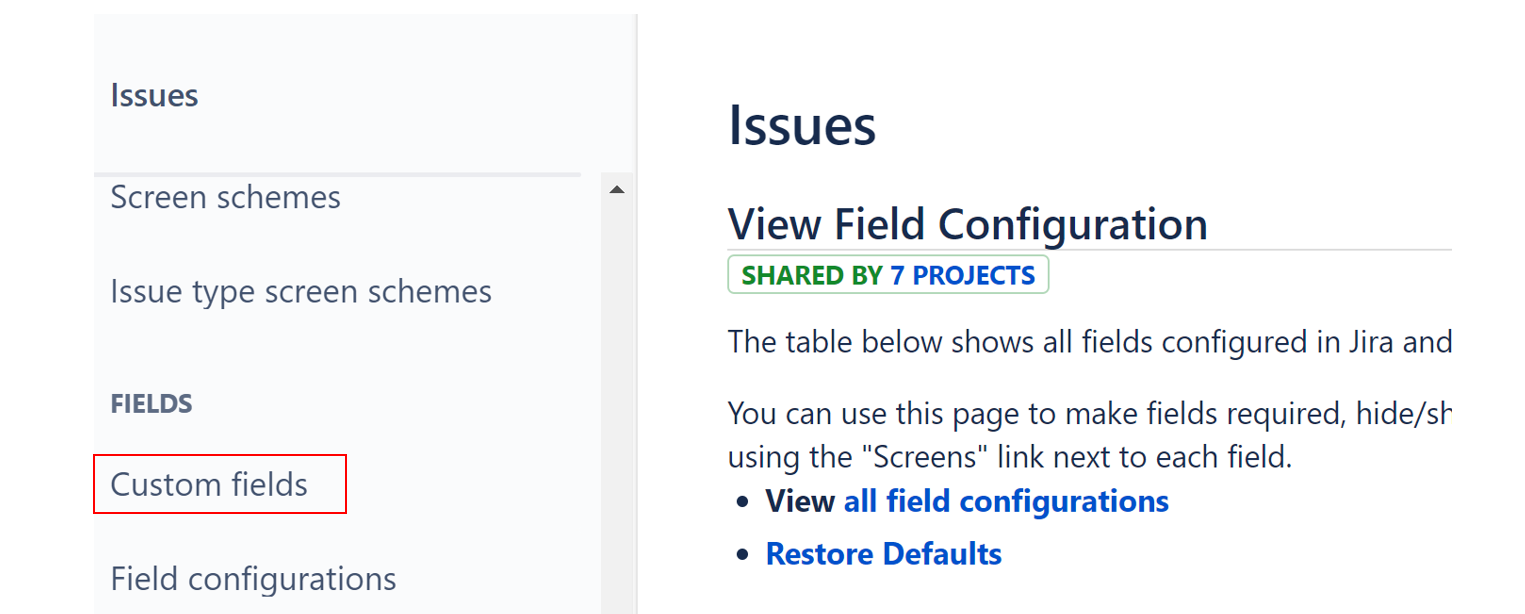
Click on the Create Custom Field button, select Short Text (plain text only) option and click Next
Name the field K Integration
In the Description paste the following text: “Custom field that K will automatically populate with a URL to the linked K Issue Page”
Add your new Custom Field to the relevant screens
Search for your new ‘K Integration’ custom field
Click on the Edit icon. Click on Associate to Screens

Search for your project key (e.g. DQI) and select the screens the custom field should be added.
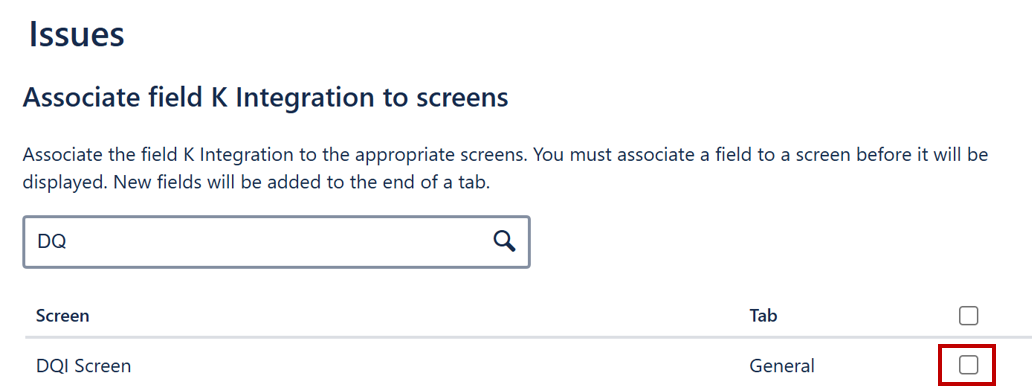
If you do not see your Project under the screens it may mean that your Project is a Team-managed project. Please reach out for further guidance.
After you’ve added the custom field to a screen, you can drag it to any preferred position in the screen
Obtain the custom field ID for use in the following steps:
Search for the new custom field you created and click on Edit Details
In the below example, the Custom Field ID is “10353”

Creating a new API for K integration
Log into Jira using the account that will be used for the K integration
To create a new API:
Click on Atlassian Account Settings → Security tab
Scroll down to API Tokens and click on Create and manage API tokens
Make sure you’ve copied the Project ID, Issue Type ID and Custom Field Name for use in the following steps. For example:
Project Name: Data Issue Management
Project ID: 10000
Work / Issue Type ID: 10100
Custom Field ID: 10353
API token
Step 2) Connect K to JIRA
Select Platform Settings in the side bar
In the pop-out side panel, under Integrations click on Integrations
Click Issue Management
Click on the New Integration button and complete the fields in the New Integration Page
Integration Type: Select JIRA
Integration Name: Type the name that you want to call this integration e.g. JIRA Data Quality Issue Management
JIRA details:
JIRA URL: Type in the URL of your JIRA cloud
Project ID: Enter the project ID you copied in Step 1 (e.g. 10203)
JIRA Type ID: Enter the Work / Issue Type ID you copied in Step 1 (e.g. 10100)
Custom Field ID: Enter customfield_ and the Custom Field ID you copied in Step 1
e.g. customfield_10353
Click Test Connection. On successful connection, click Next
Click Create to finalise the integration
Copy the Source ID of the new Jira integration you just created. This will be used to create the WebHook in JIRA

Make sure you’ve copied the Source ID. For example:
K Source ID: 1038
Step 3) Create Access Key for Jira integration
Select Platform Settings in the side bar
In the pop-out side panel, under Integrations click on Access Keys
Click New Access Key
Follow the instructions to create a new access key
Select the new integration you want to connect
Enter a new access key name so that you can easily identify which JIRA project the access key relates to
Click Create Key
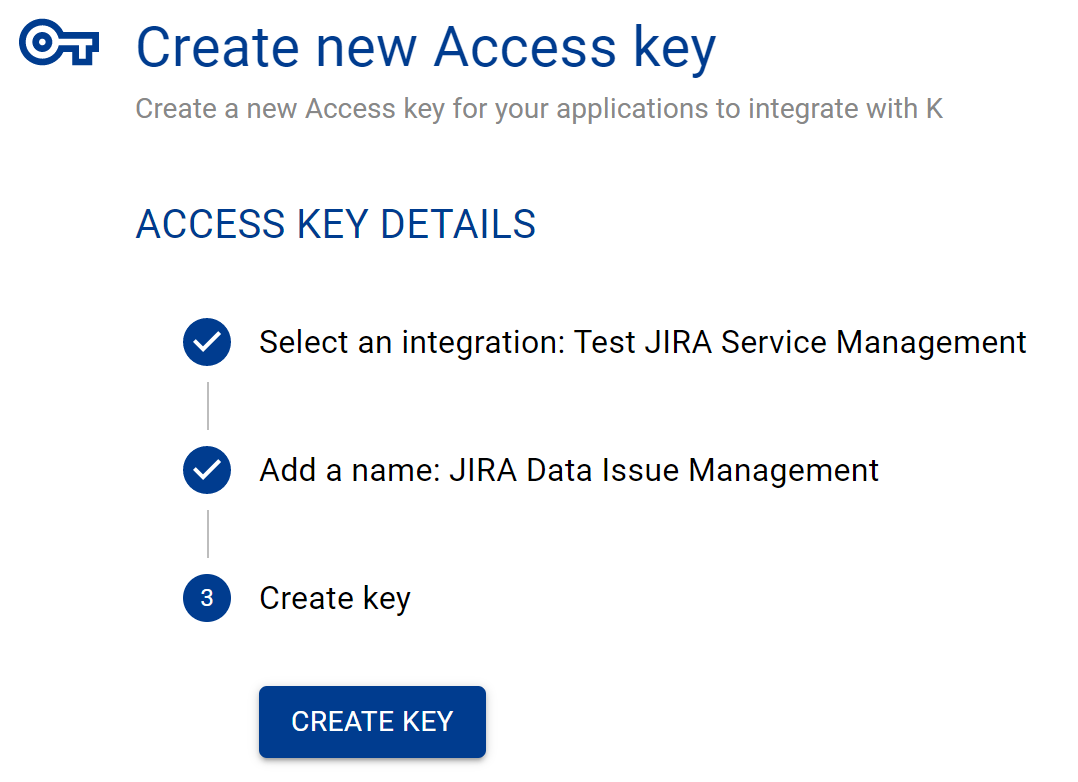
Copy and save the Access Key to a secure location you can easily access for a later step
Note: Once you hit Close you will no longer be able to see the access key again. If you lose the access key you will need to regenerate the access key and update the Jira webhook.
Make sure you’ve copied the Access Key. For example:
Access Key: 3b55f8c624a67c4997eed1a061dca537
Step 4) Synchronise JIRA updates with K through a new WebHook
Access your JIRA System Settings and scroll down to the Advanced Settings to click on WebHooks
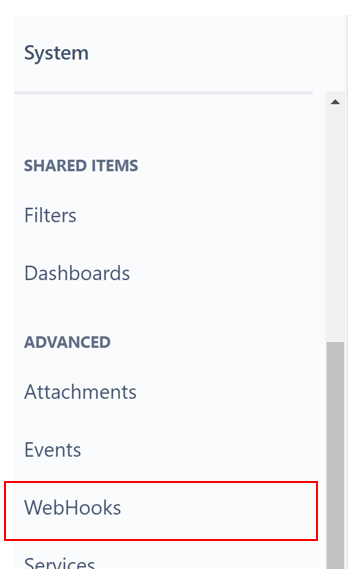
Click Create a WebHook
Complete the fields to create a new WebHook
Create a Name so that you will be able to easily recognise the WebHook is for a K integration
Enter the URL using the following format
https://[K domain]/api/webhooks/[K Source ID]?api_key=[Access Key]
The K domain is your k instance URL
K Source ID was copied in Step 2
Access Key was copied in Step 3
Example URL: https://CompanyABC.kada.ai/api/webhooks/1038?api_key=3b55f8c624a67c4997eed1a061dca537
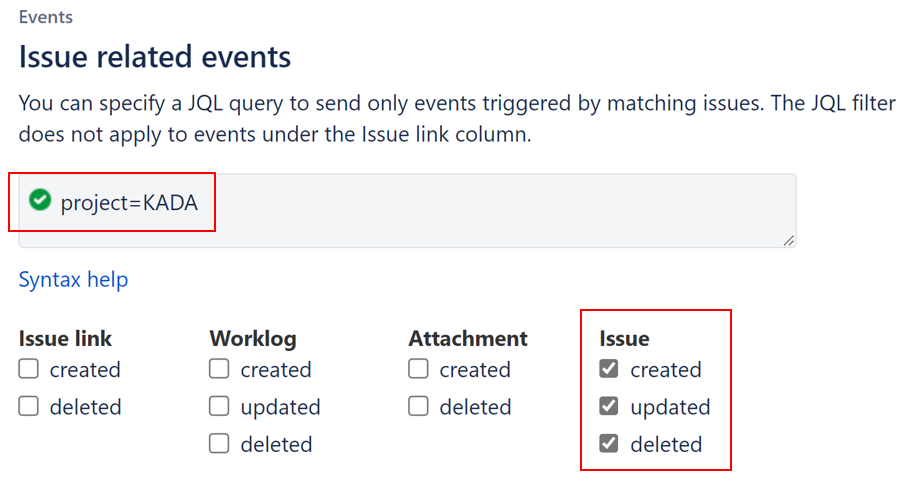
In the Issue Related Events section
Specify a JQL query to ensure that only the right issues are synchronised with K. We recommend including the Project name that was copied in Step 1
Under the Issue column, tick the created, updated and deleted box
Click Create
