Snowflake
This page will guide you through the setup of Snowflake in K using the direct connect method.
Integration details
Scope | Included | Comments |
|---|---|---|
Metadata | YES | See below for know limitations |
Lineage | YES |
|
Usage | YES | |
Sensitive Data Scanner | YES |
Known limitations
Streams & Tasks are not currently included in the metadata extracted from Snowflake. Currently under review.
Access roles only consider grants to users. Access roles do not consider grants to other roles
Step 1) Establish Snowflake Access
K only needs access to metadata tables in Snowflake. These tables are stored in the “Snowflake” database. You do not need to provide K access to any data stored in your Snowflake database.
Create a Snowflake user with read access to following views in the Snowflake database.
account_usage.history
account_usage.views
account_usage.tables
account_usage.columns
account_usage.copy_history
account_usage.grants_to_roles
account_usage.grants_to_users
account_usage.schemata
account_usage.databases
account_usage.policy_references
Ability to run
SHOW STREAMS IN ACCOUNT
SHOW PRIMARY KEYS IN ACCOUNT
There are 2 options to create this user. Pick one approach that best suits your needs.
Option 1: Creating a user with access to Snowflake Account Usage Schema
To create a user with general access to metadata available in Snowflake Account Usage schema
--Log in with a user that has the permissions to create a role/user

--Create a new role for the Catalog user
Create role CATALOG_READ_ONLY;

--Grant the role access to the Account usage schema
grant imported privileges on database Snowflake to CATALOG_READ_ONLY;
grant select on all tables in schema SNOWFLAKE.ACCOUNT_USAGE to CATALOG_READ_ONLY;
grant monitor on account to role CATALOG_READ_ONLY;

--Create a new user for K and grant it the role (remove the [])
create user [kada_user] password=['abc123!@#'] default_role = CATALOG_READ_ONLY default_warehouse = [warehouse];
Option 2: Creating a user with access to specific views of Snowflake Account Usage Schema
To create a user with specific access to metadata in Snowflake Account Usage, you will need to create a new Snowflake database with views that select from the Snowflake database. This is a known Snowflake limitation.
--Log in with a user that has the permissions to create a role/user

-- create a new database
create database CATALOG_METADATA;

-- create a new schema
create schema CATALOG_METADATA.ACCOUNT_USAGE;

— account_usage.access_history
create view CATALOG_METADATA.ACCOUNT_USAGE.ACCESS_HISTORY
    as select * from SNOWFLAKE.ACCOUNT_USAGE.ACCESS_HISTORY;

-- account_usage.views
create view CATALOG_METADATA.ACCOUNT_USAGE.VIEWS
    as select * from SNOWFLAKE.ACCOUNT_USAGE.VIEWS;

-- account_usage.tables
create view CATALOG_METADATA.ACCOUNT_USAGE.TABLES
    as select * from SNOWFLAKE.ACCOUNT_USAGE.TABLES;

-- account_usage.columns
create view CATALOG_METADATA.ACCOUNT_USAGE.COLUMNS
    as select * from SNOWFLAKE.ACCOUNT_USAGE.COLUMNS;

-- account_usage.copy_history
create view CATALOG_METADATA.ACCOUNT_USAGE.COPY_HISTORY
    as select * from SNOWFLAKE.ACCOUNT_USAGE.COPY_HISTORY;

-- account_usage.grant_to_roles
create view CATALOG_METADATA.ACCOUNT_USAGE.GRANTS_TO_ROLES
    as select * from SNOWFLAKE.ACCOUNT_USAGE.GRANTS_TO_ROLES;

-- account_usage.grant_to_grant_to_users
create view CATALOG_METADATA.ACCOUNT_USAGE.GRANTS_TO_USERS
    as select * from SNOWFLAKE.ACCOUNT_USAGE.GRANTS_TO_USERS;

-- account_usage.schemata
create view CATALOG_METADATA.ACCOUNT_USAGE.SCHEMATA
    as select * from SNOWFLAKE.ACCOUNT_USAGE.SCHEMATA;

-- account_usage.databases
create view CATALOG_METADATA.ACCOUNT_USAGE.DATABASES
    as select * from SNOWFLAKE.ACCOUNT_USAGE.DATABASES;

-- account_usage.policy_references
create view CATALOG_METADATA.ACCOUNT_USAGE.POLICY_REFERENCES
    as select * from SNOWFLAKE.ACCOUNT_USAGE.POLICY_REFERENCES;

-- create a new role
create role CATALOG_READ_ONLY;

-- grant access for the role to a warehouse and the database and schema created
grant usage on warehouse [MY_WAREHOUSE] to role CATALOG_READ_ONLY;
grant usage, monitor on database CATALOG_METADATA to role CATALOG_READ_ONLY;
grant usage, monitor on schema CATALOG_METADATA.ACCOUNT_USAGE to role CATALOG_READ_ONLY;
grant select on all views in schema CATALOG_METADATA.ACCOUNT_USAGE to CATALOG_READ_ONLY;
grant select on future views in schema CATALOG_METADATA.ACCOUNT_USAGE to CATALOG_READ_ONLY;

-- create a new Kada user
create user [kada_user] password=[‘<add password>’] default_role = CATALOG_READ_ONLY default_warehouse = [warehouse];
Configuring User Authentication
Configure the user to use key-pair authentication (Recommended)
https://docs.snowflake.com/en/user-guide/key-pair-auth
or set the user type to be a legacy user if you wish to use only a Password for authentication (not recommended).
Set the user type to legacy using the following command
ALTER USER [kada_user] SET TYPE = LEGACY_SERVICEFrom the above record down the following to be used for the setup
Kada user name
Password
Private Key (if configured)
Role
Warehouse
(If creating a new database for metadata) Database name
Snowflake account (found in the URL of your Snowflake instance - between https:// and .snowflakecomputing.com/…)
Step 2) Connecting K to Snowflake
Select Platform Settings in the side bar
In the pop-out side panel, under Integrations click on Sources
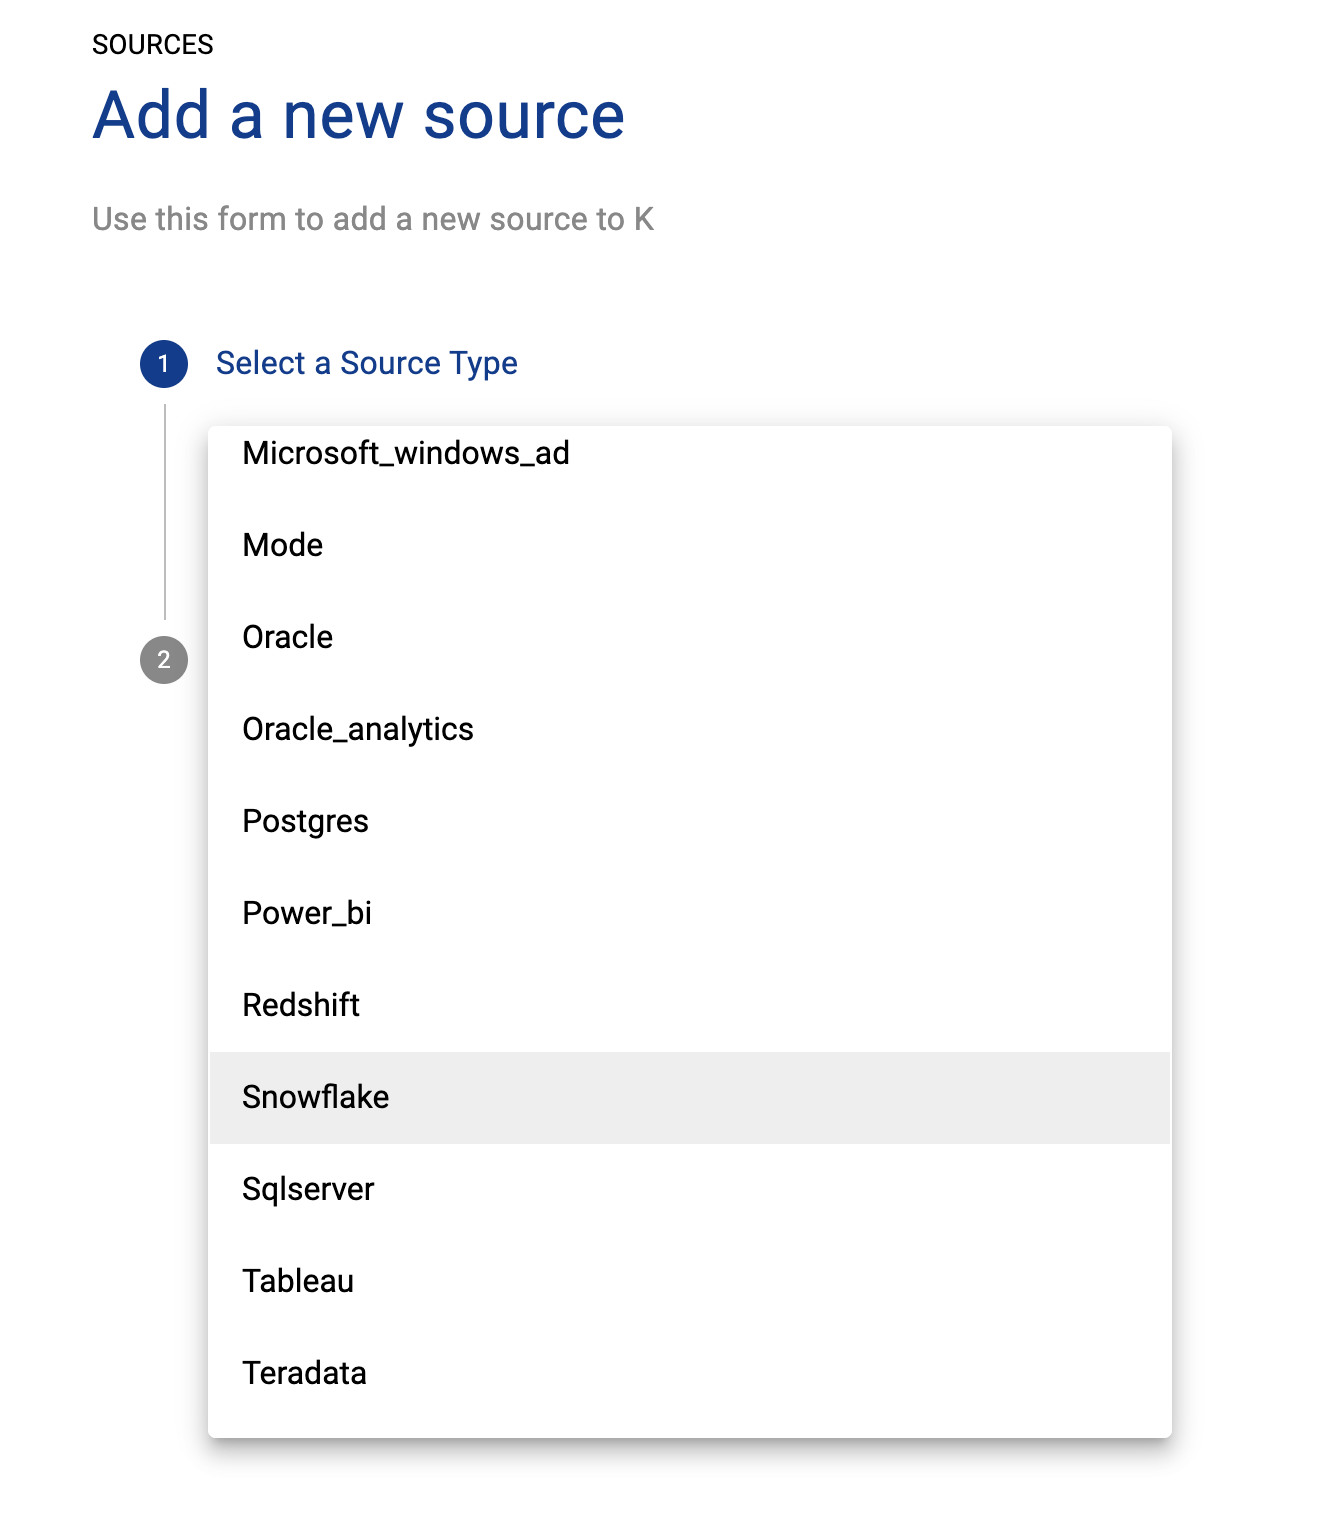
Click Add Source and select Snowflake
Select Direct Connect and add your Snowflake details and click Next
Fill in the Source Settings and click Next
Name: The name you wish to give your Snowflake DB in K
Host: Add your Snowflake Account (found in your Snowflake URL)
Omit the https:// from the URL
Information Database Role: Add the role the user should use
Information Database: Default is Snowflake if using Snowflake DB. Otherwise enter the Database created to store metadata views from Step 1
Warehouse: Add the warehouse the user should use
Enable data masking (optional): Select this option if you wish K to mask literals in Snowflake code objects.
Enterprise (optional): Select this option to leverage Enterprise features such as Object dependencies that improve lineage coverage
Note object dependency limitations here - Platform Concept Definitions
Use Key Pair Authentication (optional): Select this option if the Snowflake user is configured for key pair authentication
Add the Connection details and click Save & Next when connection is successful
Snowflake account: Use the account information part of your Snowflake account. Do not include snowflakecomputing.com
Username: Add the Snowflake user name
Password: Add the Snowflake user password
Private key: Add the Private key for the Snowflake user
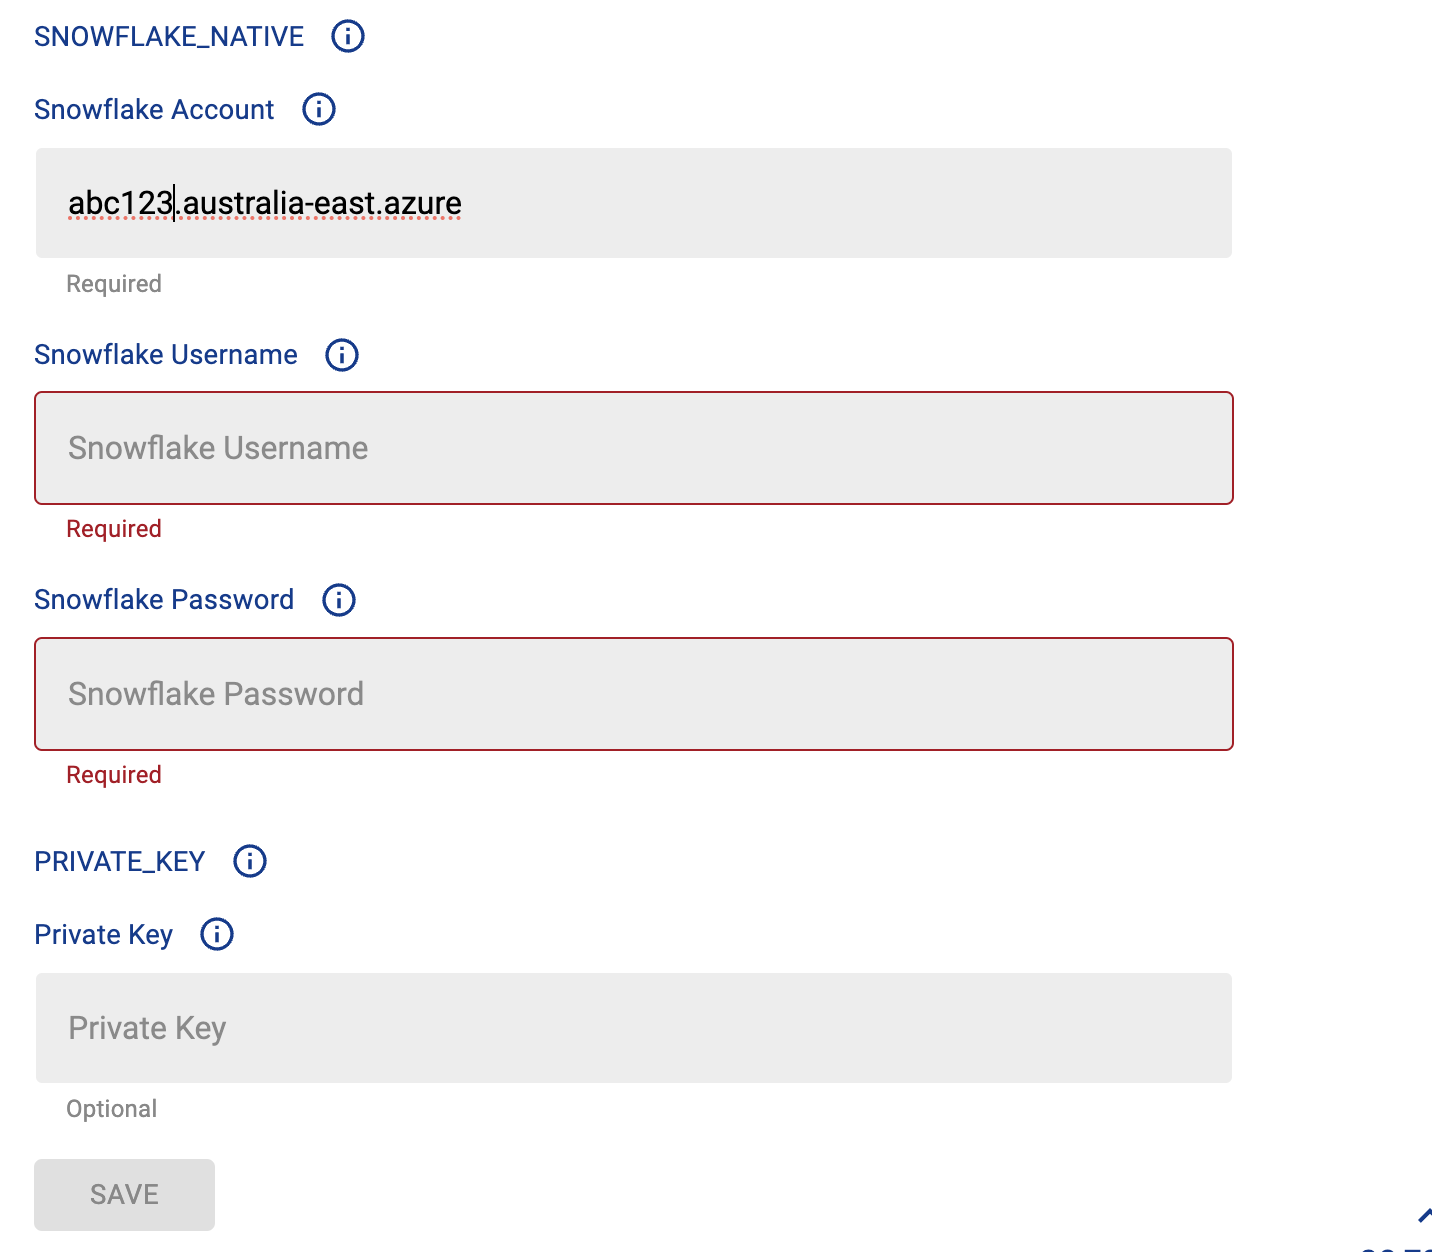
Test your connection and click Save
Select the Databases you wish to load into K and click Finish Setup
All databases will be listed. If you have a lot of databases this may take a few seconds to load
Return to the Sources page and locate the new Snowflake source that you loaded
Click on the clock icon to select Edit Schedule and set your preferred schedule for the Snowflake load

Note that scheduling a source can take up to 15 minutes to propagate the change.
Step 3) Manually run an ad hoc load to test Snowflake setup
Next to your new Source, click on the Run manual load icon

Confirm how you want the source to be loaded
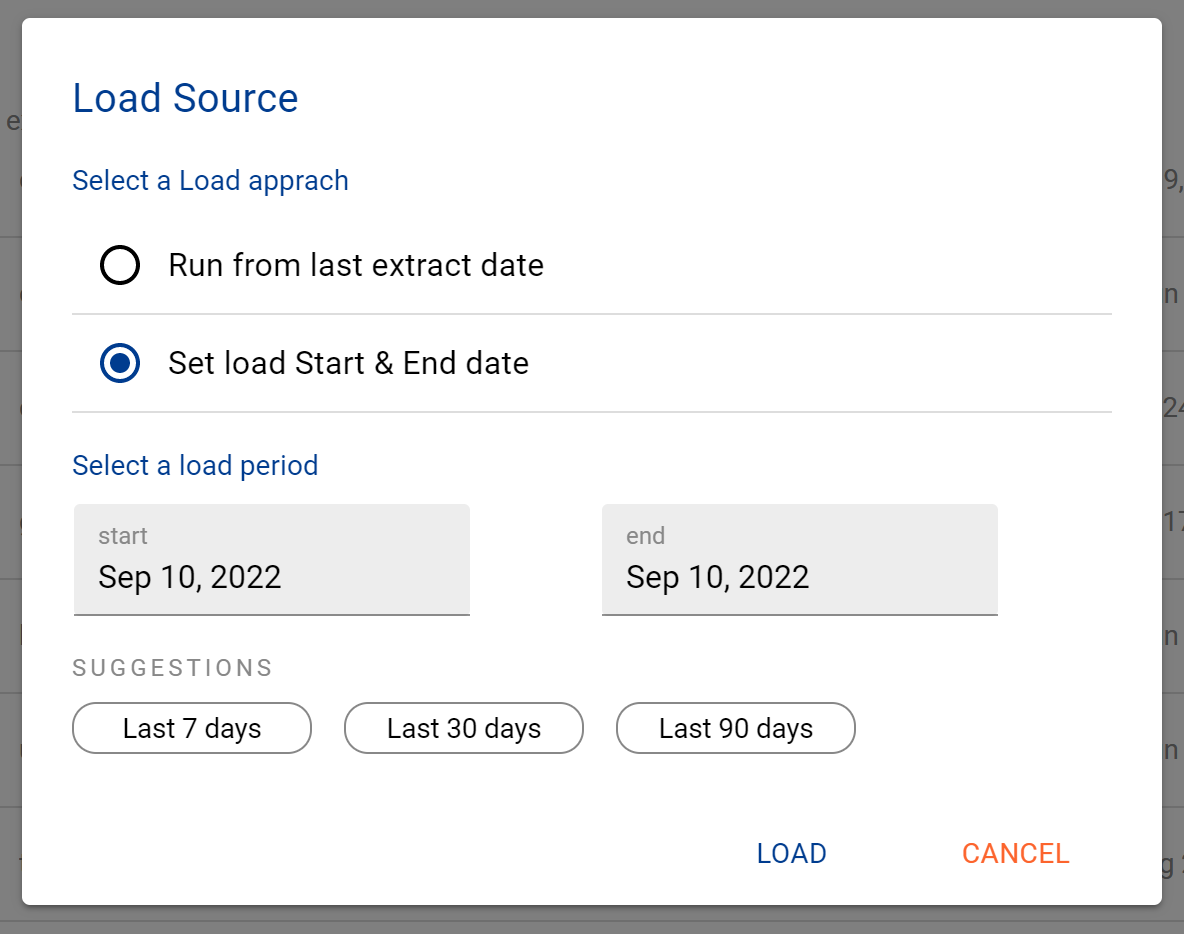
After the source load is triggered, a pop up bar will appear taking you to the Monitor tab in the Batch Manager page. This is the usual page you visit to view the progress of source loads

A manual source load will also require a manual run of
DAILY
GATHER_METRICS_AND_STATS
To load all metrics and indexes with the manually loaded metadata. These can be found in the Batch Manager page
Troubleshooting failed loads
If the job failed at the extraction step
Check the error. Contact KADA Support if required.
Rerun the source job
If the job failed at the load step, the landing folder failed directory will contain the file with issues.
Find the bad record and fix the file
Rerun the source job