
UPDATED IN VERSION 6.1
Kada provides a MCP integration for Snowflake
Prerequisites
-
You must have access to Snowflake and have Account Admin access
-
You must have access to K and have Admin access
-
Kada MCP Client ID / Secret Value .
-
Kada MCP Server URL endpoint (e.g.,
https://demo.kada.ai/mcp)
You must request access to the Kada MCP. Reach out to your Kada account manager for access.
Step 1: Creating the K Agent in Copilot Studio
-
Open Snowflake in your Browser
-
Click on your avatar and select Settings
-
Go to Account Agent Settings
-
Select Add Custom
-
Add the following details then click Add
-
Location: Select a database where the MCP connector will be deployed to
-
Name: Give the MCP connector name e.g. K MCP
-
Description: Give the MCP connector a description: MCP for K platform
-
Authentication type: Use Standard OAuth
-
Server URL:
https://<your-deployed-server-url>/mcp -
Token endpoint:
https://<your-kada-domain>/keycloak/auth/realms/kada/protocol/openid-connect/token -
Oauth Client ID: Ask your Kada account manager
-
Oauth Client Secret: Ask your Kada account manager
-
Authorisation endpoint:
https://<your-kada-domain>/keycloak/auth/realms/kada/protocol/openid-connect/auth -
Scopes:
openid profile kada-mcp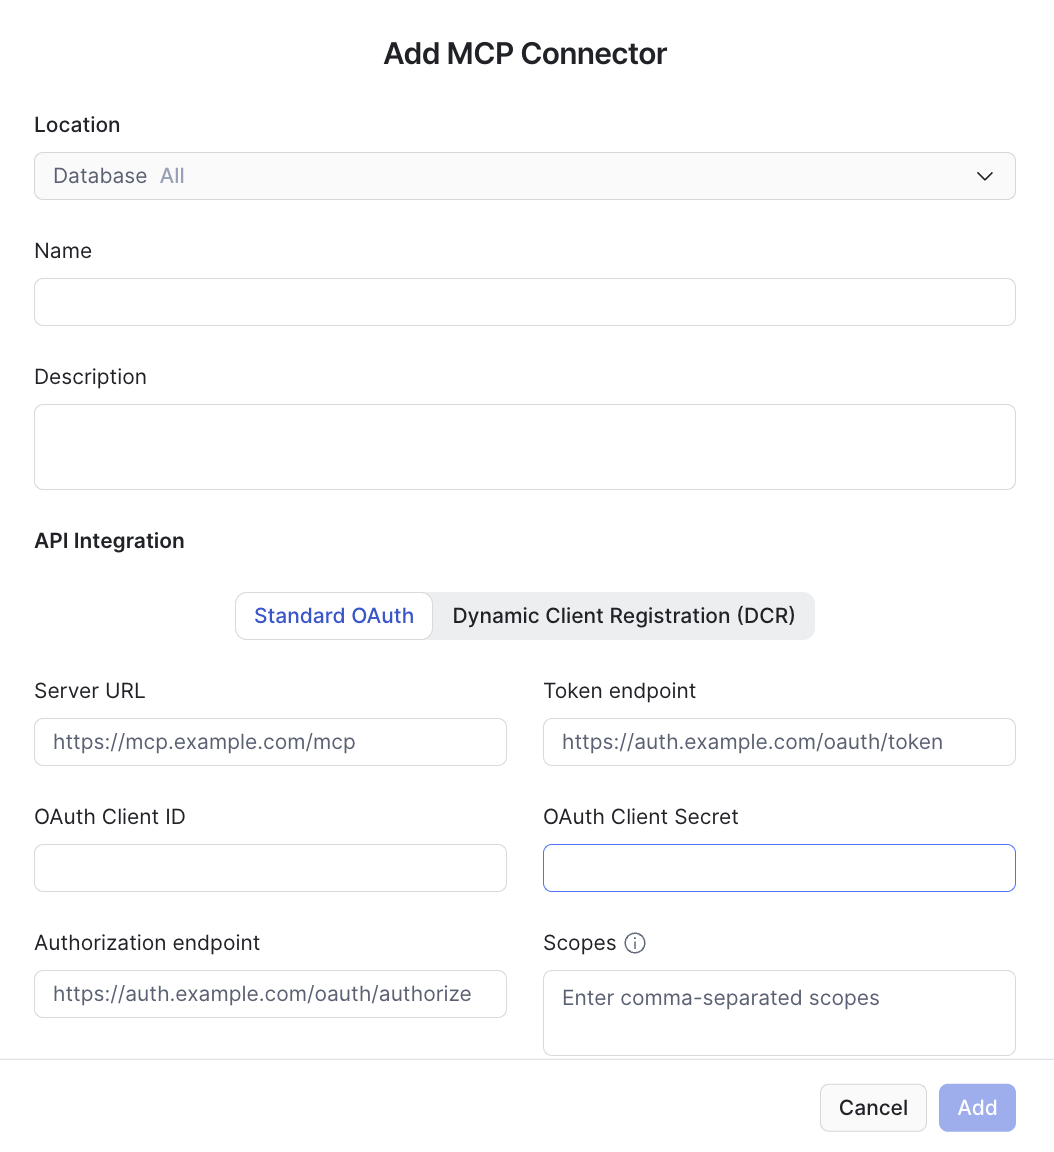
-
Step 2: Add the Redirect URI to your Kada MCP
-
Open K in your Browser
-
Go to Settings → Customisation → Configure Single Sign On
-
Go to Clients. Click on to mcp-oauth
-
In Access Settings. Add the following to the Valid Redirect URIs. Click Save
-
https://identity.snowflake.com/oauth2/callback
-
Step 3: Connect Coco to K
-
Go back to Snowflake.
-
Click on your avatar and select Settings
-
Go to Personal Agent Settings
-
Go to the MCP Connector that you added in Step 1. Click Connect
-
You will be asked to sign in to K to complete the authentication step
-
-
The K MCP will be connected after successful authentication

Step 4: Testing your Agent
-
Open up a chat with Coco
-
Test the agent with question using the Kada tools
-
Test the agent with questions about your data ecosystem. Examples:
-
What report should I use for [use case] -
Who is the owner of this report?
Please advise your Kada account manager with any feedback you may have.
-