UPDATED IN VERSION 6.1
Through Bulk Action you can:
-
Update properties for multiple data assets
-
Easily link multiple data assets to a list
-
Easily link multiple data assets to a warning notice
Once a bulk action has been created, you can choose to save it and set a schedule to have it run on a regular basis.
-
For example: Set a bulk action to run monthly to automatically assign a specific data owner to newly created data assets for a domain.
Bulk Action is only available to Data Governance, Data Manager, and K Admin users, except for Add to List, which is available to all users
Accessing Bulk Action
You can access Bulk Action in three ways:
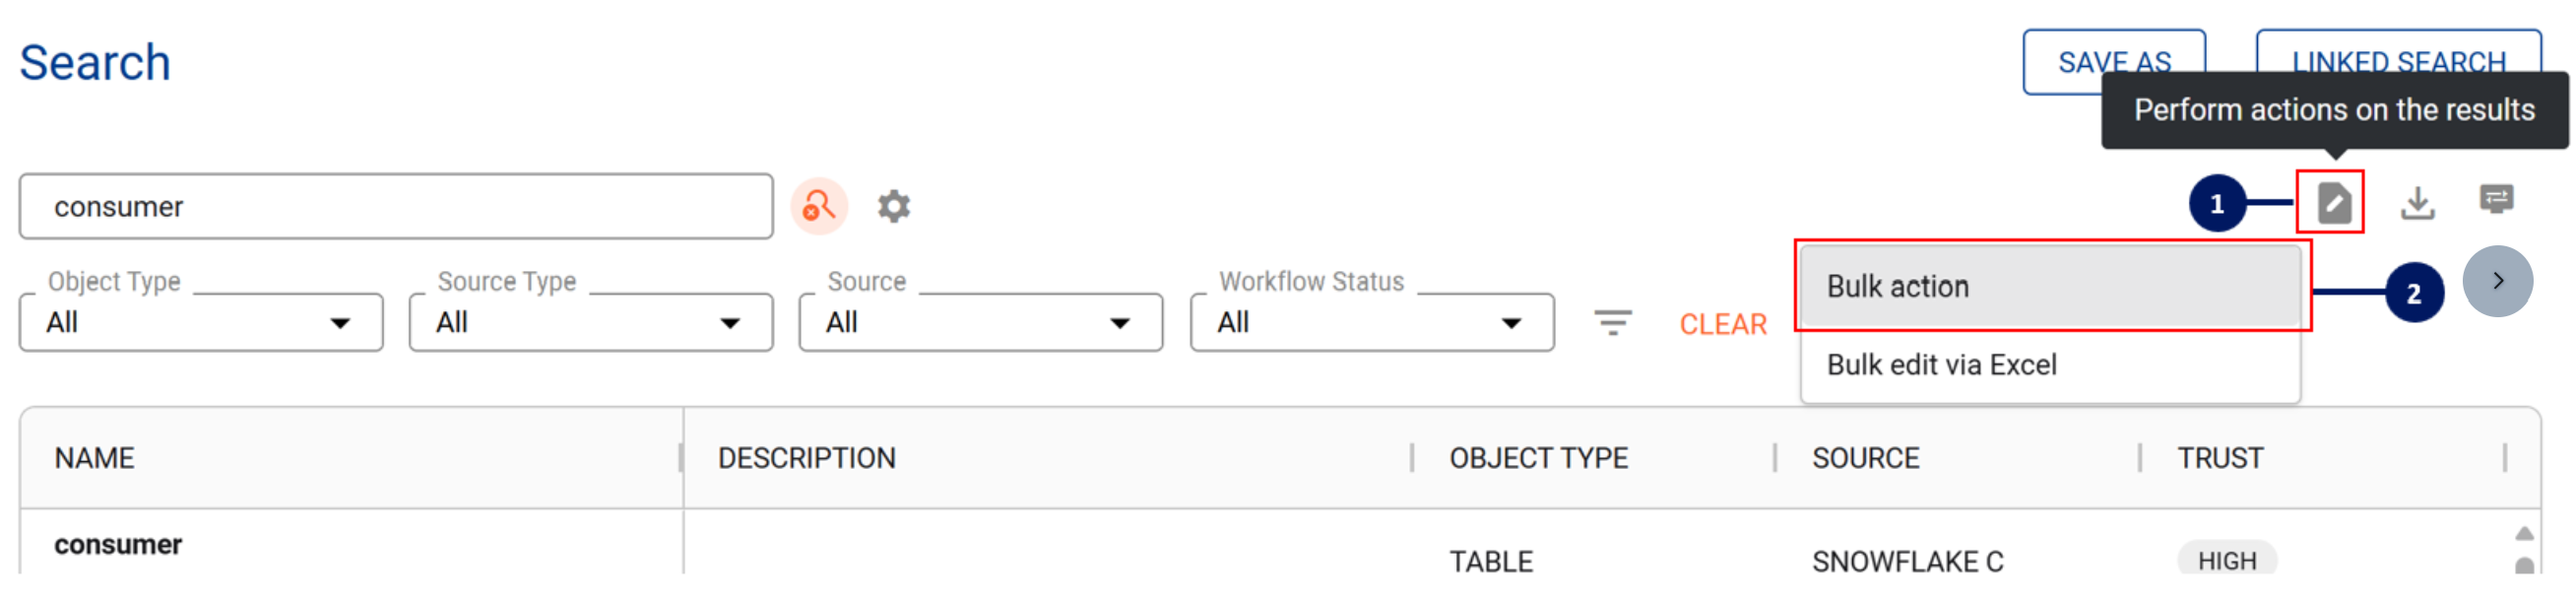
Option 1) Search Page — run a search and select assets from the results, then open Bulk Action from the toolbar.
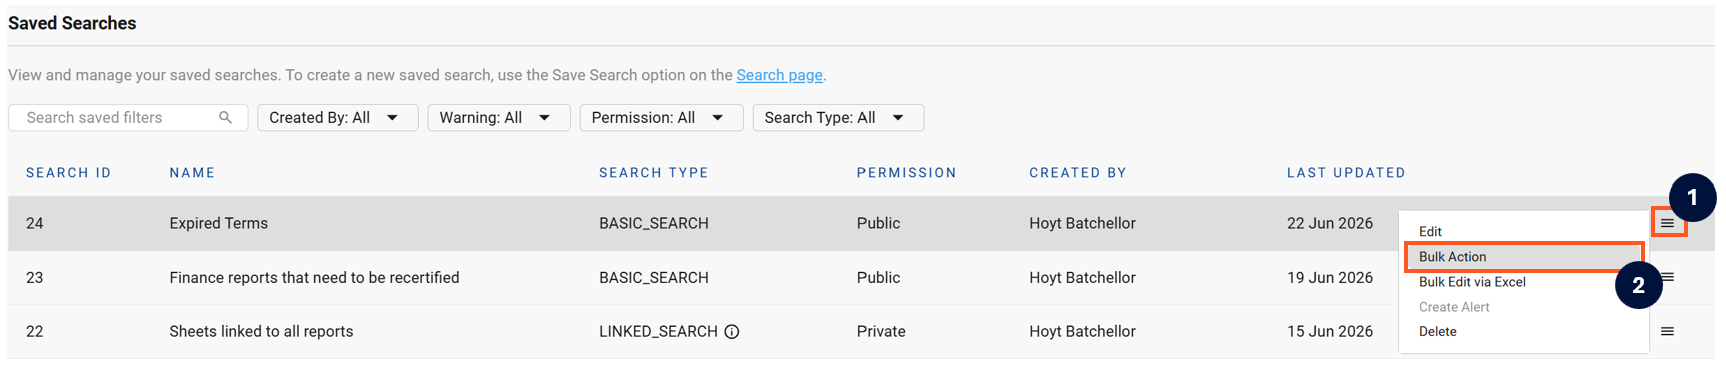
Option 2) Via Saved Search — On the search page save your filter settings and then open Bulk Action from the Saved Search page.
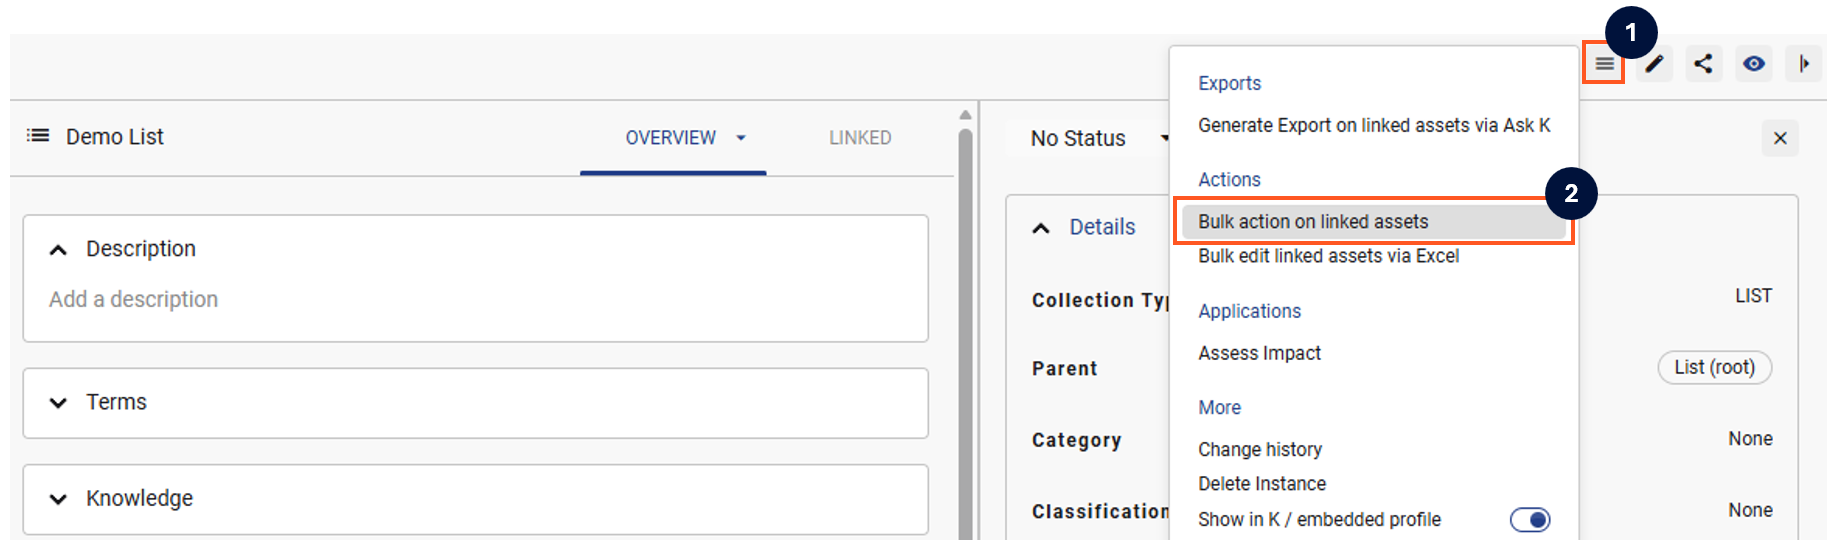
Option 3) Via Lists — open a list and select assets, then open Bulk Action from the list toolbar.
How to complete a Bulk Action
-
Step 1) Open Bulk Action for the assets you want to update via Search, Filters, or Lists.
-
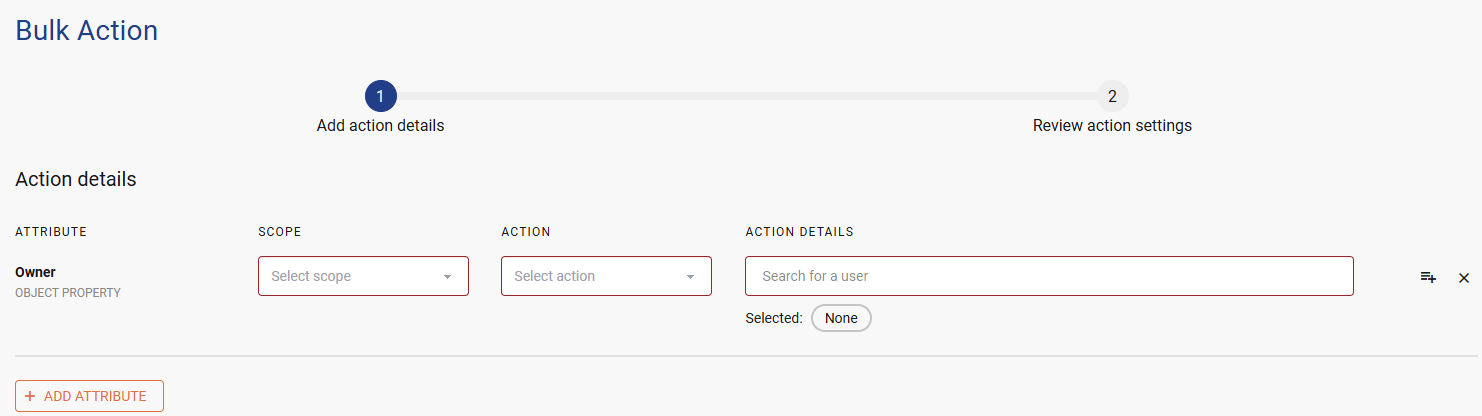
Step 2) Choose the attribute you want to update. You can select multiple attributes to update at the same time.
-
Step 3) Confirm the Scope of the bulk update. If multiple types of data assets have been selected, you can restrict the update to a specific asset type (e.g. Tables and Columns only).
-
Step 4) Confirm the type of Action. There are up to 4 action types:
-
Clear — delete all current values stored
-
Remove only — delete a specific value (e.g. remove one of several Stewards)
-
Replace — replace the current values with a new one
-
Add to existing — add additional values alongside existing ones
-
-
Step 5) Review the Action Settings — confirm the correct target has been selected, then choose to:
-
Run now
-
Save for future use
-
Schedule for a future run
-
-
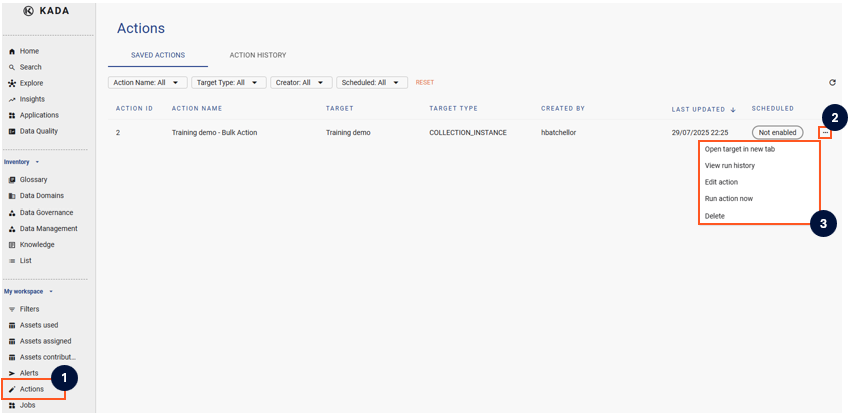
Step 6) After clicking Save or Run, you will be taken to the Actions Centre where you can view saved and previously run actions.
About the Actions Centre
Access the Actions Centre from the side menu. It shows all saved actions and run history.
For any saved action, the menu lets you:
-
Review the target list of data assets the action updates
-
View the run history for that action
-
Edit the action, including changing its run schedule
-
Run the action immediately
-
Delete the action