Bulk Edit via Excel Upload lets you export a template of your data assets, make changes in Excel, and import the file back into K. This is a preferred approach when:
-
Changes need to be socialised, reviewed, or approved with stakeholders outside of K
-
The required changes (e.g. descriptions) are already documented in a spreadsheet
Access: This function is currently limited to Table, Column, Report, and Sheet objects and is only available to K Administrators.
Note: Changes made via Bulk Edit via Excel are not logged in the asset's change log.
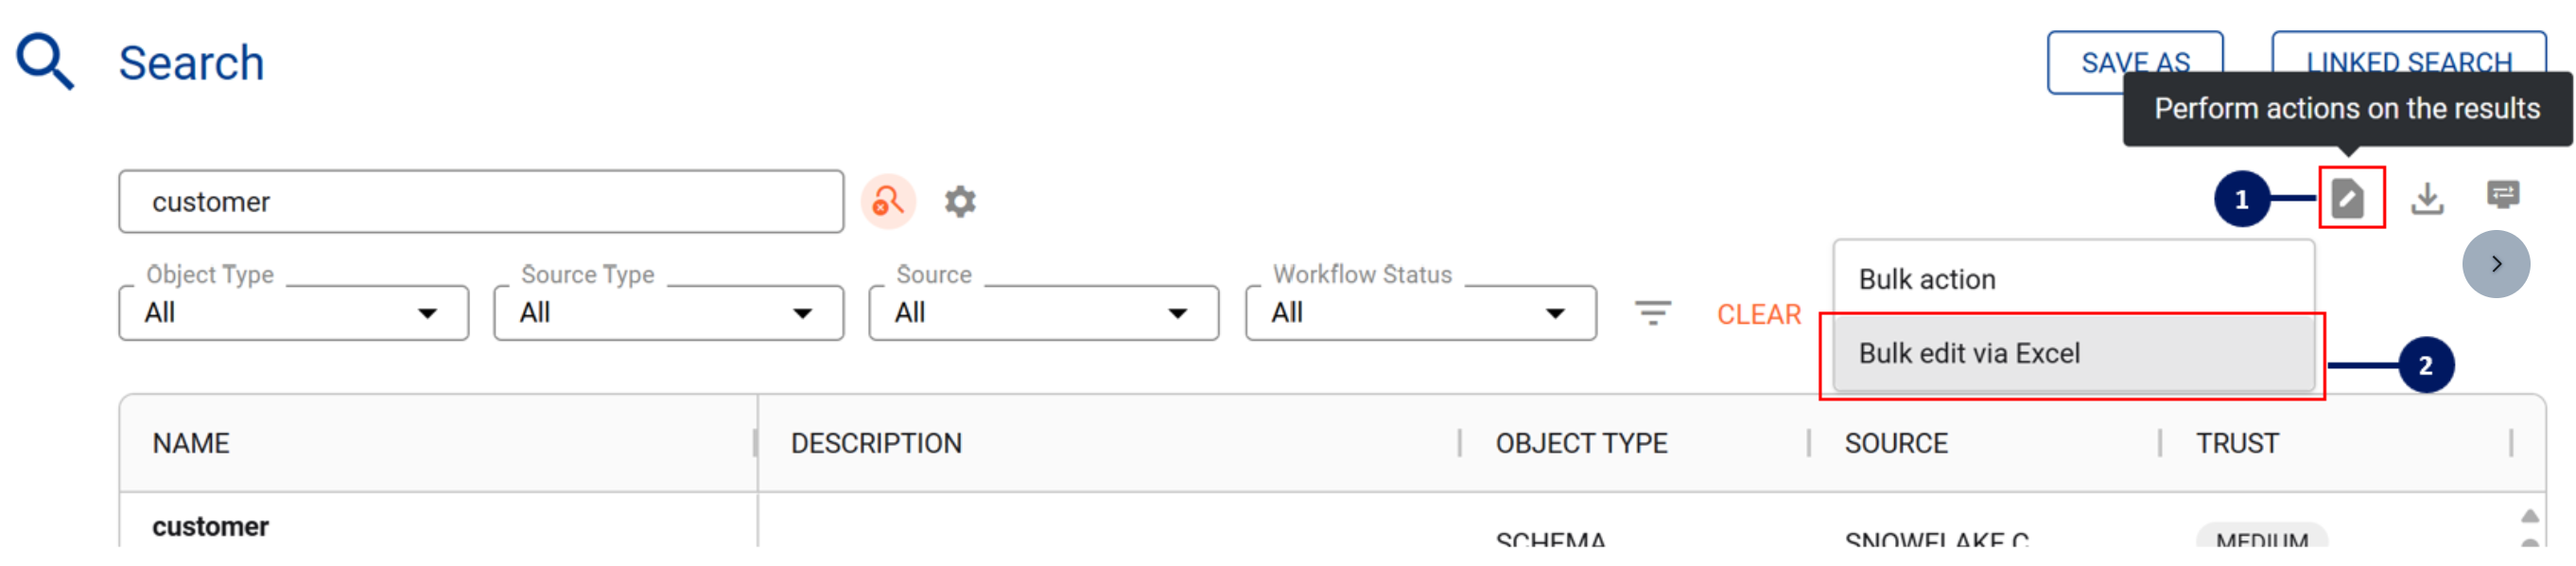
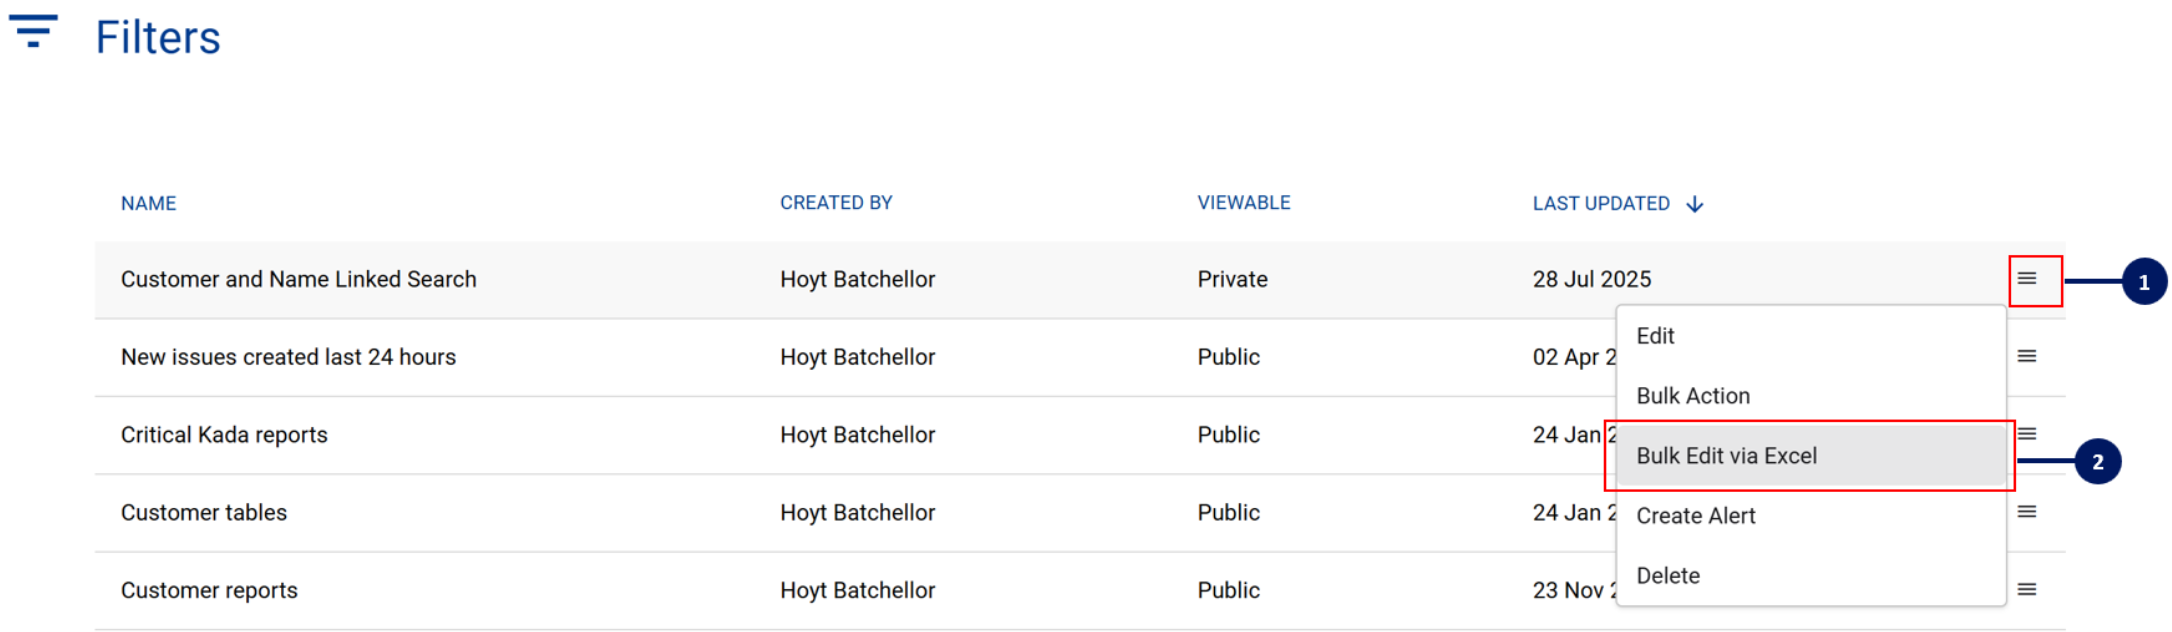
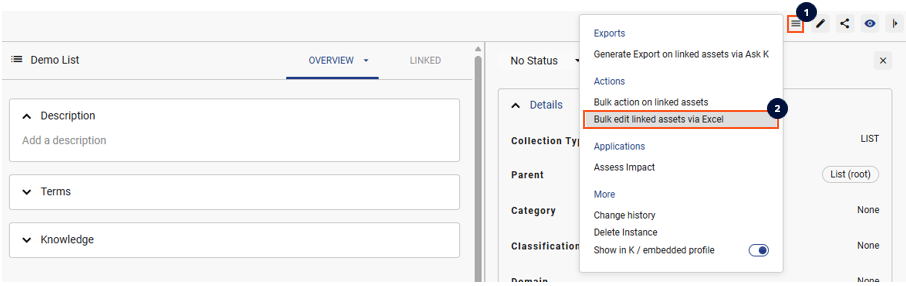
Step 1) Select assets and generate your template
You can select assets to add to your Bulk Edit Excel template via three options:
-
Option 1) Search Results — run a search and select assets from the results
-
Option 2) Filters — apply filters to scope your asset list
-
Option 3) Lists — select assets from within a list
By default, the following properties are included in the template:
-
Business name, Description, Tags, Classification, Domains, Verified for, Do not use for, Owner, Stewards
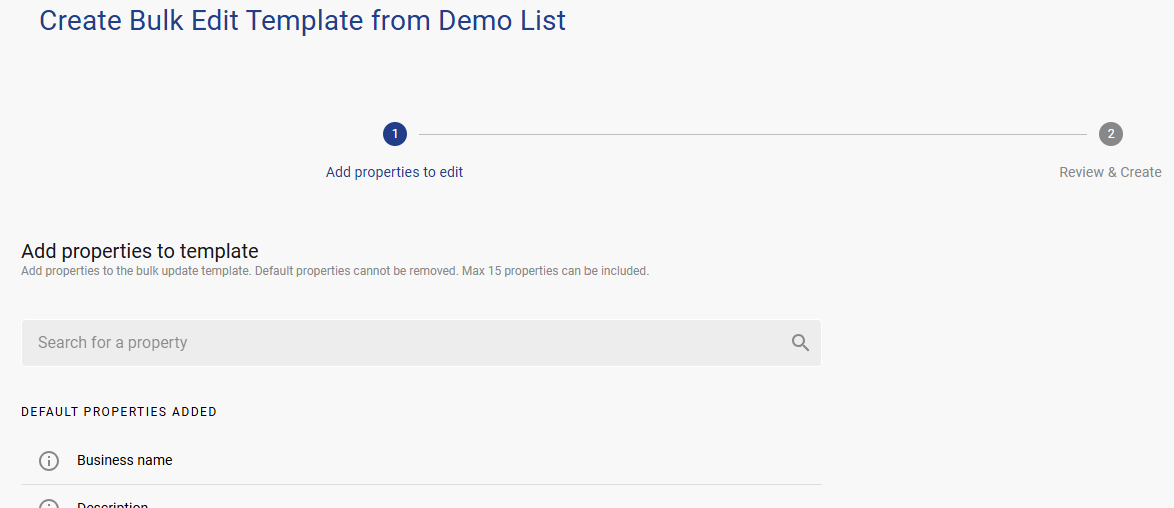
You can also add up to 6 additional properties (15 properties total can be updated at once). Review the template properties and click Create. You will be taken to the My Application Results page where you can download the file when it is ready.
Step 2) Edit the Excel template
-
Open the file in Excel and follow the instructions on the first (Instructions) tab.
-
Edit the properties for your assets and save the file locally.
Key things to note:
-
Cells highlighted in grey are locked to protect the workbook structure — do not edit these.
-
When re-imported, all metadata properties will be replaced — blank cells will overwrite existing data in K.
-
Orange columns have restricted values (e.g. only pre-defined Domains can be entered). Refer to the corresponding orange tab for the list of valid values. If a value is missing, create it in K first, then re-generate the template.
-
Enter multiple values (e.g. multiple Domains) by separating each with a comma.
Always check for and delete blank rows. Previously edited rows that have been cleared are treated as "activated" — K will attempt to upload them and the job will fail. To delete a blank row:
-
Right-click the tab and click Unprotect Sheet (no password required)
-
Right-click the blank row and click Delete
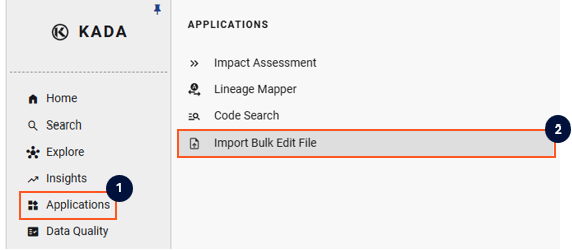
Step 3) Upload your edited file
-
Go to the Import Bulk Edit File page via K Applications.
-
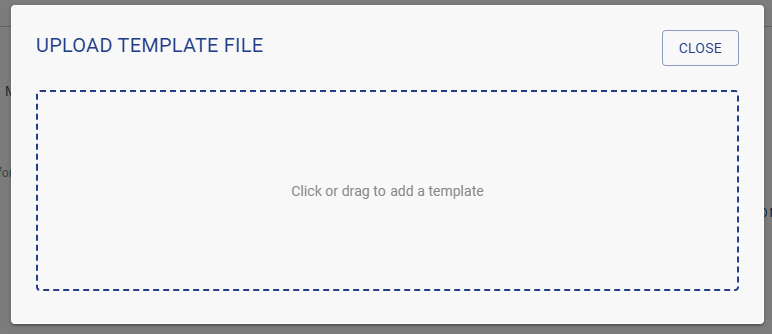
Click Upload Bulk Edit File, select your edited file, and click Import.
-
If the file uploads without errors, it will show a successful upload. If there are issues, it will fail and provide error details.
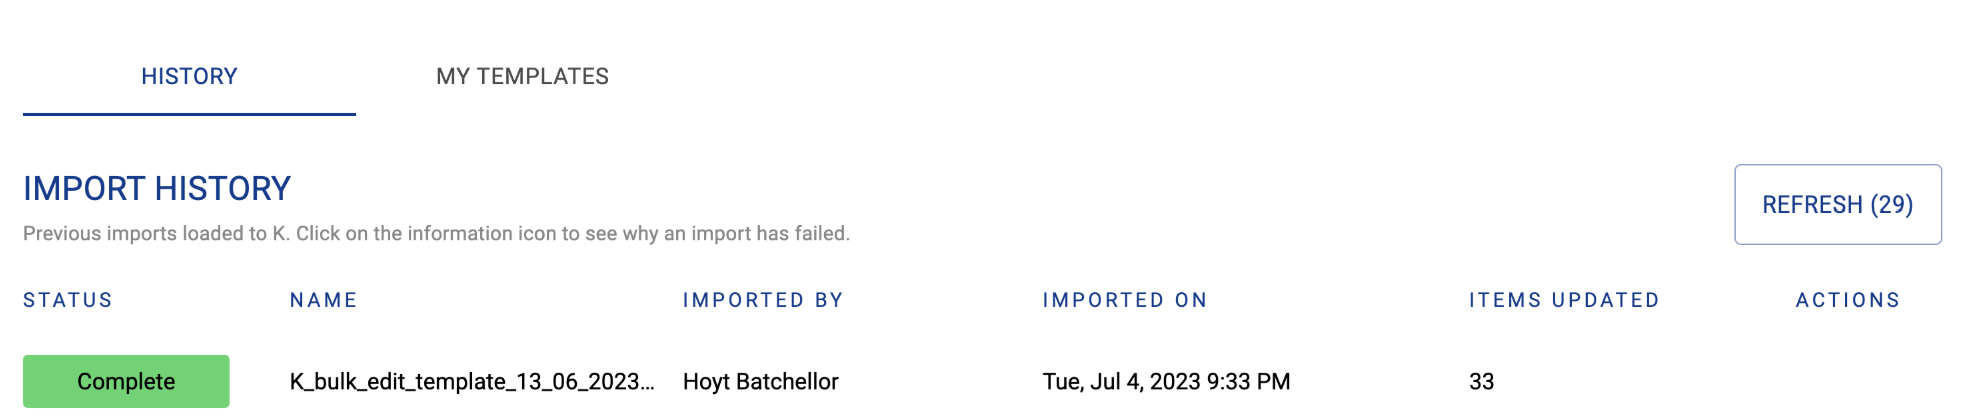
Note on error rows: The row number in the error log is incremental across all tabs. For example, if the Tables tab has 500 records and the Reports tab has 100 records, an error on row 550 refers to row 50 in the Reports tab.