
New in Version 6.1
Creating, editing or Deleting a Schedule group requires Workspace admin. Adding a rule to an existing Schedule group requires Rule creator role or above.
Use schedule group to configure a set of rules to run and alert on together — on a schedule. Grouping related rules means you don't have to trigger and monitor each one individually.
Creating a schedule group
🔒 Creating, editing, and deleting schedule groups requires the Workspace Admin role.
-
Go to Schedule Groups in the workspace.
-
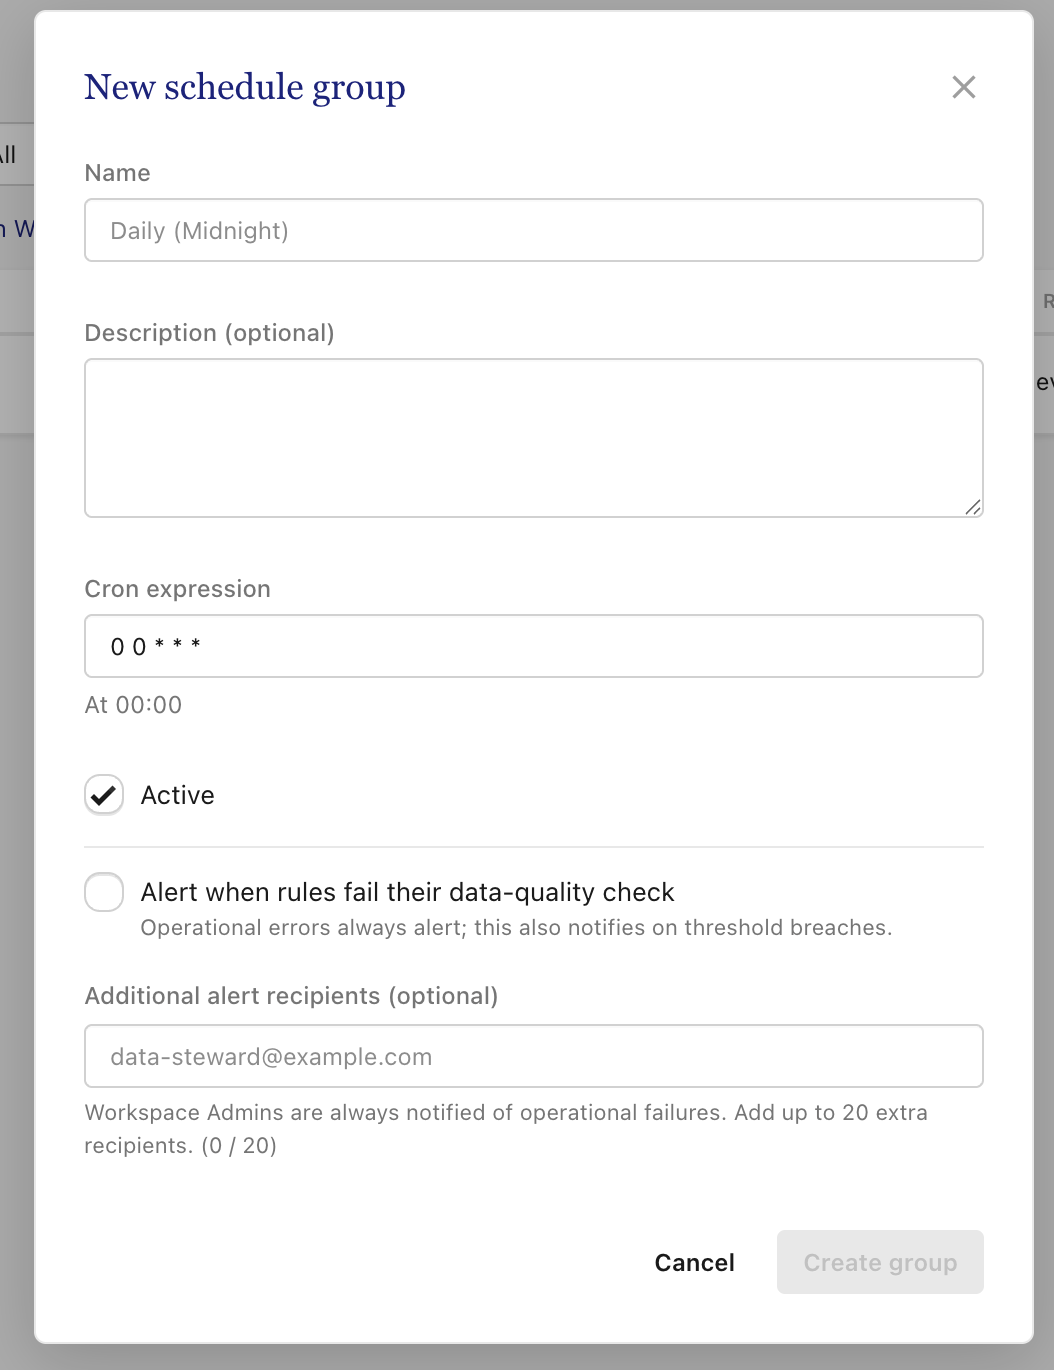
Click Create Schedule Group. Fill in the following details:
-
Name: Give the Schedule Group a name - e.g. Daily at 8am
-
Description: Give the Scheduled Group a description to explain the Schedule - e.g. Runs every day at 8am including weekends
-
Cron expression: Provide a cron expression to define the schedule. If you need help try a cron assistant tool or ask an AI assistant such as ChatGPT
-
Active flag: Set the flag to Yes to enable the schedule
-
Alert flag: Set the flag to Yes to alert recipients on any assigned DQ test failure
-
Alert recipients: Add the email to any additional recipients that will receive the alert. Note the creator of the Scheduled group will also receive the alert.
-
-
Click Create group to save your changes. You can now assign rules to it.
Assigning rules to a schedule group
Rule Creators and above can assign rules to a schedule group:
-
Go to the Rules tab
-
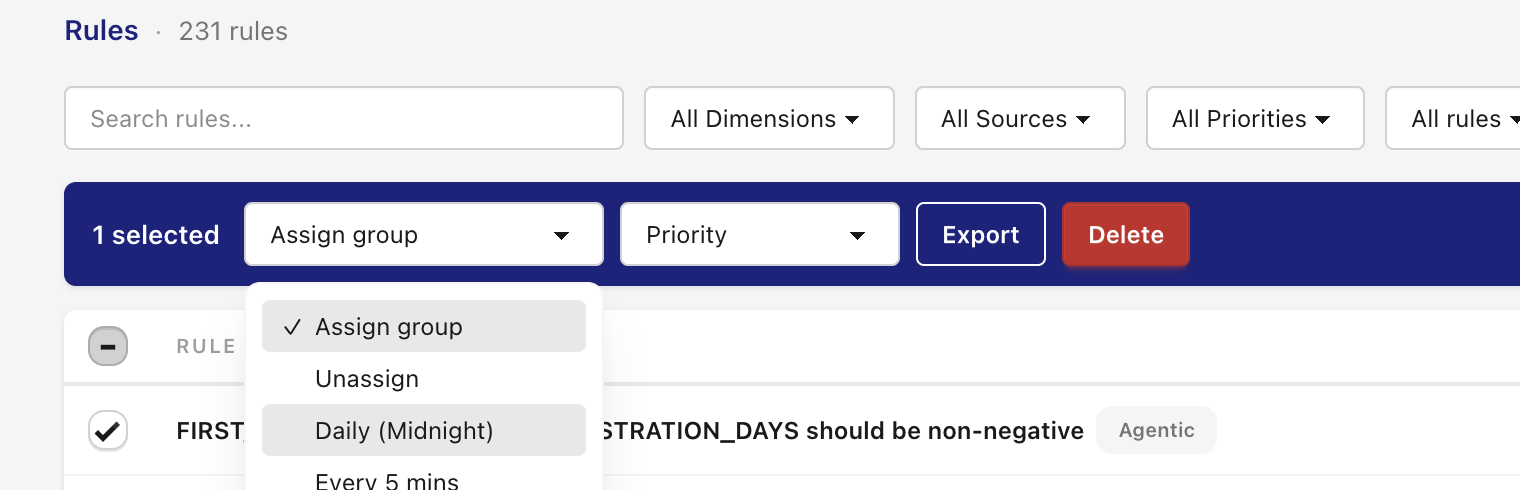
Select a rule or select multiple rules.
-
Assign the rule(s) to a Schedule group
Running a schedule group now
Click Run Now on a schedule group to trigger every rule in it immediately, outside its normal schedule. This is useful for checking a change straight away without waiting for the next scheduled run.
-
Go to Schedule groups
-
Select a Schedule group to open the Schedule group profile.
-
Click Run now

Editing and deleting a schedule group
A Workspace Admin can rename a schedule group or delete it entirely.
When a schedule group is deleted, all rules within the schedule group become unassigned.