
A Business Glossary in K is a governed Collections that gives your organisation a single source of truth for business terms, definitions, and ownership. Linking a term to the physical tables, columns, and reports it describes surfaces that definition directly on the Data Profiles of every linked asset, closing the gap between business language and technical metadata.
This page provides an overview on:
-
How to create a new glossary
-
How to add new terms and link terms to data assets
-
Tips on how to structure and govern your glossary.
Only Data Governance Managers, Data Managers, and Administrators have the ability to create new glossaries.
If you are a Data Steward and cannot create a new glossary, check with your Kada Admin team to see if you’ve been assigned the correct Kada role profile.
Step 1: Create the Glossary Collection
-
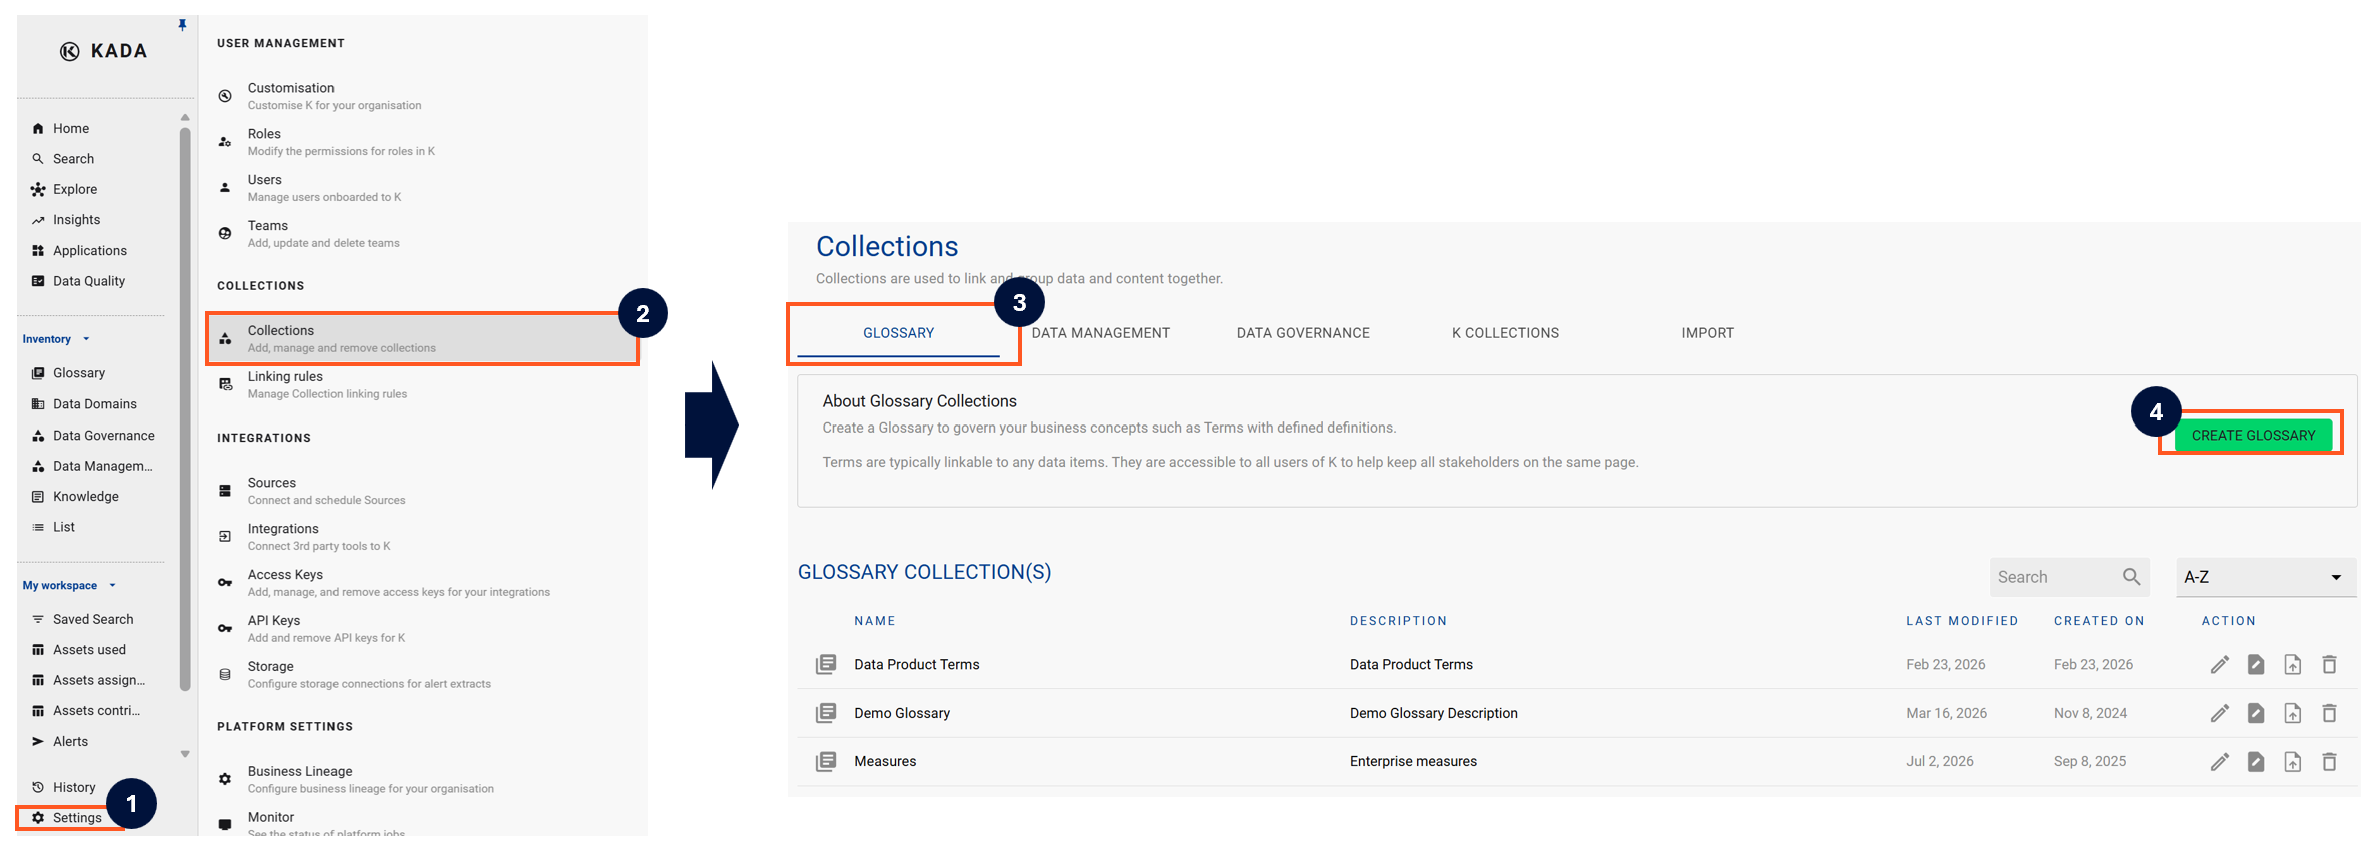
Select Platform Settings in the side bar, then Collections
-
Open the Glossary tab and click Create Glossary
-
-
Fill in the collection details:
-
Collection Name: a clear, domain-specific name, e.g.
Finance Business Glossary -
Search Name: a single-word name used in search, e.g.
Fin_bus_glossary -
Description: the scope and purpose of this glossary
-
-
Confirm which K roles can edit the Glossary and which can link terms to data assets, then click Create
Set edit and linking permissions deliberately at this step. Once a Glossary has real terms and links in it, tightening access later is more disruptive than starting narrow and opening it up.
-
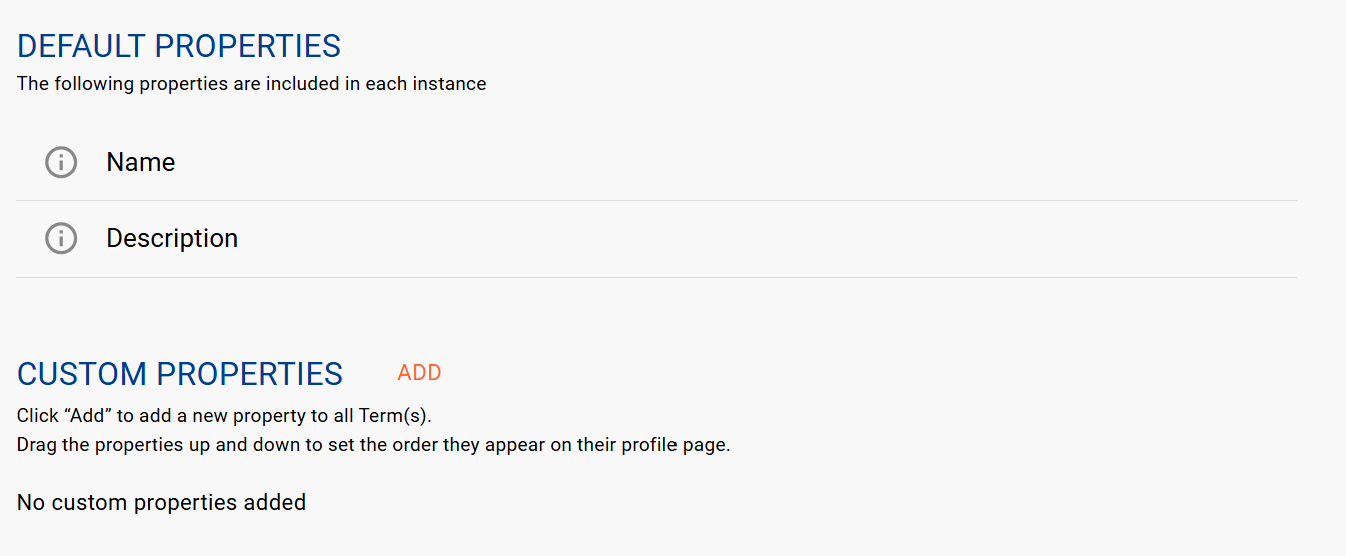
Next confirm the properties you want to add to your Glossary Collection.
-
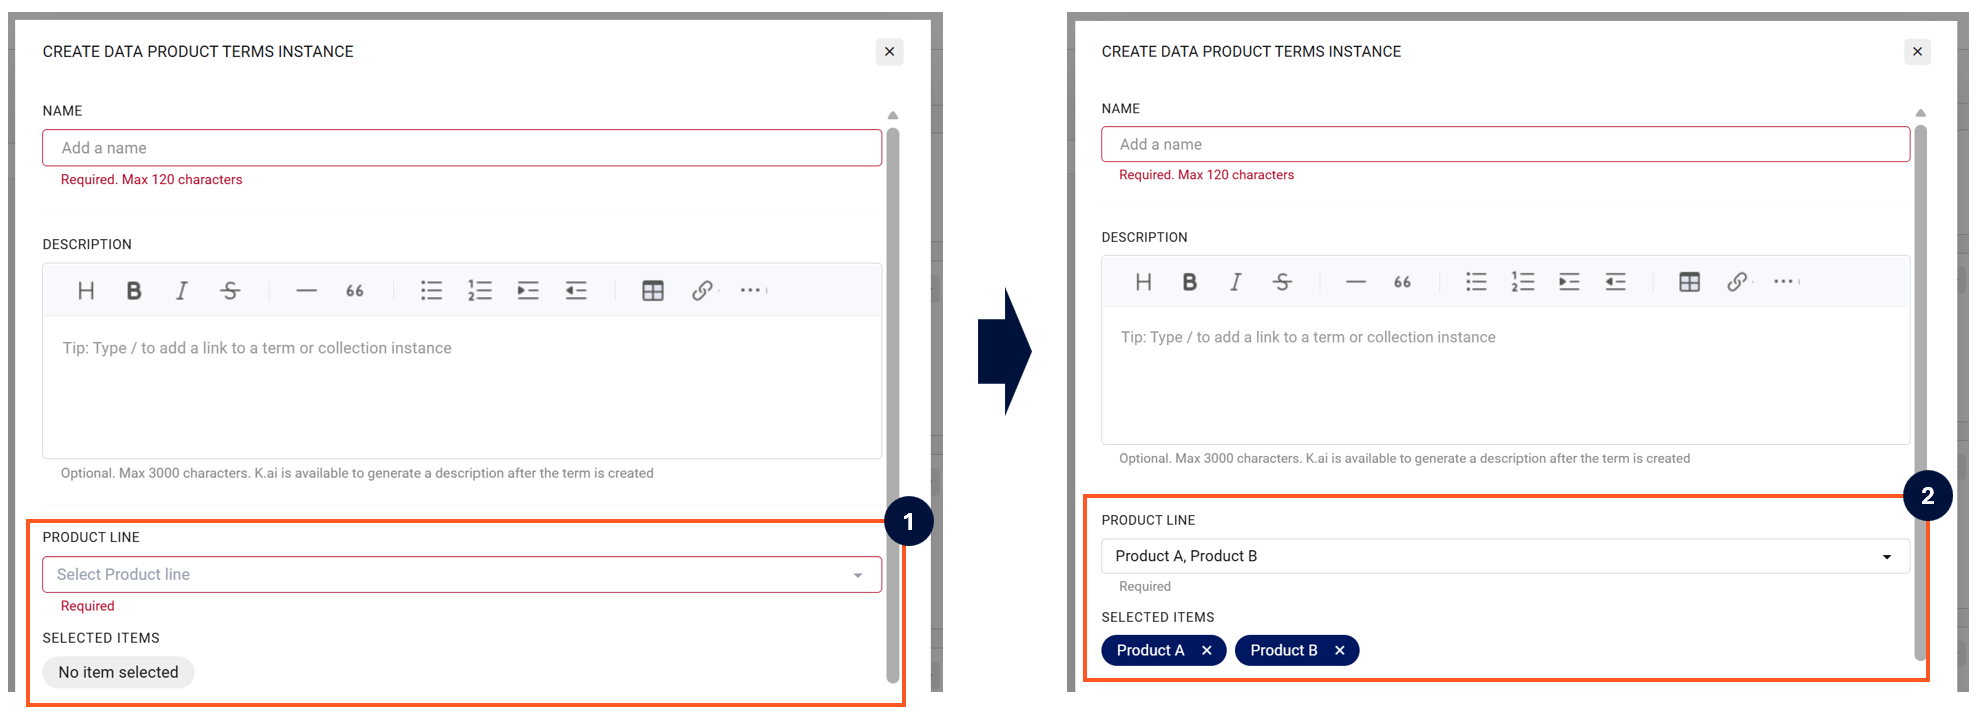
By adding custom properties, you can require all terms in the newly created glossary to have these additional properties included. For example, in a Product Glossary, requiring the term to be linked to a Product Type
-
-
-
Below is an example of a custom property field
-
Step 2: Add Terms to your new Glossary
Terms are the instances that make up a Glossary, and each gets its own profile page. As a Glossary is a type of Collection, a glossary term is the same thing as a Collection instance.
-
Open the Glossary Collection you just created via the Inventory
-
Click Add Instance (or Create Term)
-
Name: required, max 120 characters. Standardise on singular, title-cased noun phrases, e.g.
Active Customer, not a technical column name -
Description: optional, k.ai can generate a draft description after the term is created if you leave it blank
-
Complete any Custom Properties that the Glossary has been configured with.
-
-
Click Create
See How to Create an Instance in a Collection for the full instance-creation flow, including how to structure a term hierarchy for related terms.
Step 3: Complete the profile details for your new term
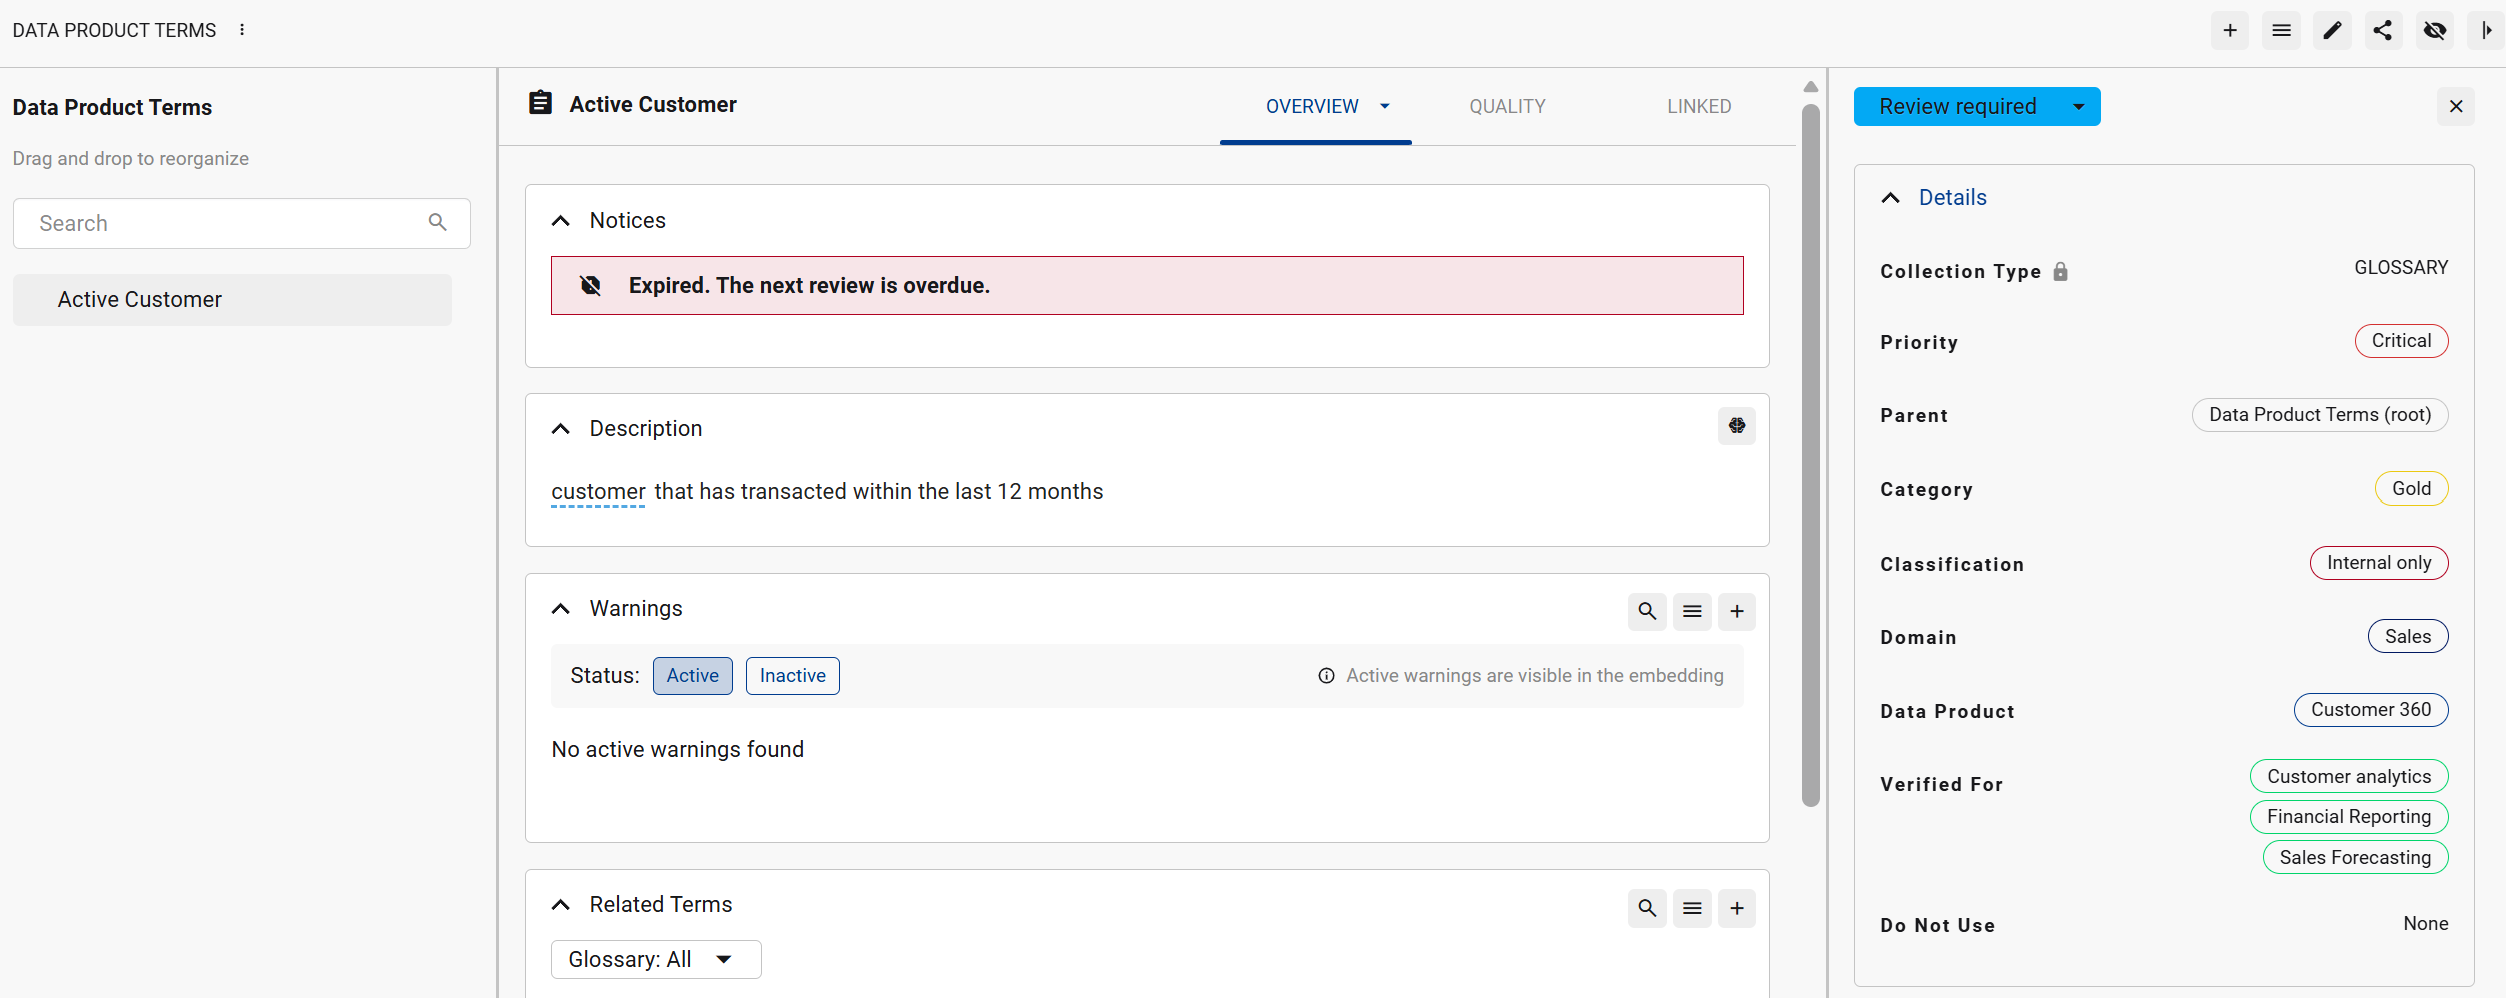
A collection instance is another type of data asset and has the same data profile sidebar options to help you users understand how to use the glossary term.
The more you complete, the higher the trust rating for the glossary term.
For a large number of terms, use Bulk Action to quickly update term details or use Bulk Edit Collections that lets up upload changes via an Excel template. You can also use the Bulk Excel upload for the initial population of a new Glossary terms as well as ongoing maintenance.
Step 4: Link your Term to Data Assets
-
Manually: from the data asset's Data Profile page, find the Glossary in the linked collections panel and select the matching term
-
Automatically: set up a linking rule on the Collection using a pattern that matches your technical naming convention, e.g.
^cust(omer)?_id$, so matching assets link going forward without manual work
See How to Link data items to an Instance for the full manual and rule-based linking steps, and How to create a collection instance linking rule for setting up a rule.
Tips for Data Stewards and Data Governance Managers
-
Write clear, technology-agnostic definitions. Focus on the business concept, not the database column type behind it.
-
Build a logical hierarchy where one genuinely exists, e.g.
Accountparent toActive AccountandSuspended Account. You can create multiple child layers in business glossaries -
Work with your Data Governance Manager to set up linking rules for predictable technical naming patterns, rather than linking every matching asset by hand.
Glossary Governance
Governance here is two separate things: who can change the Glossary, and how you keep the terms in it accurate over time.
Who can edit and link. Review this periodically, not just at creation. Two settings control it: the edit permission set when the Glossary was created, and the platform-level setting for who can link glossary terms to a data asset (this one applies to all glossaries, not just one). See Tags vs Collections if you're deciding whether a new grouping should be a governed Glossary term at all, or just a Tag.
Keeping terms current. Every term can carry a Review Date, a Review Frequency (90, 180, or 365 days), and a Next Review Date that K calculates automatically from the two. When someone certifies a term, K prompts them to confirm the review date and frequency as part of that action.
-
Set up a saved search filtered on Next Review Date (Next 7 days / Next 30 days) and attach an alert, so Owners and Stewards get notified of terms coming up for review
-
Set up a second saved search with Next Review Date between the start of time and now, to catch anything already overdue, and alert on that separately
-
Data Governance Managers, Data Managers, Data Owners, and Data Stewards can also monitor review health across the whole Glossary from the Asset/Collection Governance Dashboards
Full detail on configuring review dates, frequencies, and alerts is in Setting a Review Date.
Related Guides