This page will walk through the setup of BigQuery in K using the direct connect method.
Integration details
|
Scope |
Included |
Comments |
|---|---|---|
|
Metadata |
YES |
|
|
Lineage |
YES |
|
|
Usage |
YES |
|
|
Sensitive Data Scanner |
NO |
Sensitive Scanner does not currently support Big Query. |
Step 1) Setup a Google Cloud Service Account
This step is performed by the Google Cloud Admin.
-
Create a Service Account by going to the Google Cloud Admin
-
Give the Service Account a name (e.g. KADA BQ Integration)
-
Select the Projects that include the BigQuery instance(s) that you want to catalog
-
Click Save
-
-
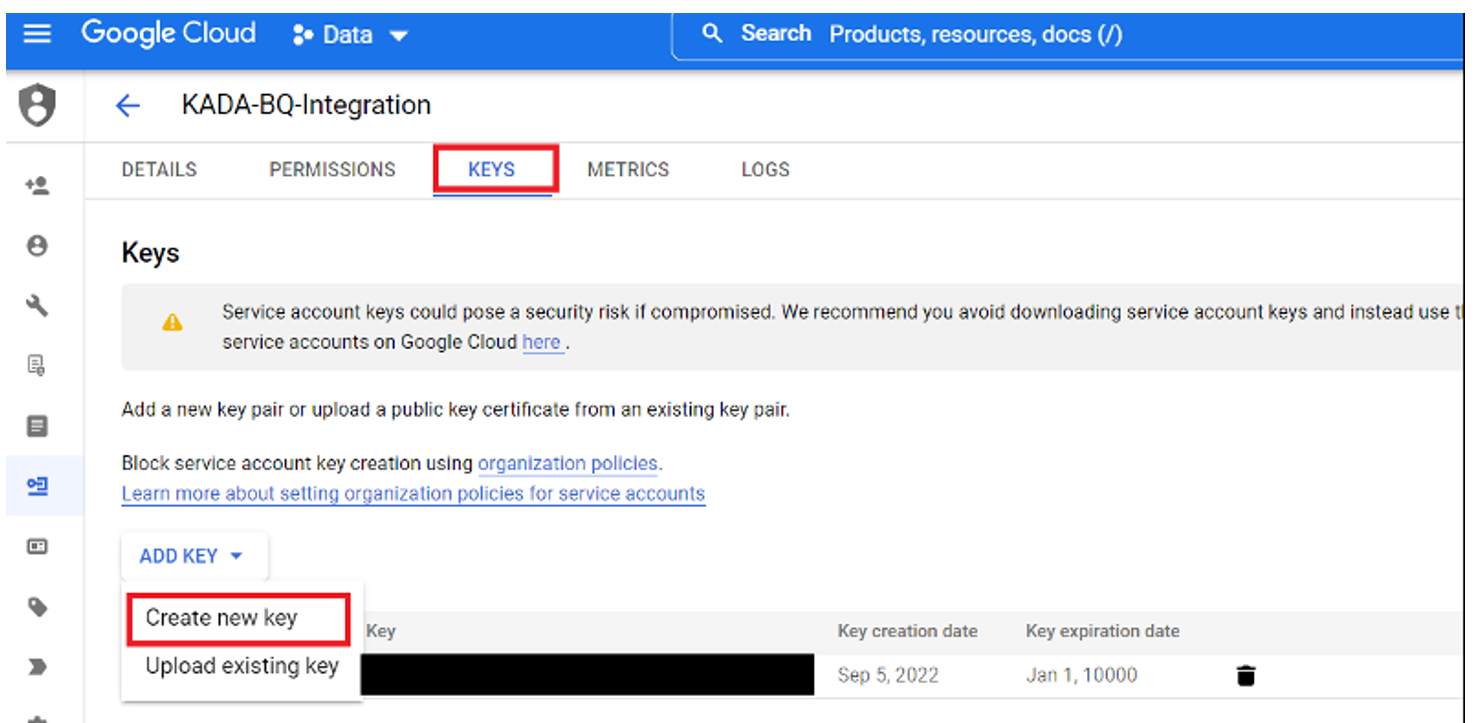
Create a Service Token
-
Click on the Service Account

-
Select the Keys tab. Click on Create new key
-
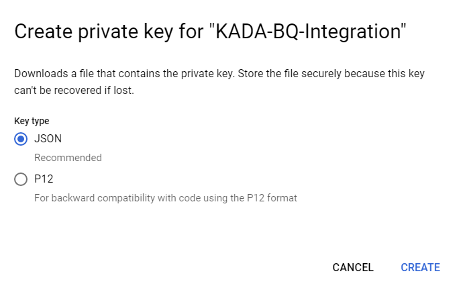
Select the JSON option. After clicking 'CREATE', the JSON file will automatically download to your device. Provide this to the user(s) that will complete the next steps.
-
-
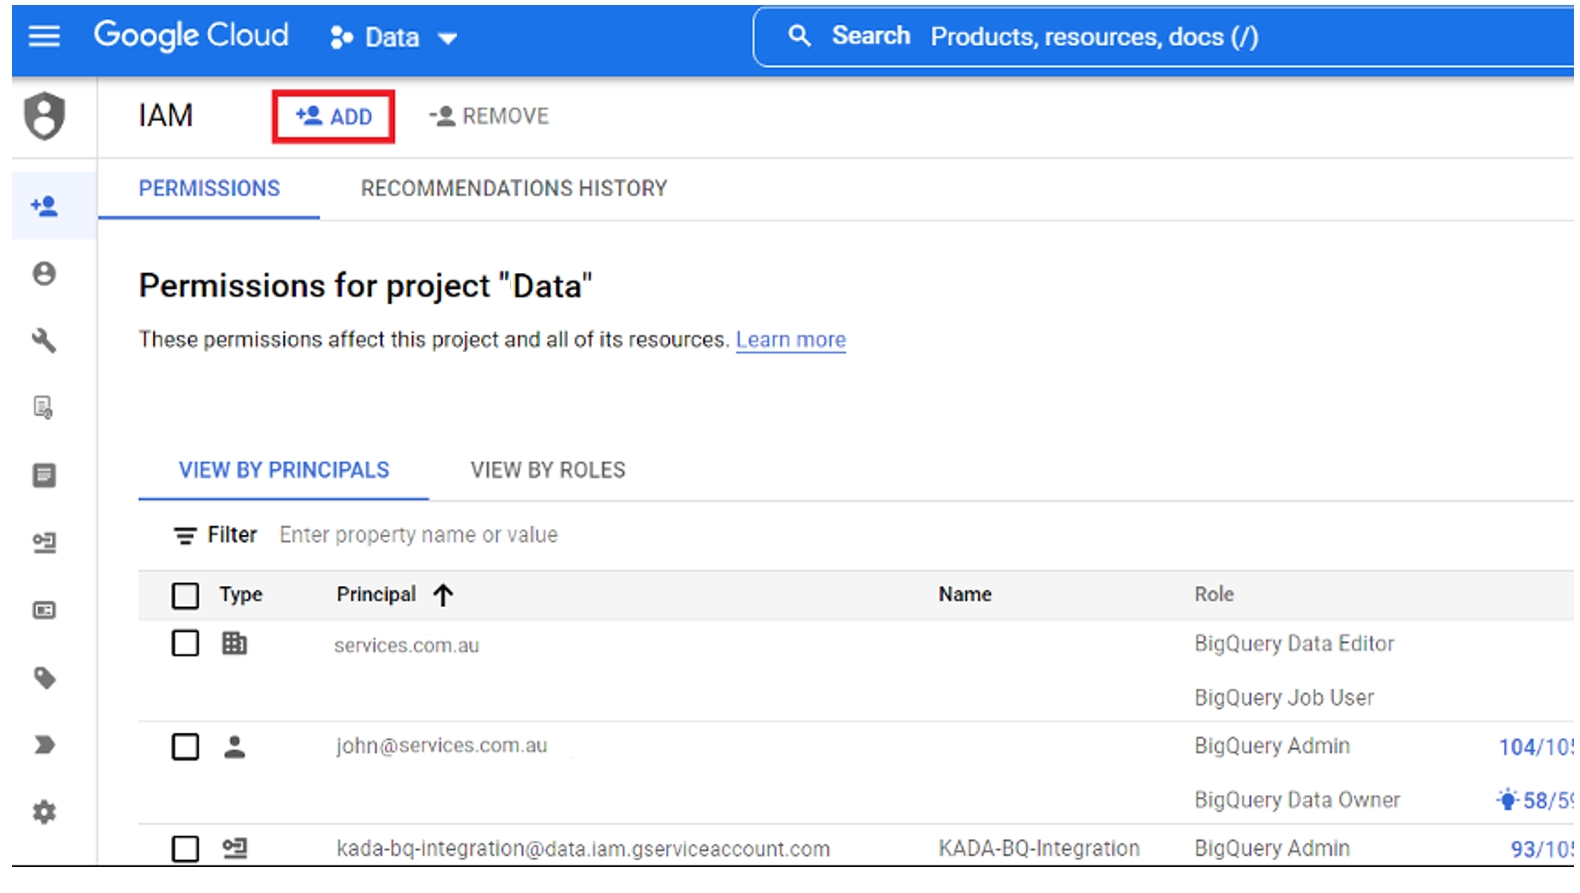
Add grants on the Service Account by going to the IAM page
-
Click on ADD
-
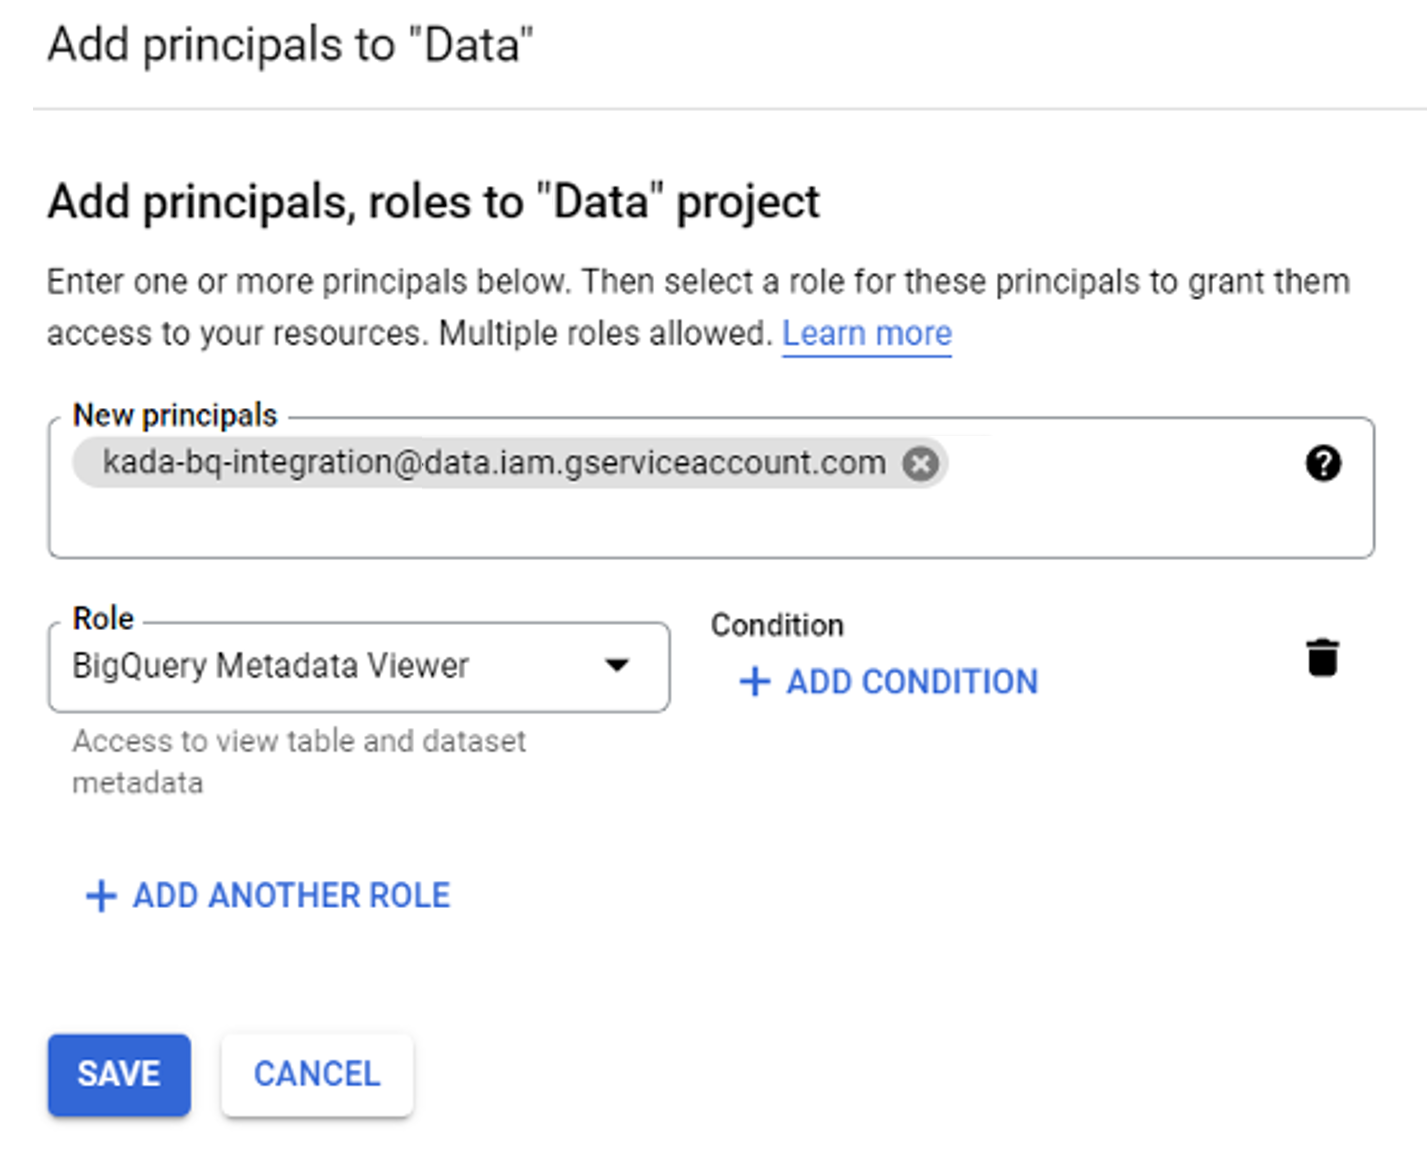
Add the Service Account to the 'New principals' field.
-
Grant the following roles to this principal:
-
BigQuery Job User
-
BigQuery Metadata Viewer
-
BigQuery Read Session User
-
BigQuery Resource Viewer
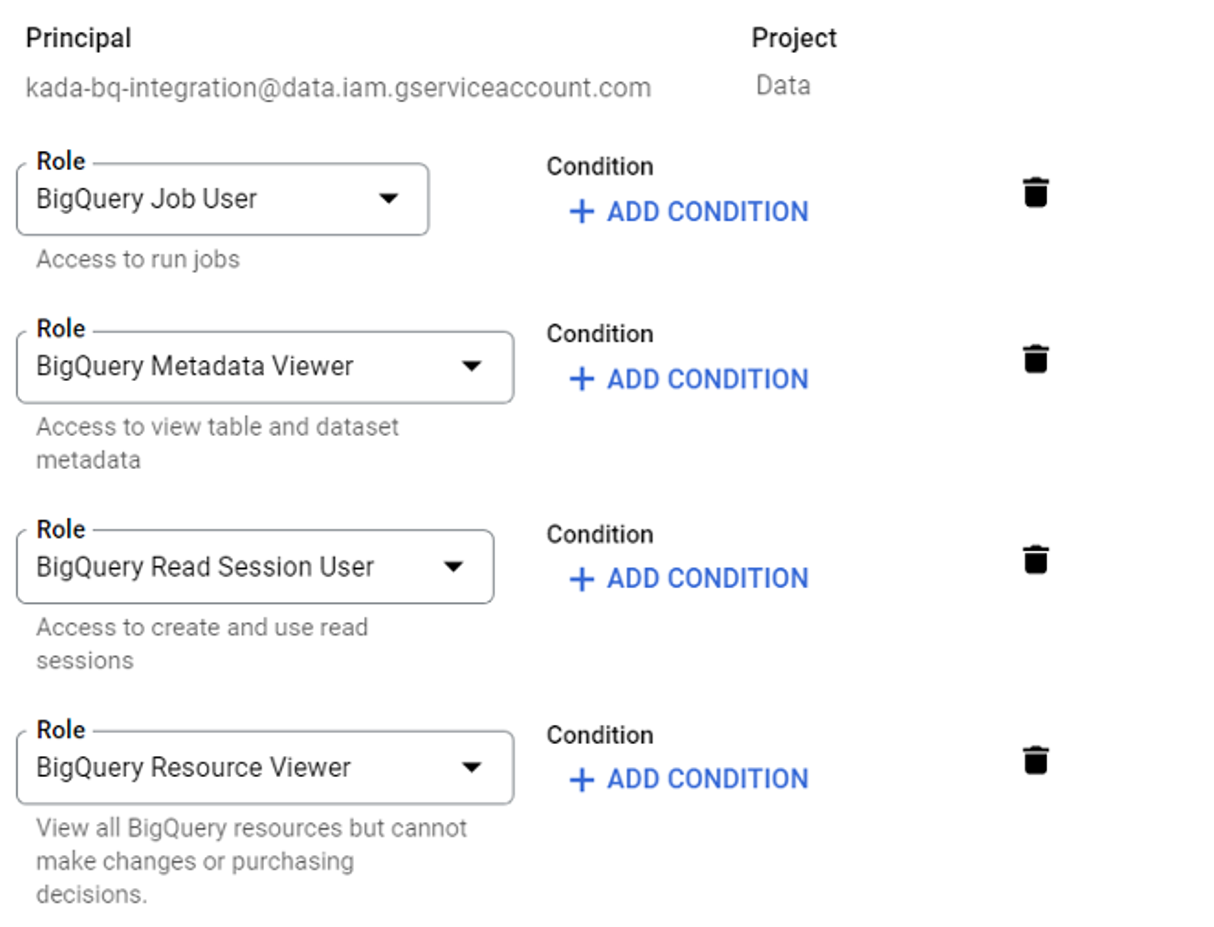
-
-
Click SAVE
-
Step 2) Connecting K to BigQuery
-
Select Platform Settings in the side bar
-
In the pop-out side panel, under Integrations click on Sources
-
Click Add Source and select BigQuery
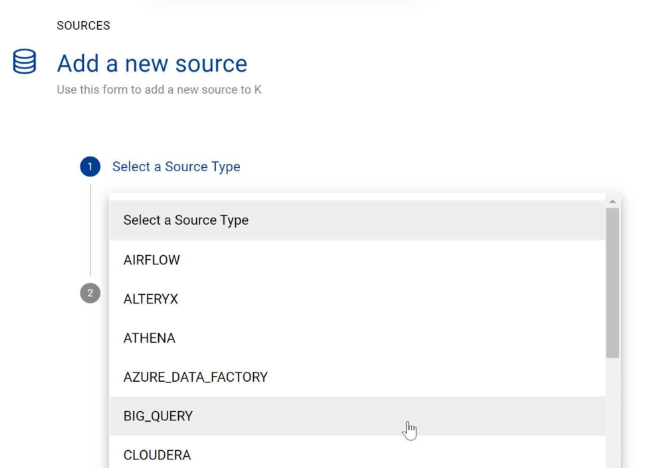
-
Select Direct Connect
-
Fill in the Source Settings and click Save & Next
-
Name: The name you wish to give your BigQuery Service in K
-
Host: Add your BigQuery Host Name (e.g. cloud.google.com)
-
Region: Select the region your Service is located in (check with your admin if you are unsure)
-
-
Add the Connection details and click Save & Next when connection is successful
-
Credentials: Copy the content of the Credentials.json created in Step 1
-
-
Test your connection and click Save
-
Select the Databases you wish to load into K and click Finish Setup
-
All databases will be listed. If you have a lot of databases this may take a few seconds to load.
-
-
Return to the Sources page and locate the new BigQuery source that you loaded
-
Click on the clock icon to select Edit Schedule and set your preferred schedule for the BigQuery load
Note that scheduling a source can take up to 15 minutes to propagate the change.