This page will walkthrough the setup of dbt Cloud in K using the direct connect method.
Each dbt Cloud account will need to be added as a separate dbt source.
Integration details
|
Scope |
Included |
Comments |
|---|---|---|
|
Metadata |
Yes |
|
|
Tests |
Yes |
|
|
Lineage |
Yes |
|
|
Usage |
Yes |
|
|
Sensitive Data Scanner |
N/A |
|
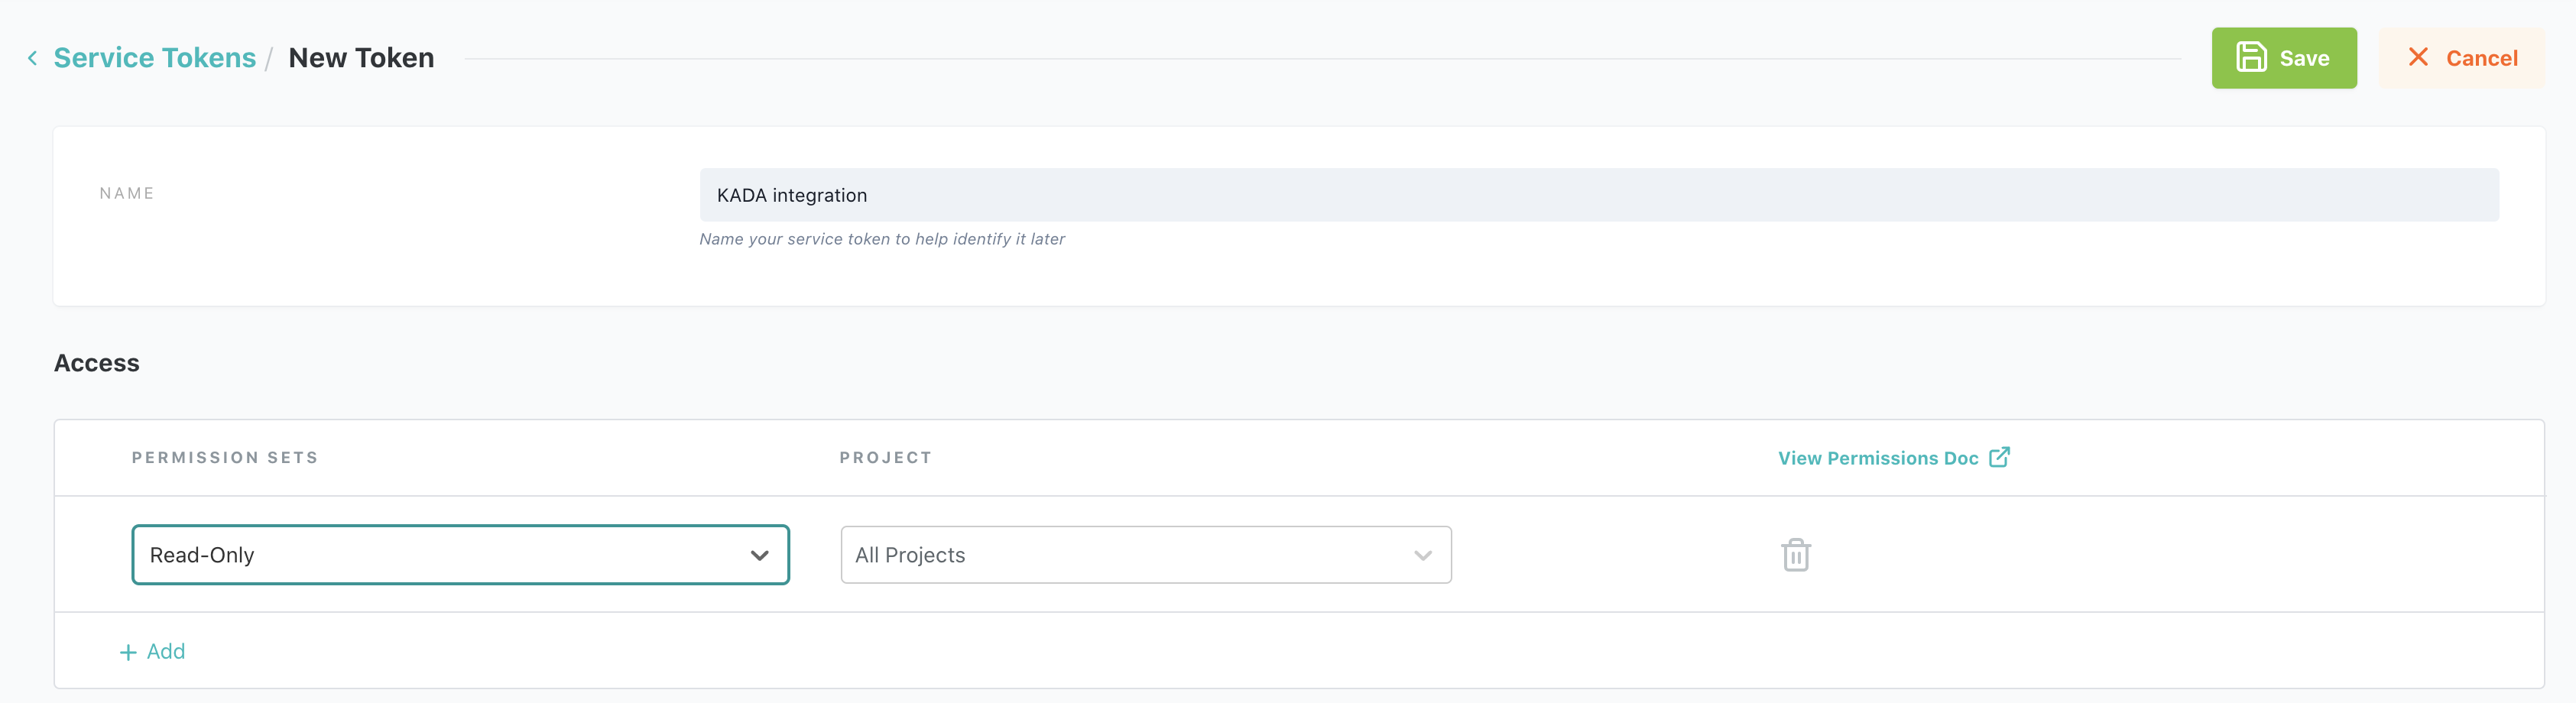
Step 1) Create a Service Token
-
Log into your dbt cloud account and go to Account Settings > Service Tokens

-
Click New Token
-
Give the Token a name
-
Add Read Only Access to All Projects
-
Copy the Token for use in the next step
Step 2) Add dbt Cloud as a New Source
-
Select Platform Settings in the side bar
-
In the pop-out side panel, under Integrations click on Sources
-
Click Add Source and select dbt CLOUD
-
Select Direct Connect and add your dbt Cloud details and click Next
-
Fill in the Source Settings and click Save & Next
-
Name: Give the dbt source a name in K
-
Host: add your
cloud.getdbt.com.[account id] -
Account ID: You can find your Account ID in the URL when you log into your dbt cloud console. e.g.
https://cloud.getdbt.com/#/accounts/[account ID]/projects/[project ID]/dashboard/ -
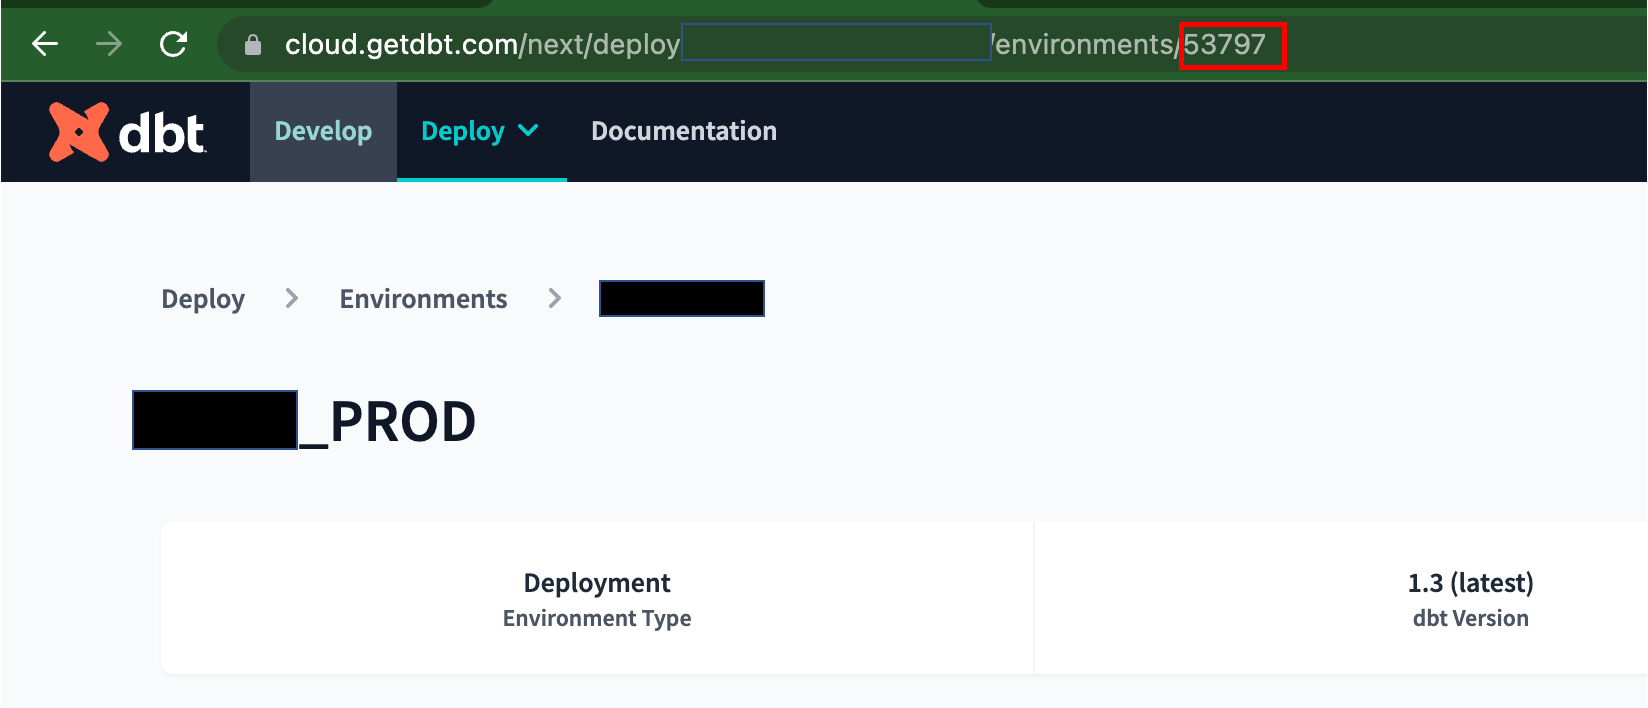
Environment ID: Add the ID for each Environment you want to include. Add the Environment IDs as a comma separated list.
-
Each Project may have more than one environment. You can find the ID by going to the Environments page for a project and looking at the URL.
-
The value must be the ID, not the name of the environment.
-
-
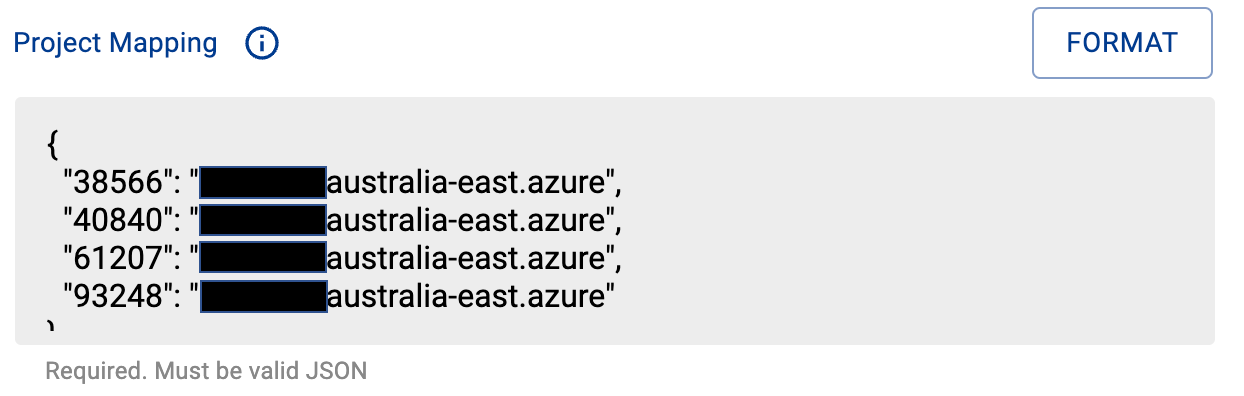
Project mapping: Each DBT project is associated with a source. Add a mapping between the DBT project and the source (refer to the Host/Database mapping documentation). You will need to add a mapping for each project.
-
NOTE: You can find the ID by going to the Project page in your DBT cloud account and looking at the URL

-
-
Add your Token copied from Step 1 and click Save
-
Test your connection and click Save
-
Click Finish Setup
Step 3) Schedule dbt Cloud source load
-
Select Platform Settings in the side bar
-
In the pop-out side panel, under Integrations click on Sources
-
Locate your new dbt Cloud Source and click on the Schedule Settings (clock) icon to set the schedule
Note that scheduling a source can take up to 15 minutes to propagate the change.