This page will walkthrough the setup of Dynamics in K using the direct connect method.
This integration has been tested with Microsoft Dataverse Web API v9.2
Integration details
|
Scope |
Included |
Comments |
|---|---|---|
|
Metadata |
YES |
|
|
Lineage |
No |
|
|
Usage |
No |
|
|
Sensitive Data Scanner |
N/A |
|
Integration with Dynamics will extract metadata for every table unless a subset of tables are specified. It is recommended that you specify the list of tables to synchronise.
Step 1: Registering A Kada App in Azure AD
This step is performed by the Azure AD Admin.
Skip this step if you have already configured a Kada app in Azure AD for Entra SSO or Power BI integration
-
Log in to your company's Azure Portal and open the Azure Active Directory page
-
Select App Registration in the side panel and click New registration
-
Complete the registration form
-
Name: Enter a name for the integration e.g. KADA Dynamics API Integration
-
Supported account types: Select Accounts in this organisation directory only
-
Redirect URL: Add Web / https://www.kada.ai
-
-
Click Register to complete the registration
-
Click on the newly created KADA Dynamics API Integration App
-
Save the Application (client) ID and Directory (tenant) ID for use in a later step
-
Click on Endpoints and save the URL for OpenID Connect metadata document for use in a later step
-
Select Certificates & secrets in the side panel and click New client secret
-
Complete the new secret form and save the Secret Value for use in a later step
Make sure you send the following information to the K Admin so that they can complete the next process:
-
Application (client) ID
-
Directory (tenant) ID
-
Secret Value
Step 2: Kada App access to Dynamics API
This step is performed by a Dynamics admin
-
Log in to your company's Dynamics / Power Apps
-
Select Environments and click on the Environment that you want to load into K.
-
Click on Settings
-
Select on Users + permissions and click on Application Users
-
Click New App User. In the slide out:
-
Click Add an App. Search for the App that was created in Step 1 and add it
-
Select an appropriate org
-
Add the Service Reader role

-
-
Click Create
Step 3: Obtain the Web API endpoint
This step is performed by a Dynamics admin
-
Log in to your company's Power App Maker
-
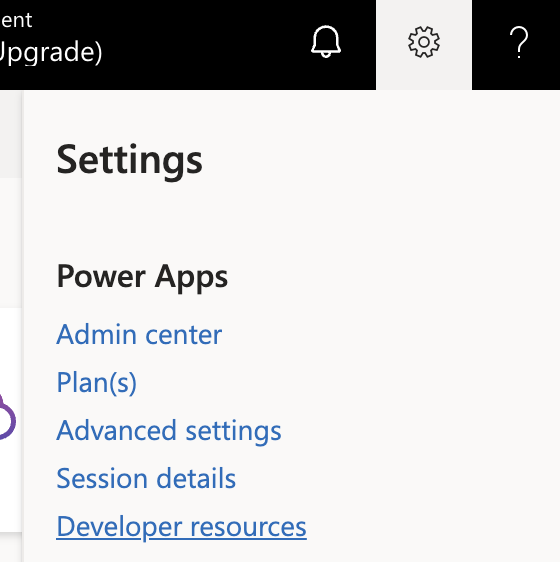
Select Settings. Click on Developer resources
-
Save the Web API endpoint for use in a later step
Step 4: Review the list of entities to be loaded into K (Optional)
This step is performed by a Dynamics admin
The Dynamics integration will extract all entities (and fields). This may include some entities that you do not want to load into K. K supports extracting a list of entities (and associated fields) as well.
To review the list of entities you want to extract:
-
Log in to your company's Power App Maker
-
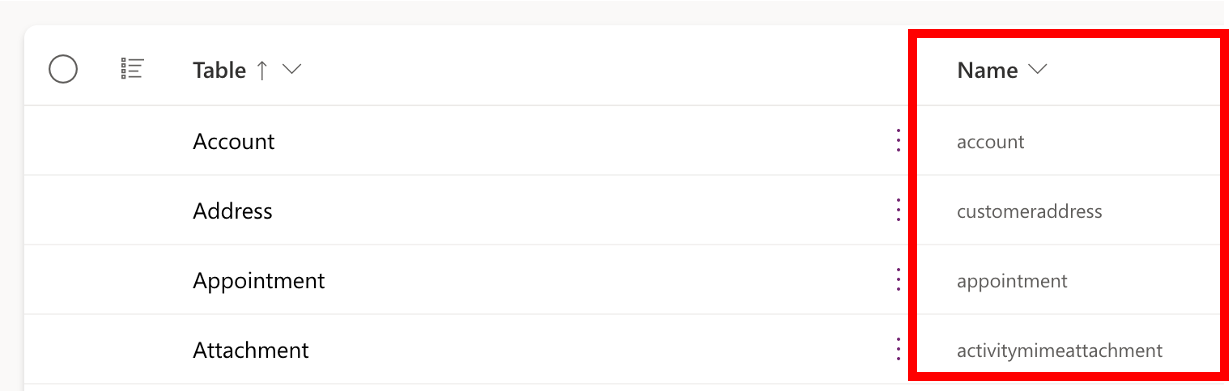
Select Tables
-
Take down the list of table names that you want to include in the extract
Step 5: Create the Source in K
This and the following step is performed by a K admin
-
Go to Settings, Select Sources and click Add Source
-
Select Microsoft Dynamics as the Source type
-
Select Direct Connect and add your Dynamics Source Settings
-
Name: Give the Microsoft Dynamics source a name in K.
-
Host: Enter a hostname for your Microsoft Dynamics instance. You may consider using the URL from the Web API endpoint from Step 3 (e.g.
https://<org-id>.api.crm6.dynamics.com) -
Resource: Enter the Web API endpoint from Step 3 (e.g.
https://<org-id>.api.crm6.dynamics.com/api/data/v9.2) -
Entity: Enter a comma separated list of tables to be synchronised.
-
Data masking: Applies data masking to any logs extracted (optional)
-
Metadata only: Only extracts metadata (optional)
-
-
Click Save & Next
-
Setup your Connection details from Step 1
-
Tenant ID
-
Client ID
-
Client Secret
-
-
Test your connection and click Next
Step 6: Schedule Microsoft Dynamics source load
-
Select Platform Settings in the side bar
-
In the pop-out side panel, under Integrations click on Sources
-
Locate your new Microsoft Dynamics Source and click on the Schedule Settings (clock) icon to set the schedule
Step 7: Manually run an ad hoc load to test Microsoft Dynamics
-
Select Platform Settings in the side bar
-
In the pop-out side panel, under Platform Settings click on Sources
-
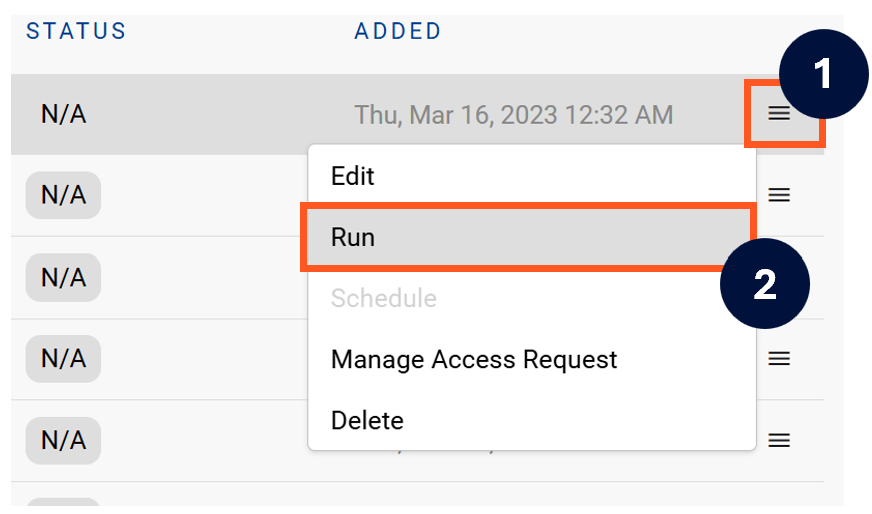
Next to the Source click on the menu icon and select Run
-
After the manual run is triggered, a pop up bar will appear containing a link that can take you to the Monitor tab where you can check the progress of the job.
Troubleshooting failed loads
-
If the job failed at the extraction step
-
Check the error. Contact KADA Support if required.
-
Rerun the source job
-
-
If the job failed at the load step, the landing folder failed directory will contain the file with issues.
-
Find the bad record and fix the file
-
Rerun the source job
-