This page will guide you through the setup of Databricks in K using the direct connect method.
Integration details
|
Scope |
Included |
Comments |
|---|---|---|
|
Metadata |
YES |
See below for known limitations |
|
Lineage |
YES |
|
|
Usage |
YES |
|
|
Sensitive Data Scanner |
alpha |
|
Known limitations with this integration:
-
Hive catalogues are not supported currently.
Step 1) Databricks access
-
Ensure you have configured Unity enabled catalogue for your workspace
-
Enable System Schemas for access & queries
-
Follow the following documentation to enable the system schemas:
-
https://docs.databricks.com/en/admin/system-tables/index.html#enable
-
https://kb.databricks.com/unity-catalog/find-your-metastore-id
-
Run the following commands to enable:
curl -v -X PUT -H "Authorization: Bearer <PAT TOKEN>" "https://<YOUR WORKSPACE>.cloud.databricks.com/api/2.0/unity-catalog/metastores/<METASTORE ID>/systemschemas/access"
curl -v -X PUT -H "Authorization: Bearer <PAT TOKEN>" "https://<YOUR WORKSPACE>.cloud.databricks.com/api/2.0/unity-catalog/metastores/<METASTORE ID>/systemschemas/query"
-
-
-
-
SQL Warehouse
-
Create or use an existing SQL Warehouse for K to use for the extraction.
-
Go to the SQL Warehouse page. Select the SQL Warehouse to use.
-
Go to the connection details
-
Note down the Server hostname and HTTP path
-
-
-
PAT Token
-
For the user that will be used to connect, create a PAT token to be used for authentication.
-
From the above, record down the following for use in the setup:
-
Databricks account URL
-
e.g.
adb-<workspaceId>.<instance>.azuredatabricks.net
-
-
PAT token
-
Server host name
-
HTTP path
Step 2) Connecting K to Databricks
-
Select Platform Settings in the side bar
-
In the pop-out side panel, under Integrations click on Sources
-
Click Add Source and select Databricks
-
Select Direct Connect and add your Databricks details and click Next
-
Fill in the Source Settings and click Next
-
Name: The name you wish to give your Databricks source in K
-
Host: Add your Databricks Account location. Can be seen in the URL when you log into your Databricks account.
-
e.g.
adb-<workspaceId>.<instance>.azuredatabricks.net
-
-
Server Hostname: The SQL Warehouse Server hostname
-
e.g.
adb-<workspaceId>.<instance>.azuredatabricks.net
-
-
HTTP Path: The SQL Warehouse Http path either to a DBSQL endpoint or to a DBR interactive cluster
-
e.g.
/sql/1.0/warehouses/<warehouseId>
-
-
-
Add the Connection details and click Save & Next when connection is successful
-
PAT Token: Add the PAT token created in Step 1
-
-
Test your connection and click Save
Step 3) Manually run an ad hoc load to test the integration
-
Select Platform Settings in the side bar
-
In the pop-out side panel, under Platform Settings click on Sources
-
Next to the Source click on the menu icon and select Run
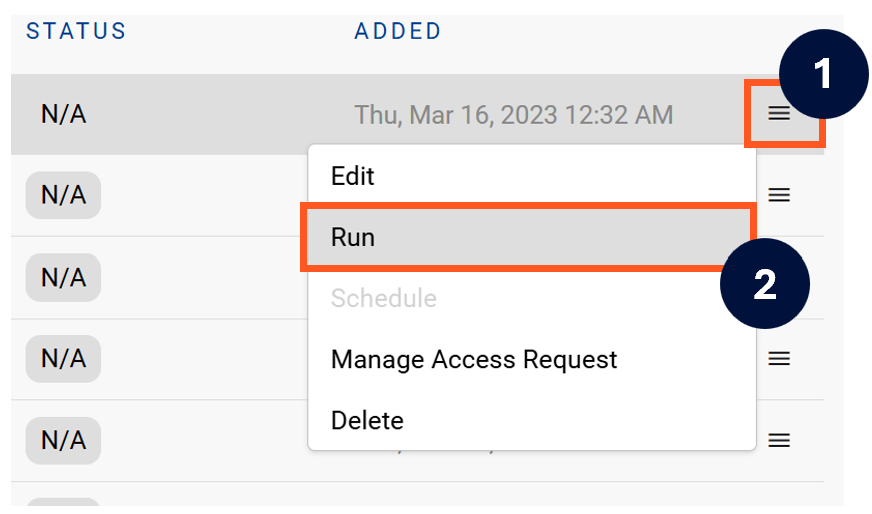
-
After the manual run is triggered, a pop up bar will appear containing a link that can take you to the Monitor tab where you can check the progress of the job.
Troubleshooting failed loads
-
If the job failed at the extraction step
-
Check the error. Contact KADA Support if required.
-
Rerun the source job
-
-
If the job failed at the load step, the landing folder failed directory will contain the file with issues.
-
Find the bad record and fix the file
-
Rerun the source job
-