
This page will walkthrough the setup of PowerBI in K using the direct connect method.
Integration details
|
Scope |
Included |
Comments |
|---|---|---|
|
Metadata |
YES |
See limitations below |
|
Lineage |
YES |
|
|
Usage |
YES |
|
|
Sensitive Data Scanner |
N/A |
|
Known Power BI limitations (limited by Microsoft)
-
Power BI API is currently rate limited. This may impact extracts where you have 200+ workspaces or groups. Some Power BI reports may fail to extract correctly and may their details may not be profiled.
-
Power BI datasets using large dataset storage format cannot be profiled.
-
Power BI reports created in web browser (not uploaded from desktop) cannot be profiled for detailed lineage. Dataset lineage will be available.
Known KADA Power BI integration limitations (to be resolved in upcoming releases)
-
Power BI reports that use report measures cannot be profiled for detailed lineage.
-
Power BI access does not consider direct grants to users. Access is only detected for users via AD groups.
Step 1) Enabling PowerBI Admin APIs to be accessible to an AD Group
This step is performed by the Power BI Admin.
At the end of this step, the AD Group will need to be provided with access to the following Admin API Settings:
-
Read-only Power BI admin APIs — Enabled
-
Detailed metadata — Enabled
-
DAX and mashup expressions — Enabled
-
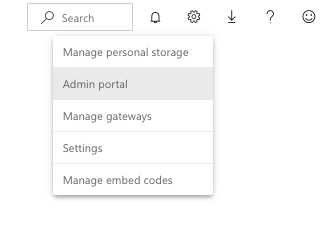
Open Power BI portal and navigate to Admin Portal in the top right hand navigation
-
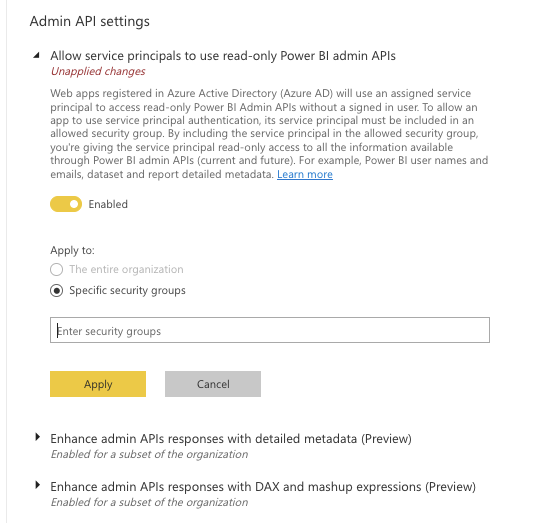
Go to Tenant Settings and scroll to Admin API settings
-
Set Allow Service Principals to use read-only Power BI admin APIs to Enabled
-
Select Specific Security Groups
-
Add the AD group (K PowerBI AD Group) that is appropriate for managing this access. This is typically the Admin group for Power BI. If no appropriate group exists, contact your Azure AD admin to create a new security group.
-
-
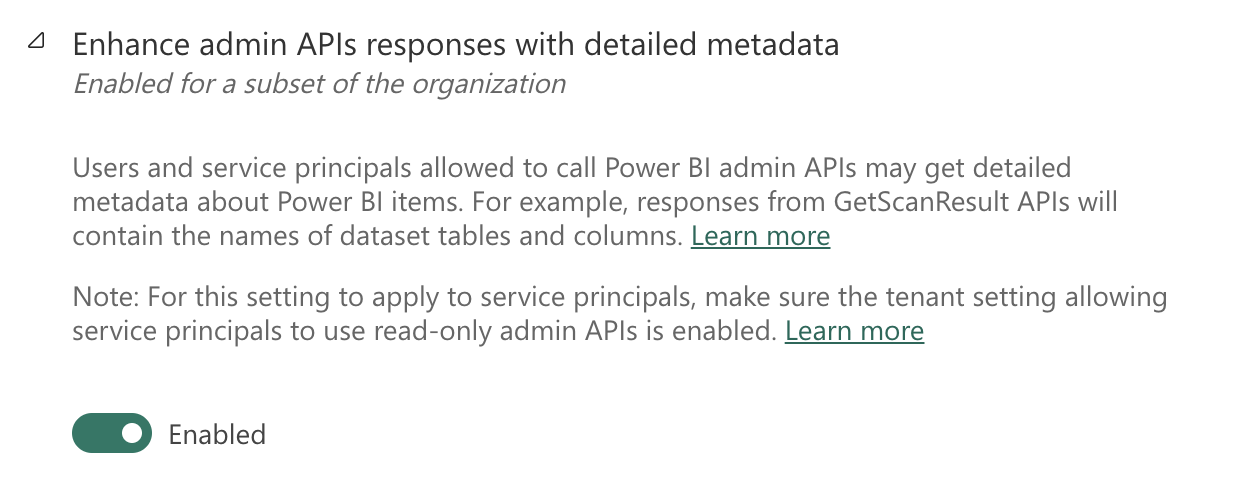
[Required for Power BI detailed lineage] Set Enhance admin API responses with detailed metadata to Enabled
-
Add the same AD group (e.g. K PowerBI AD Group) as the previous API Settings option
-
If you have previously published PowerBI datasets and the Enhance admin APIs response with detailed metadata was not enabled, you will need to republish all PowerBI datasets in workspaces that you want K to profile.
The ability to collect detailed lineage information only applies to datasets that are published after this feature is turned on.
-
Set Enhance admin APIs responses with DAX and mashup expressions to Enabled
-
Add the same AD group (e.g. K PowerBI AD Group) as the previous API Settings option
-
-
[Required for Power BI detailed lineage] Set Allow Service Principals to use Power BI APIs to Enabled
-
Select Specific Security Groups
-
Add the same AD group (e.g. K PowerBI AD Group) as the previous step
-
-
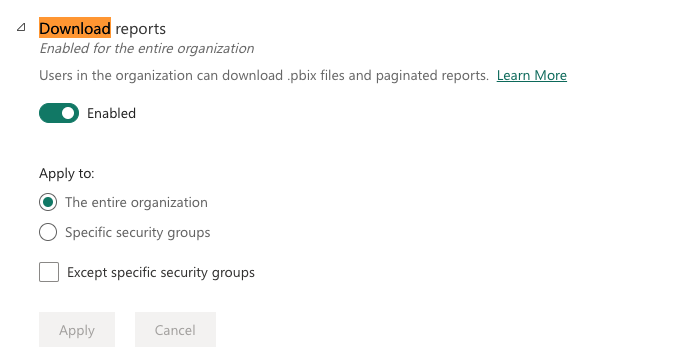
Set Download Reports to Enabled
-
Select Specific Security Groups
-
Add the same AD group (e.g. K PowerBI AD Group) as the previous step
-
Make sure you send the AD Group name used to the Azure AD Admin so that they can complete the next step.
Step 2) Registering PowerBI App in Azure AD
This step is performed by the Azure AD Admin.
-
Log in to your company's Azure Portal and open the Azure Active Directory page
-
Select App Registration in the side panel and click New registration
-
Complete the registration form
-
Name: Enter a name for the integration e.g. KADA Power BI API Integration
-
Supported account types: Select Accounts in this organisation directory only
-
Redirect URL: Add Web / https://www.kada.ai
-
-
Click Register to complete the registration
-
Click on the newly created KADA Power BI API Integration App
-
Save the Application (client) ID and Directory (tenant) ID for use in a later step
-
Click on Endpoints and save the URL for OpenID Connect metadata document for use in a later step
-
Select Certificates & secrets in the side panel and click New client secret
-
Complete the new secret form and save the Secret Value for use in a later step
-
Return to the Azure Portal and select Group
-
Find the AD Group that was created in step 1 and click Members
-
Select Add Members and add KADA Power BI API Integration to the group as a Service Principal
Make sure you send the following information to the K Admin so that they can complete the next process:
-
Application (client) ID
-
Directory (tenant) ID
-
Secret Value
Step 3a) Add Service Principal to PowerBI Workspace(s) for Detailed sheet level lineage and usage
This step is performed by the Power BI Admin.
To have detailed lineage AND sheet usage add the Kada Service Principal (e.g. KADA Power BI API Integration) as a Contributor to the Workspace. For Detailed Lineage only, add the Service Principal as a Viewer of the Workspace.
[Required for Detailed Lineage] To capture detailed lineage of your Power BI assets (e.g. measure to sheet lineage, process parameters used in dataset connections etc) add the KADA Power BI API Integration (created in Step 2) as a Viewer to each Power BI workspace you want it to profile.
[Required for Sheet Usage] To capture sheet level usage add the Kada Power BI API Integration as a Contributor to each Power BI workspace you want to profile.
K will now be able to access the Usage Metrics Report dataset in each workspace and extract the sheet level usage. If the Usage Metrics Report dataset is missing, no sheet level usage will be captured.
The Usage Metrics Report dataset needs to be added in each workspace. To do this, select any Power BI report and select View usage metrics report. This will create the Usage Metrics Report dataset will be created
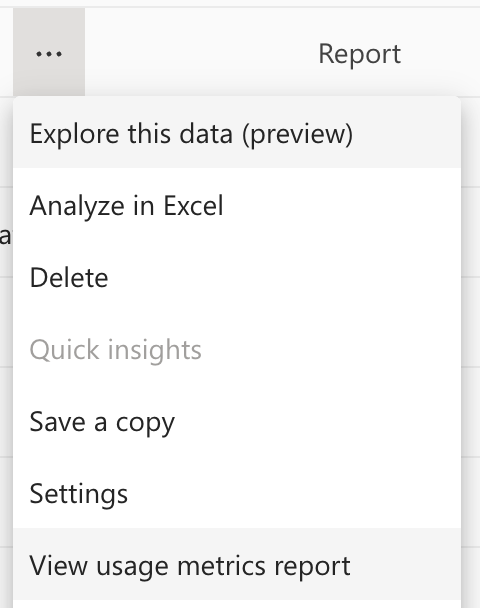
If the usage metrics report dataset has been previously created and is stale (refreshes for this dataset are paused if the Usage metrics report is not used in a while), is linked to a user that has left you may need to delete this dataset and recreate it.
https://community.fabric.microsoft.com/t5/Service/Usage-metrics-is-not-updating/m-p/2773128
To add the Kada Power BI API Integration to many (or all workspaces) consider using the Power Shell option
Step 3b) Activate Usage Metrics per Workspace
https://learn.microsoft.com/en-us/power-bi/collaborate-share/service-modern-usage-metrics#create-and-view-a-new-usage-metrics-report
Step 4) Add PowerBI as a New Source
This step is performed by the K Admin.
-
Select Platform Settings in the side bar
-
In the pop-out side panel, under Integrations click on Sources
-
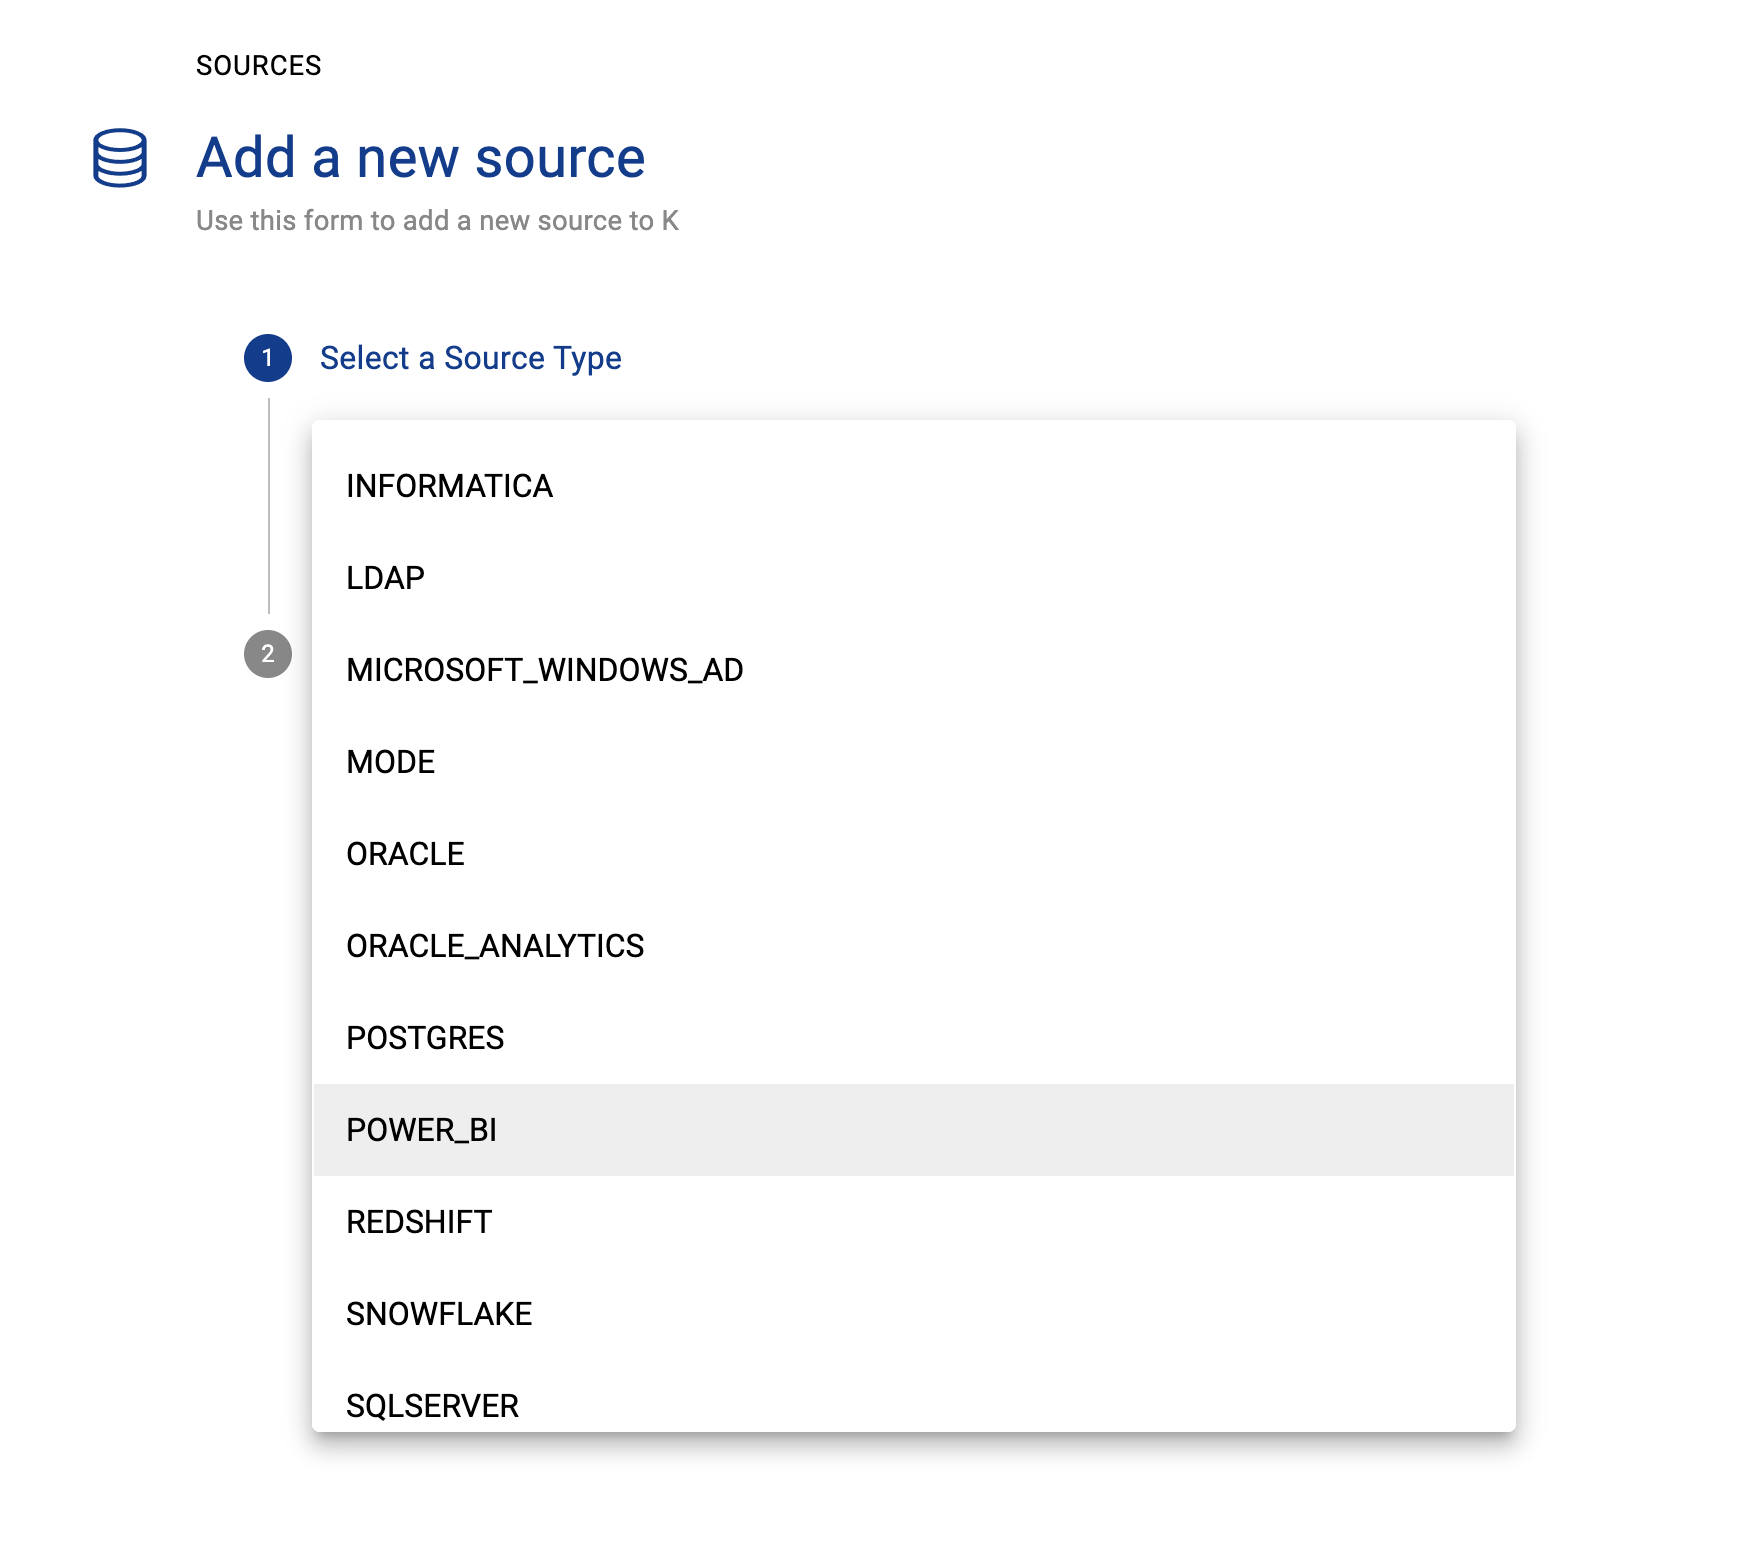
Click Add Source and select Power_bi
-
Select Direct Connect and add your Power BI details and click Next
-
Fill in the Source Settings and click Save & Next
-
Name: Give the Power BI source a name in K
-
Host: Must be unique. You can use
app.powerbi.comif you only have 1 instance of Power BI. -
Timeout: Default is 10, sometimes it may take longer for the API to respond, so we recommend increasing it to 20
-
Update the Host / Database mapping (refer to the mapping documentation). This step can be completed after the initial load via the guided workflow.
-
Select Enable Workspace Filtering if you wish to load only select Workspaces
-
-
Add Connection Details and click Save & Next
-
Tenant ID: Add the Directory (tenant) ID copied from step 2
-
Client ID: Add the Application (client) ID copied from Step 2
-
Client Secret: Add the Secret ID copied from Step 2
-
-
Test your connection and click Next
-
If you selected Enabled Workspace Filtering, select the Workspaces you want to load. If you have a lot of workspaces this may take a bit of time to load.
-
Click Finish Setup
Step 5) Schedule PowerBI source load
-
Select Platform Settings in the side bar
-
In the pop-out side panel, under Integrations click on Sources
-
Locate your new PowerBI Source and click on the Schedule Settings (clock) icon to set the schedule
Note that scheduling a source can take up to 15 minutes to propagate the change.
Step 6) Manually run an ad hoc load to test Power BI
-
Select Platform Settings in the side bar
-
In the pop-out side panel, under Platform Settings click on Sources
-
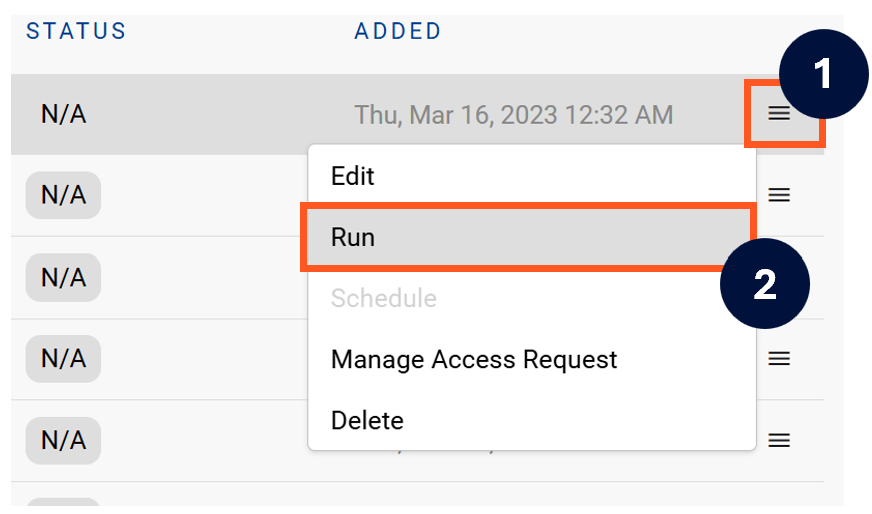
Next to the Source click on the menu icon and select Run
-
After the manual run is triggered, a pop up bar will appear containing a link that can take you to the Monitor tab where you can check the progress of the job.
Troubleshooting failed loads
-
If the job failed at the extraction step
-
Check the error. Contact KADA Support if required.
-
Rerun the source job
-
-
If the job failed at the load step, the landing folder failed directory will contain the file with issues.
-
Find the bad record and fix the file
-
Rerun the source job
-