
This page will guide you through the setup of Informatica Cloud (IICS) in K using the direct connect method.
Integration details
|
Scope |
Included |
Comments |
|---|---|---|
|
Metadata |
YES |
|
|
Lineage |
YES |
|
|
Usage |
YES |
|
|
Sensitive Data Scanner |
N/A |
|
Step 1) Create KADA User
This step is performed by an IICS Admin.
-
Log into your IICS instance.
-
Note down the URL you use e.g.
https://dm1-<region>.informaticacloud.com/to be used in Step 2
-
-
Create a new KADA user.
-
Follow the steps here: Informatica Knowledge - Creating Users
-
-
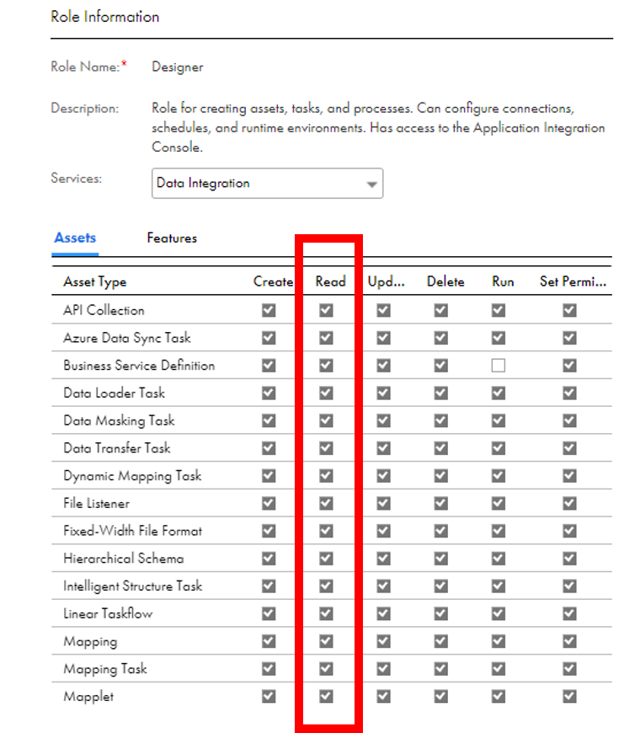
Assign the user Read access to all assets in the Data integration service.
-
See more here: Informatica Cloud User Groups and Roles
-
-
Login to the user account and set an appropriate password. Note down the username and password to be used in Step 2.
Step 2) Add IICS as a New Source
This step is performed by a KADA admin.
-
Log into K. Select Platform Settings in the side bar
-
In the pop-out side panel, under Integrations click on Sources
-
Click Add Source and select IICS
-
Fill in the Source Settings and click Save & Next
-
Name: Give the IICS source a name in K (e.g. Acme Inc IICS)
-
Host: Use your IICS URL (e.g.
https://dm1-<region>.informaticacloud.com/)
-
-
Enter your API and User details and click Save
-
API URL: Use your IICS URL (e.g.
https://dm1-<region>.informaticacloud.com/) -
Username: Add the username you created in Step 1
-
Password: Add the password you created in Step 1
-
-
Check the connection by clicking Test connection
-
Click Save & Finish
Step 3) Schedule IICS source load
-
Select Platform Settings in the side bar
-
In the pop-out side panel, under Integrations click on Sources
-
Locate your new IICS Source and click on the Schedule Settings (clock) icon to set the schedule
Note that scheduling a source can take up to 15 minutes to propagate the change.
Step 4) Manually run an ad hoc load to test IICS
-
Select Platform Settings in the side bar
-
In the pop-out side panel, under Platform Settings click on Sources
-
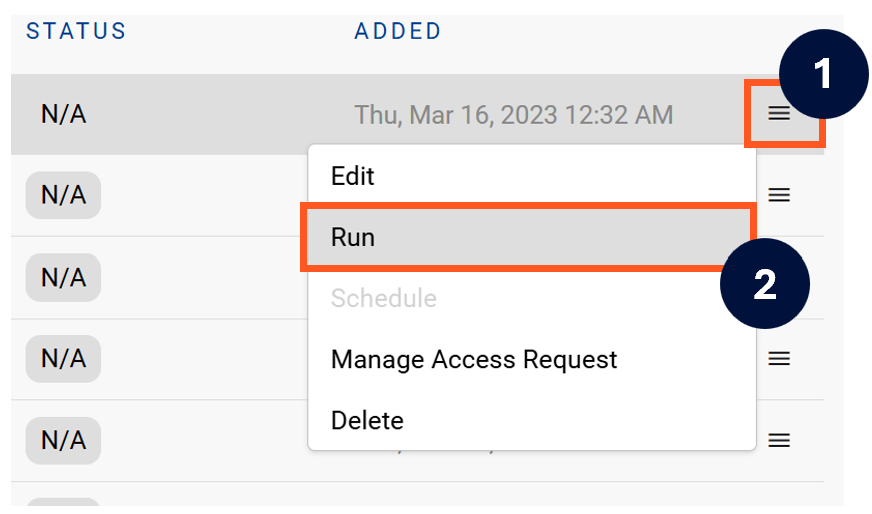
Next to the Source click on the menu icon and select Run
-
After the manual run is triggered, a pop up bar will appear containing a link that can take you to the Monitor tab where you can check the progress of the job.
Troubleshooting failed loads
-
If the job failed at the extraction step
-
Check the error. Contact KADA Support if required.
-
Rerun the source job
-
-
If the job failed at the load step, the landing folder failed directory will contain the file with issues.
-
Find the bad record and fix the file
-
Rerun the source job
-