This page will guide you through the setup of Greenplum in K using the direct connect method.
Integration details
|
Scope |
Included |
Comments |
|---|---|---|
|
Metadata |
YES |
|
|
Lineage |
YES |
|
|
Usage |
YES |
|
|
Sensitive Data Scanner |
No |
Under review |
Step 1) Establish Greenplum Access
You will need to create a user <kada user> for the K Platform.
Generally all users should have access to the pg_catalog tables on Database creation for Greenplum.
In the event the user doesn't have access, explicit grants will need to be done per new Database in Greenplum to the <kada user>.
GRANT USAGE ON SCHEMA pg_catalog TO <kada user>;
GRANT SELECT ON ALL TABLES IN SCHEMA pg_catalog TO <kada user>;
The user used for the extraction must also be able to connect to the databases needed for extraction.
PG Tables
The user must have access to these pg_catalog tables per applicable database in Greenplum:
-
pg_class
-
pg_namespace
-
pg_proc
-
pg_database
-
pg_language
-
pg_type
-
pg_collation
-
pg_depend
-
pg_sequence
-
pg_constraint
-
pg_authid
-
pg_auth_members
Databases
-
The user must also be able to connect to all databases that you want onboarded.
Step 2) Connecting K to Greenplum
-
Select Platform Settings in the side bar
-
In the pop-out side panel, under Integrations click on Sources
-
Click Add Source and select Greenplum
-
Select Direct Connect and add your Greenplum details and click Next
-
Fill in the Source Settings and click Next
-
Name: The name you wish to give your Greenplum Instance in K
-
Host: Add your Greenplum host (found in your Greenplum URL). Omit the https:// from the URL.
-
-
Add the Connection details and click Save & Next when connection is successful
-
Host: Use the same details you previously added in the Host setting
-
Username: Add the Greenplum user name you created in Step 1
-
Password: Add the Greenplum user password you created in Step 1
-
-
Test your connection and click Save
-
Select the Databases you wish to load into K and click Finish Setup
-
All databases will be listed. If you have a lot of databases this may take a few seconds to load.
-
-
Return to the Sources page and locate the new Greenplum source that you loaded
-
Click on the clock icon to select Edit Schedule and set your preferred schedule for the Greenplum load
Note that scheduling a source can take up to 15 minutes to propagate the change.
Step 3) Manually run an ad hoc load to test Greenplum setup
-
Select Platform Settings in the side bar
-
In the pop-out side panel, under Platform Settings click on Sources
-
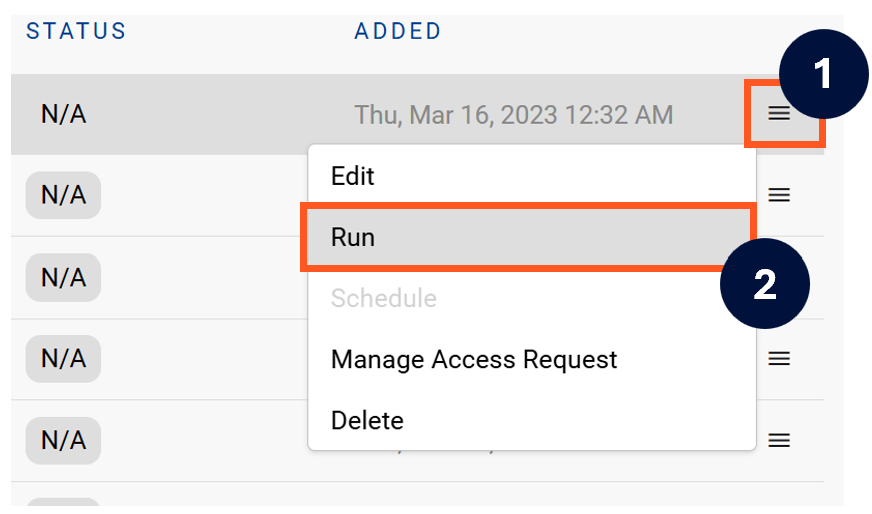
Next to the Source click on the menu icon and select Run
-
After the manual run is triggered, a pop up bar will appear containing a link that can take you to the Monitor tab where you can check the progress of the job.
Troubleshooting failed loads
-
If the job failed at the extraction step
-
Check the error. Contact KADA Support if required.
-
Rerun the source job
-
-
If the job failed at the load step, the landing folder failed directory will contain the file with issues.
-
Find the bad record and fix the file
-
Rerun the source job
-