
This page will walkthrough the setup of Salesforce CRM in K using the direct connect method.
This collector is still in progress.
Integration details
|
Scope |
Included |
Comments |
|---|---|---|
|
Metadata |
Yes |
|
|
Tests |
NO |
|
|
Lineage |
NO |
|
|
Usage |
NO |
|
|
Sensitive Data Scanner |
N/A |
|
KADA only extracts metadata (object/table schemas) — no query usage, profiling, or lineage. The permissions it needs are minimal: the API Enabled permission on your org, and read access to the Salesforce objects you want to ingest.
Prerequisites
Before starting, confirm you have:
-
A Salesforce user to act as the integration/run-as user, with the API Enabled permission and read access to every object you intend to ingest.
-
Admin access to Salesforce Setup to create an External Client App.
-
Your Salesforce My Domain value - required for the client credentials flow.
-
A running KADA instance with an Admin user
Setup Steps
Step 1 - Create the External Client App in Salesforce
-
In Salesforce Setup, go to App Manager - Found under Quick Settings -> Open Advanced Setup → Platform Tools → Apps → App Manager
-
Click New External Client App and create it as a Local app
-
Give it a name such as
KADA Salesforce Ingestion.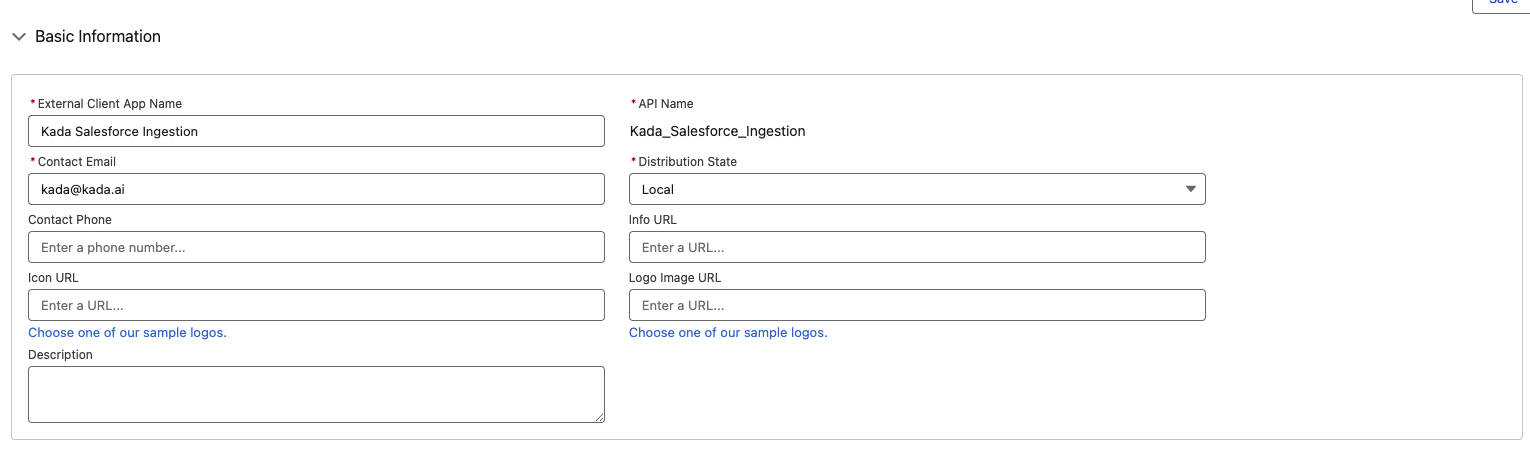
Step 2 - Enable and configure OAuth
-
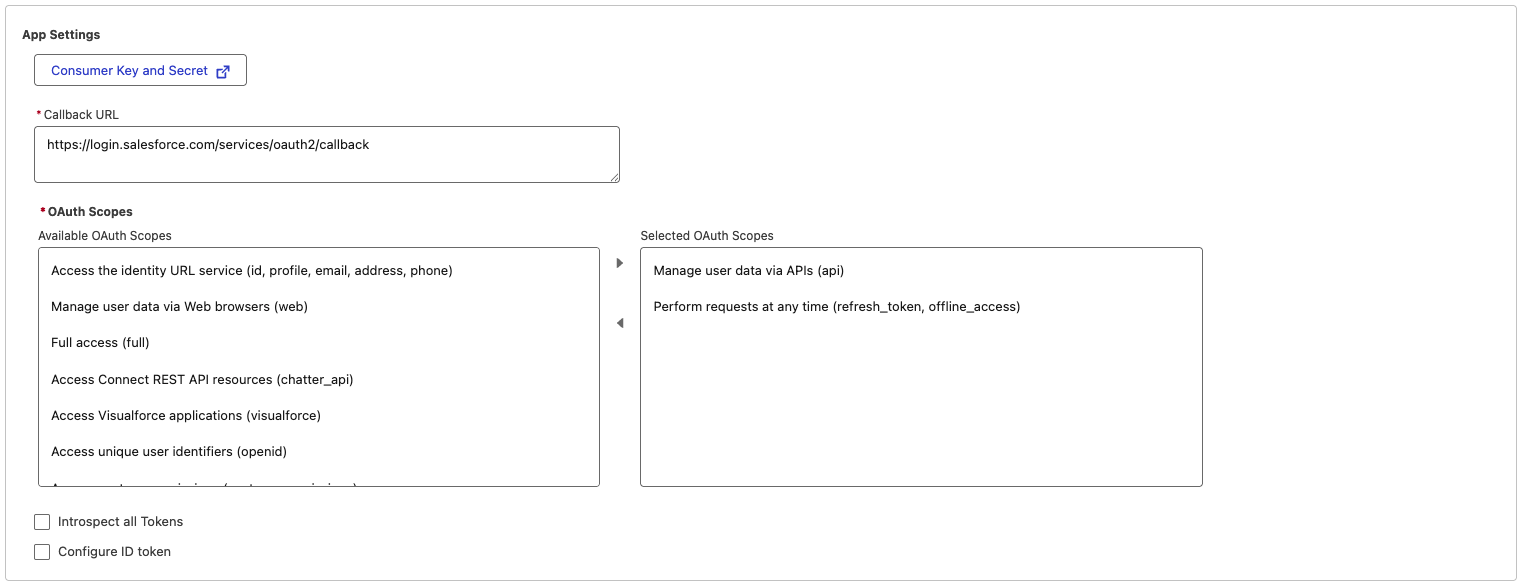
Expand API (Enable OAuth Settings) and check Enable OAuth.
-
Set a Callback URL. For these server-side flows a placeholder is acceptable, e.g.
https://login.salesforce.com/services/oauth2/callback.
Note: Salesforce requires this field, but the value is not used by the password or client credentials flows (there's no browser redirect). Any well-formed HTTPS URL works — just don't leave it blank. It would only matter if you later reconfigure the app for the web server flow
-
Add OAuth scopes — at minimum:
-
Manage user data via APIs (api) (access and manage data) - required. This is the only scope needed for its describe/query calls. (On older orgs this is labelled "Access and manage your data (API)" - same scope.)
-
Perform requests at any time (refresh_token, offline_access) - add this only for the password flow. Not needed for client credentials, which doesn't issue refresh tokens.
-
-
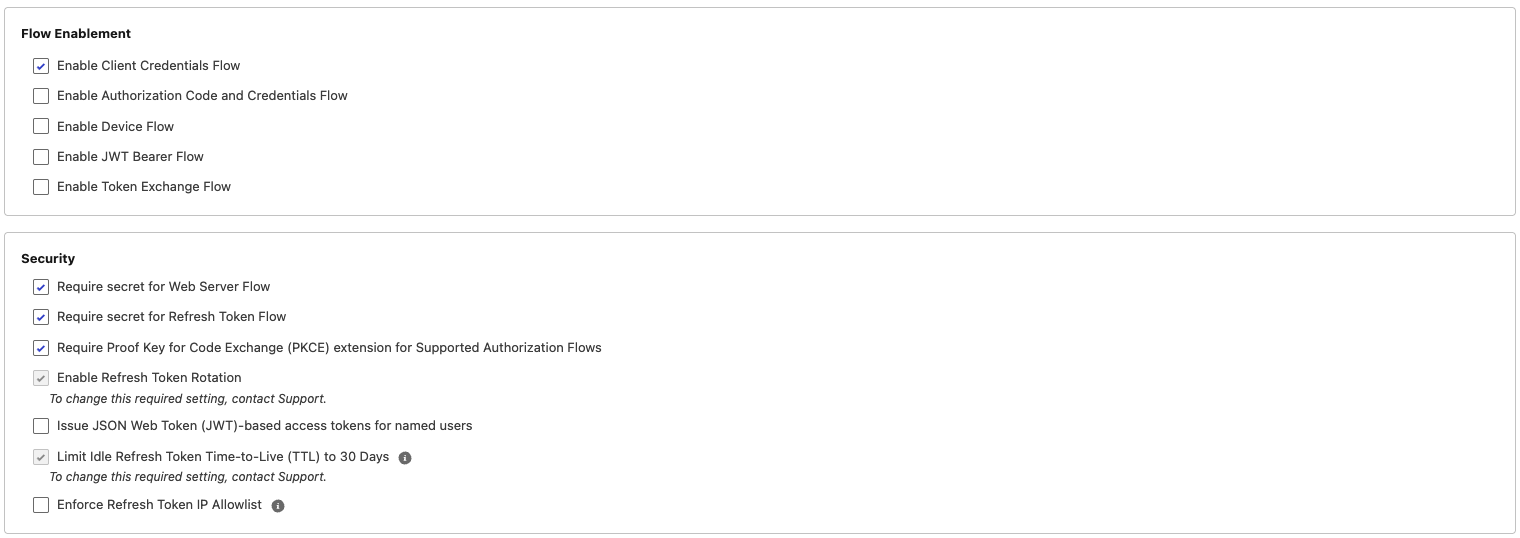
Flow Enablement:
-
Client credentials (primary): tick Enable Client Credentials Flow.
-
Password flow (alternative): leave all Flow Enablement boxes unchecked — this flow works off the base OAuth settings, not a flow-enablement toggle.
Do not tick "Enable Authorization Code and Credentials Flow" for either path — that's for the browser-redirect web server flow.
-
-
Security — enable Require secret for Web Server Flow and Require secret for Refresh Token Flow (standard hardening).
-
Click Create.
Step 3 - Configure policies
Open the app → Policies tab → Edit.
-
Permitted Users — for a controlled service integration, select Admin approved users are pre-authorised, then assign the integration user's Profile or a Permission Set. ("All users may self-authorise" also works but is broader.)
-
OAuth Policies → "OAuth Flows and External Client App Enhancements":
-
Client credentials (required): enter the integration user in the Run As field. The flow returns tokens as this user, so it must have API Enabled + read on your objects. The client credentials flow fails without this.
-
-
Optionally set IP Relaxation to "Relax IP restrictions" if your KADA host isn't in a trusted IP range.
-
Save.
Step 4 - Retrieve the Consumer Key and Secret
On the Settings tab → OAuth Settings → click Consumer Key and Secret, complete identity verification if prompted, and copy the Consumer Key (Client ID) and Consumer Secret (Client Secret). Store them securely.
Step 5 - Verify user permissions
Make sure the relevant user (the login user for password flow, or the run-as user for client credentials) has:
-
API Enabled permission.
-
Read on all target objects.
Step 6 - Add Salesforce as a New Source
-
Select Platform Settings in the side bar
-
In the pop-out side panel, under Integrations click on Sources
-
Click Add Source and select Salesforce
-
Select Direct Connect and add your Salesforce details and click Next
-
Fill in the Source Settings with the values from the table below and click Save & Next
-
Name: Give the Salesforce source a name in K
-
Host: add your
Salesforce Domain
-
-
Test your connection and click Save
-
Click Finish Setup
|
Field |
Value |
|---|---|
|
Consumer Key |
From Step 4 |
|
Consumer Secret |
From Step 4 |
|
Salesforce Domain |
your My Domain prefix like To find your My Domain: while logged into Salesforce, look at the browser address bar ( |
|
Salesforce API Version |
A current version, e.g. |
|
Salesforce Object Names |
Leave blank to ingest all objects, or list specific ones |
Step 7 - Schedule Salesforce source load
-
Select Platform Settings in the side bar
-
In the pop-out side panel, under Integrations click on Sources
-
Locate your new Salesforce Source and click on the Schedule Settings (clock) icon to set the schedule
Note that scheduling a source can take up to 15 minutes to propagate the change.
Step 8 - Manually run an ad hoc load to test Salesforce setup