Overview
This page provides a structured step by step for configuring External OAuth in Snowflake using Azure Entra ID (formerly Azure AD), where the OAuth client obtains a token for itself (client credentials flow).
Step-by-step
1. Azure Entra ID app registration as OAuth Server
-
Sign in to Azure Portal as a user with permissions to create app registrations and select New Registration. Provide a name for the resource eg. OAuth Kada - Snowflake. Choose “Accounts in this organizational directory only" for the supported account types
-
Once the app is registered, expand Manage, click on Expose an API, and select Add next to Application ID URI.
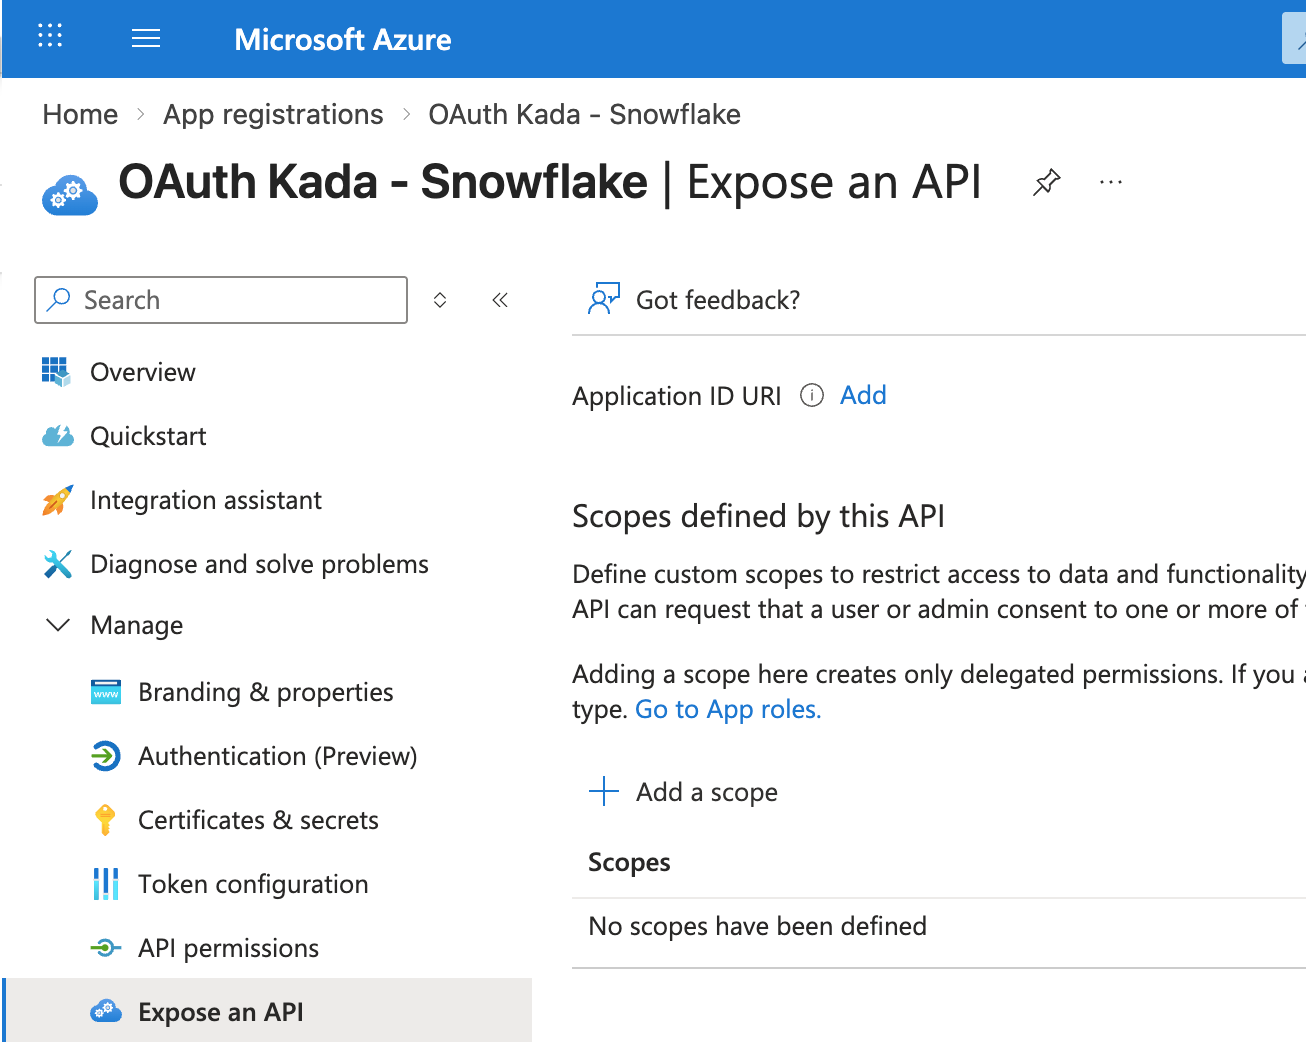
-
Save the default value, or use a unique URI of a domain registered with the tenant.
Copy this value, save it for later use.
-
Click on App roles and select Create app role
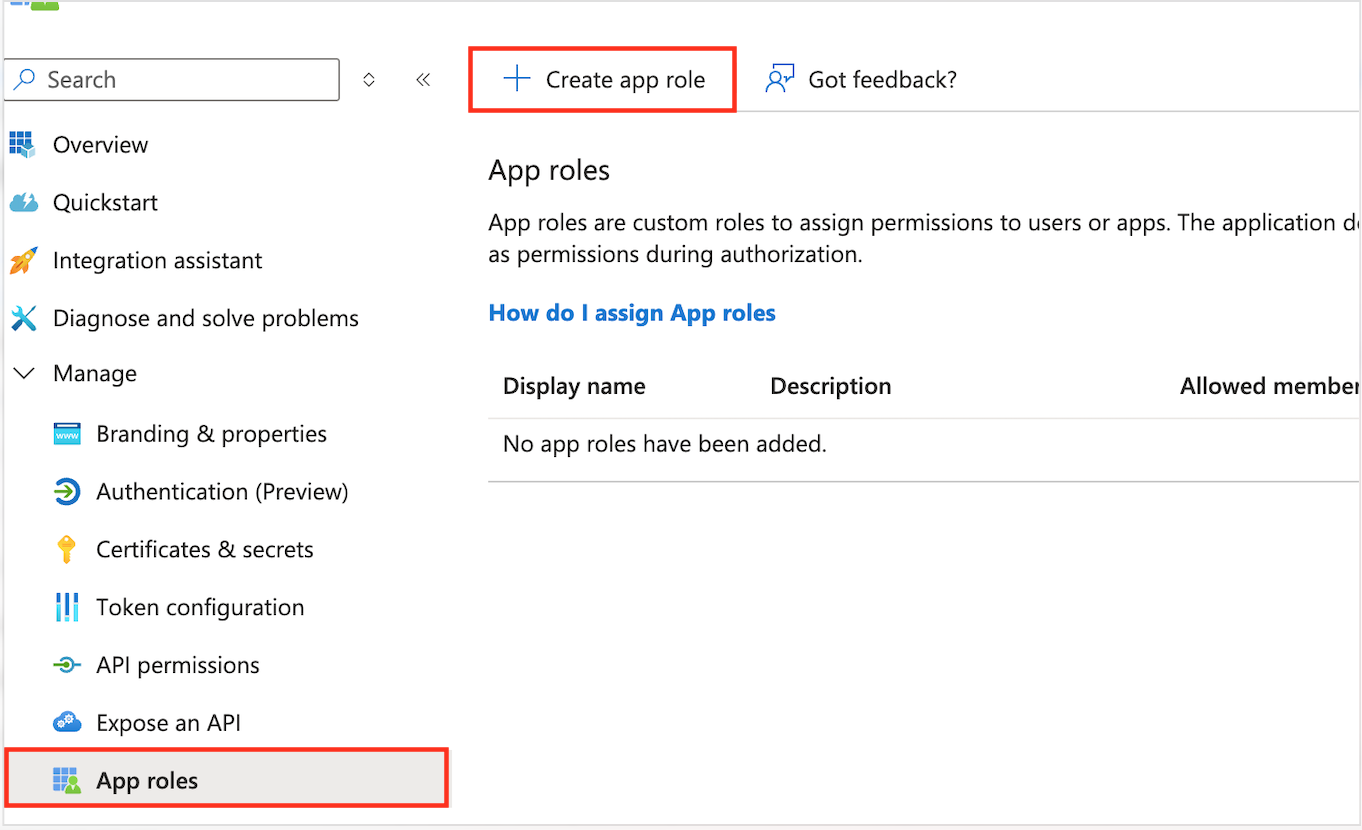
-
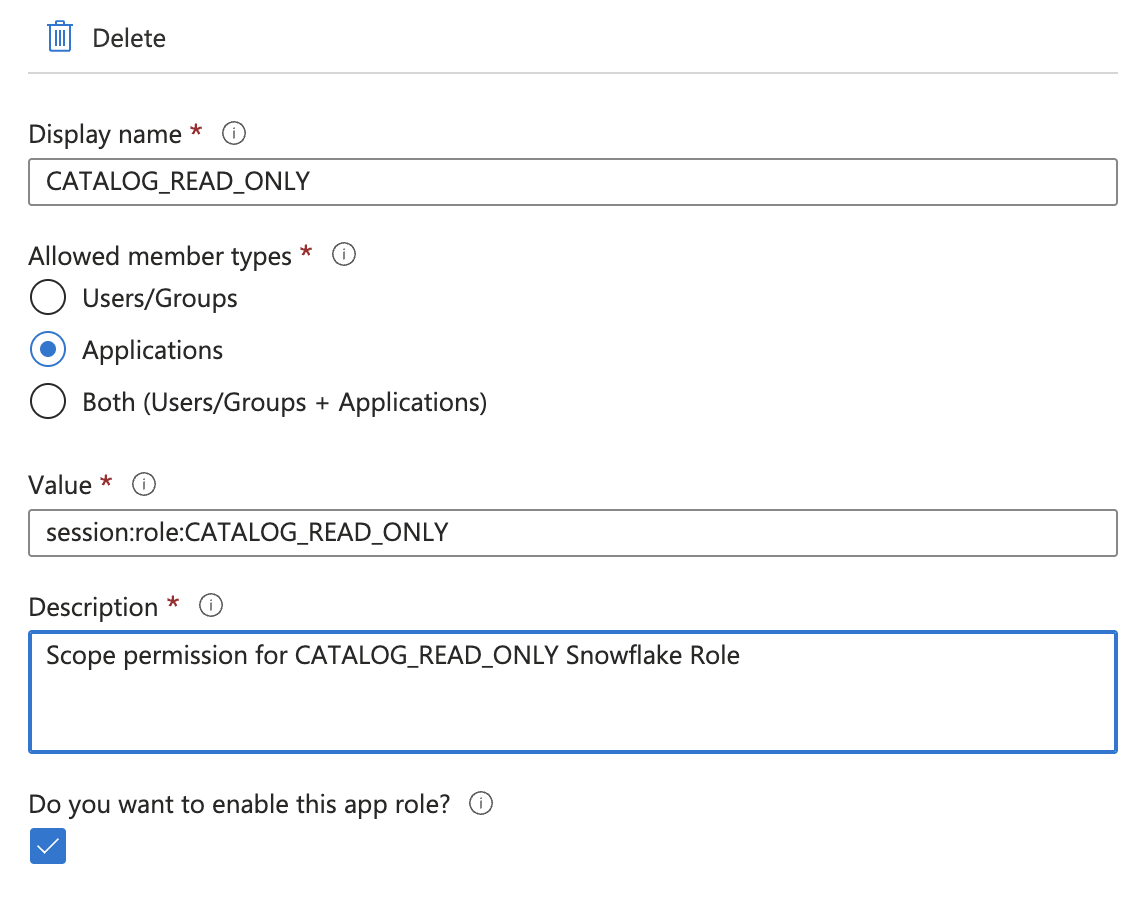
Configure the scope a client can request a token for, meaning this should be an existing role in Snowflake. We will use the custom KADA role '
CATALOG_READ_ONLY'
2. Configure an App registration as the OAuth Client
-
Navigate to the Azure Entra ID app registrations area again and create a new application:
-
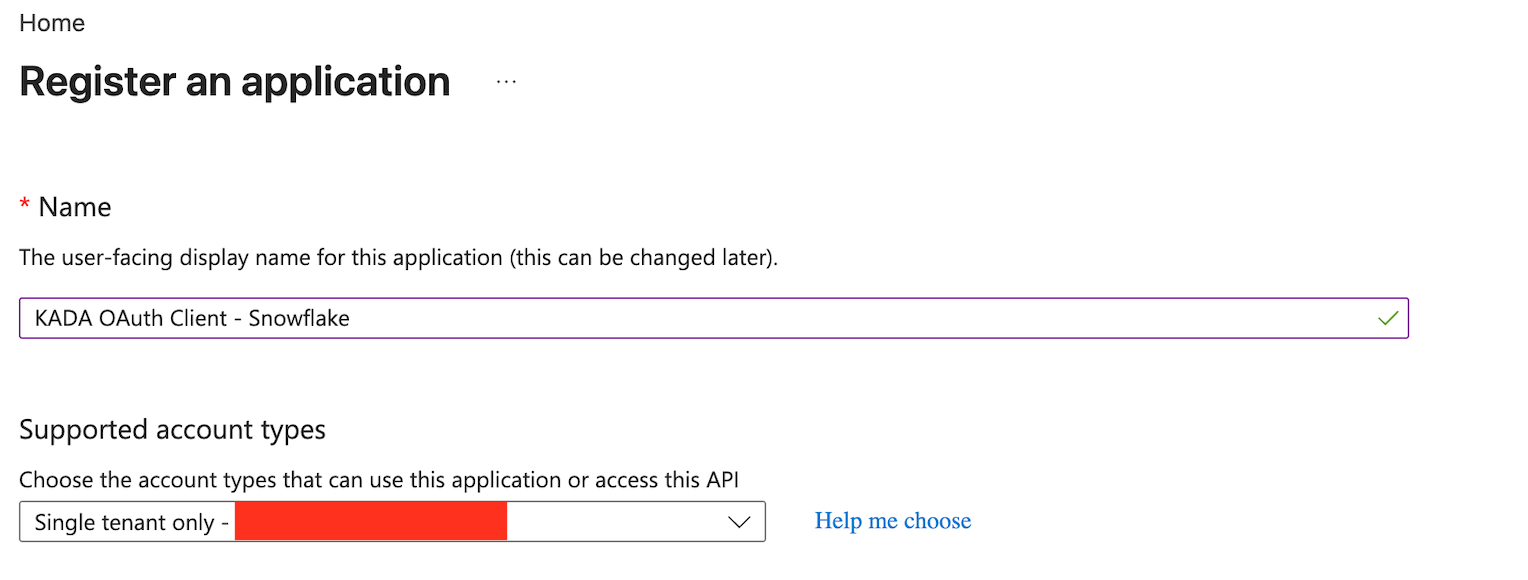
Choose a descriptive name for the application, for example:
KADA OAuth Client - Snowflake -
Select the single-tenant account type
If an existing KADA PowerBI App registration exists, we can reuse that and skip this step.
-
After creating the registration, record the following values for later steps:
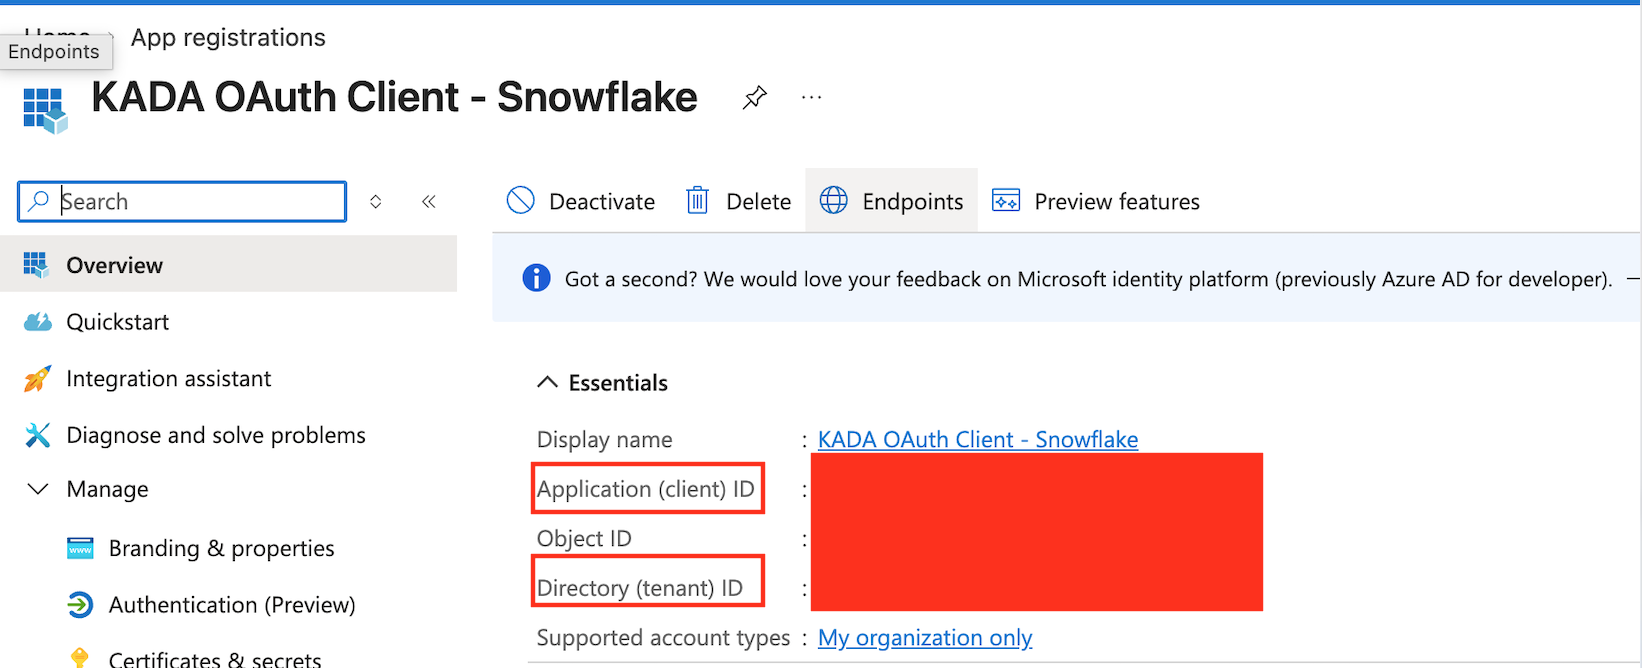
-
Application (client) identifier:
<CLIENT_ID> -
Directory (tenant) identifier:
<TENANT_ID> -
Click on Certificates & secrets and then New client secret. Add a new client secret and copy the value down. Remember to save this value as it will be masked next time we view this page.
-
Click API Permissions and then Add a Permission.
-
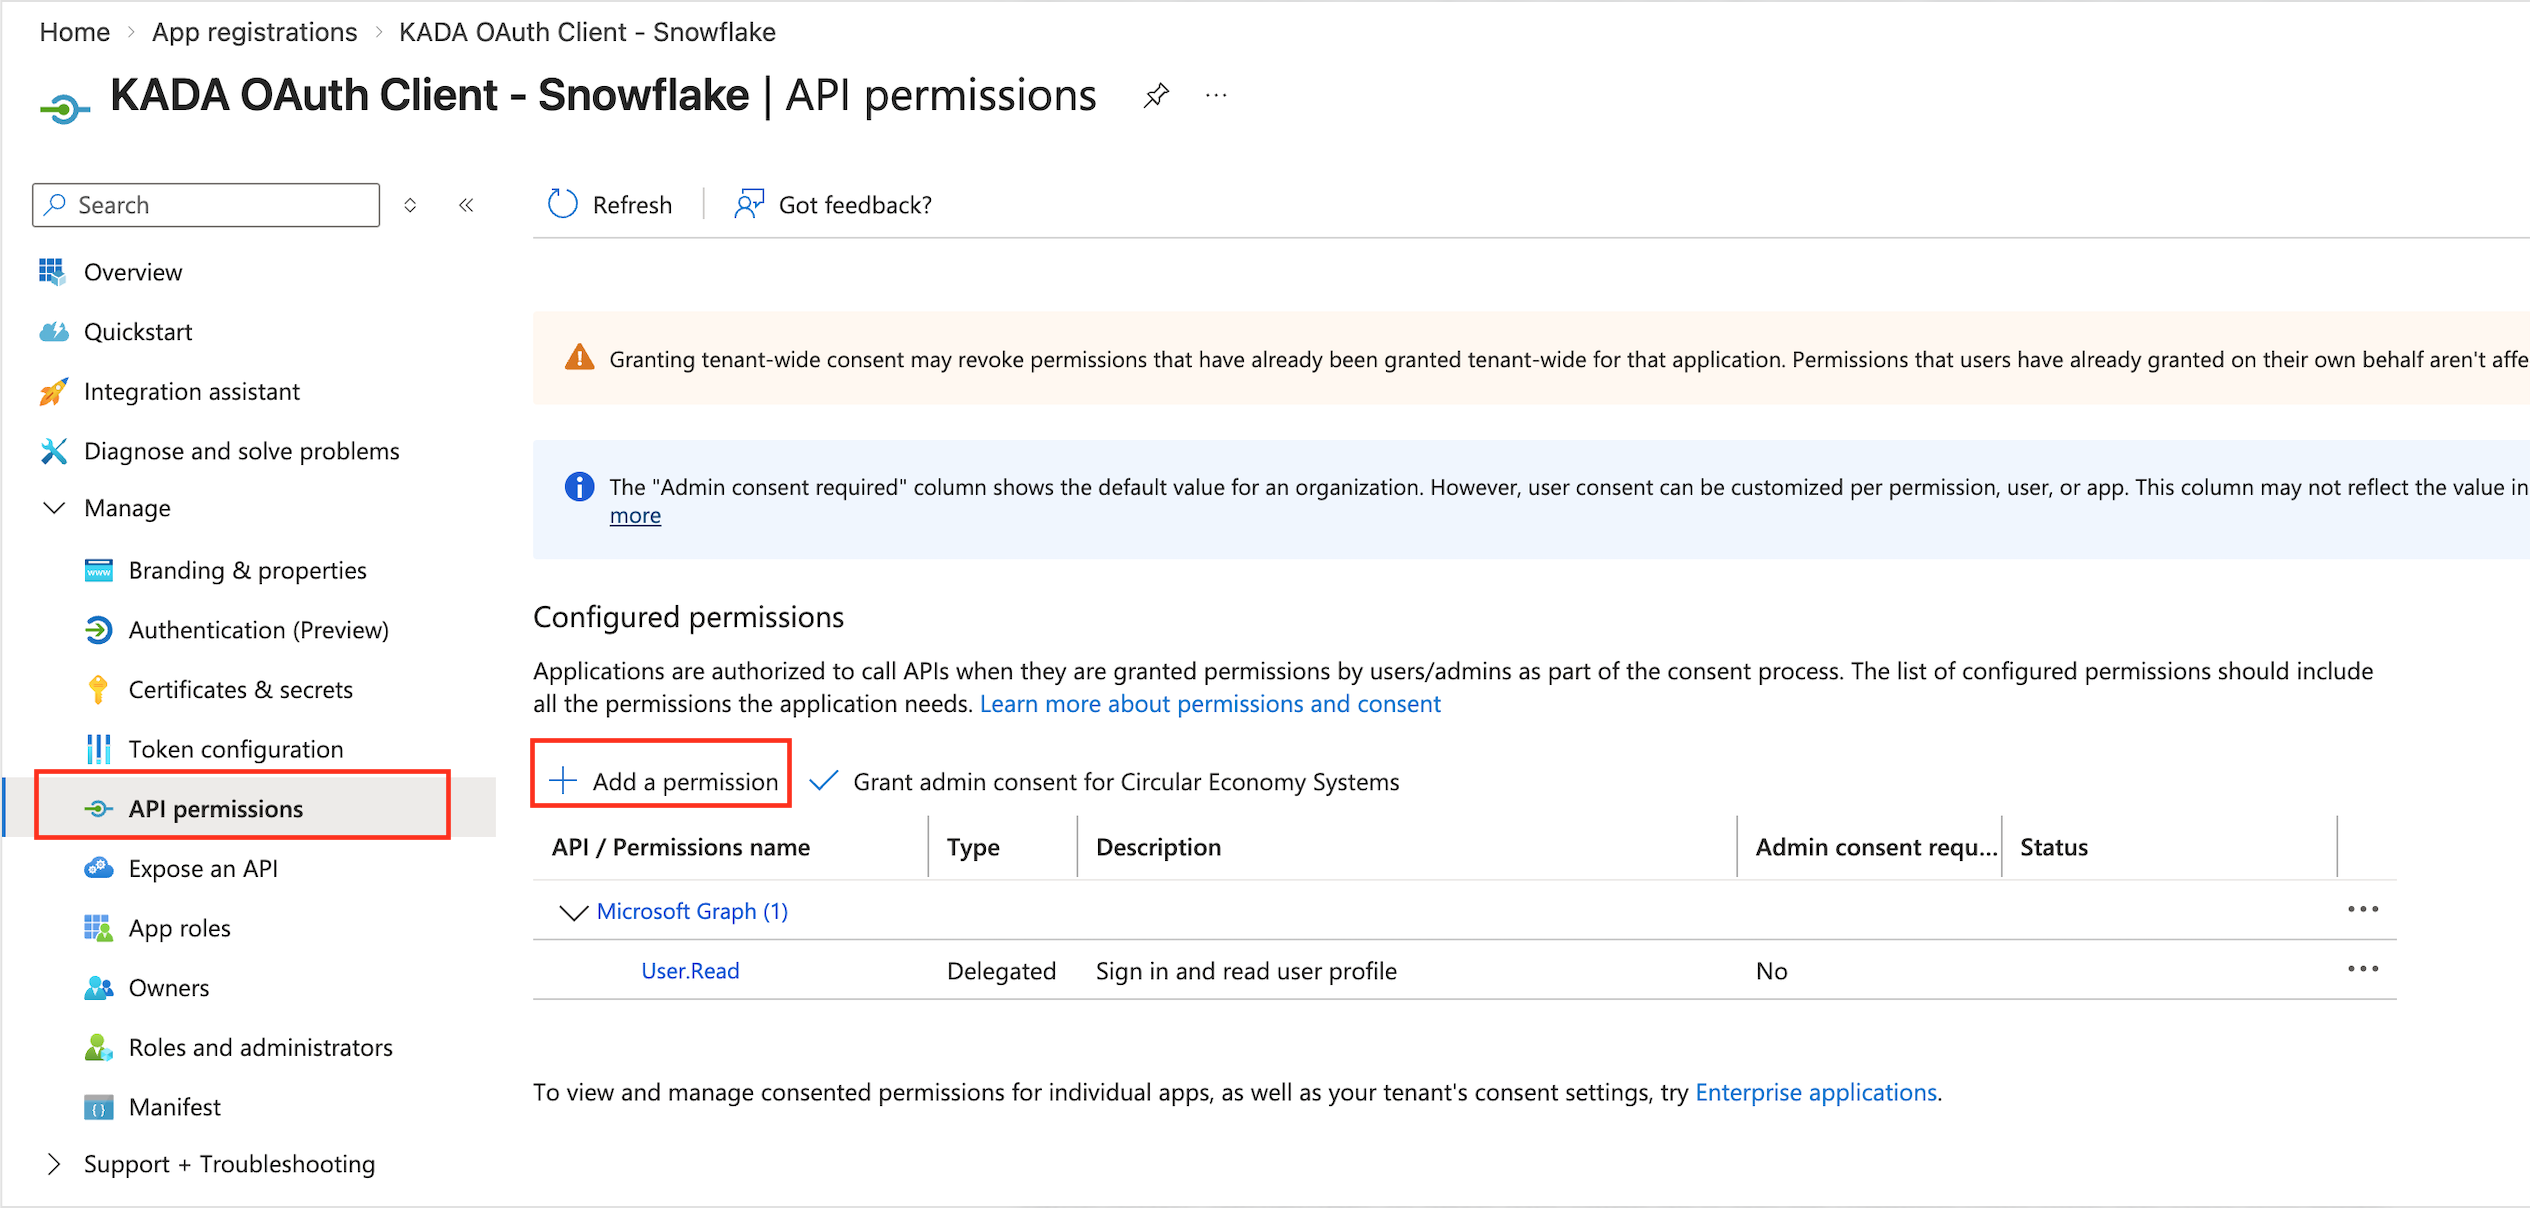
Select APIs my organization uses and search for the OAuth Resource created in Step 1.
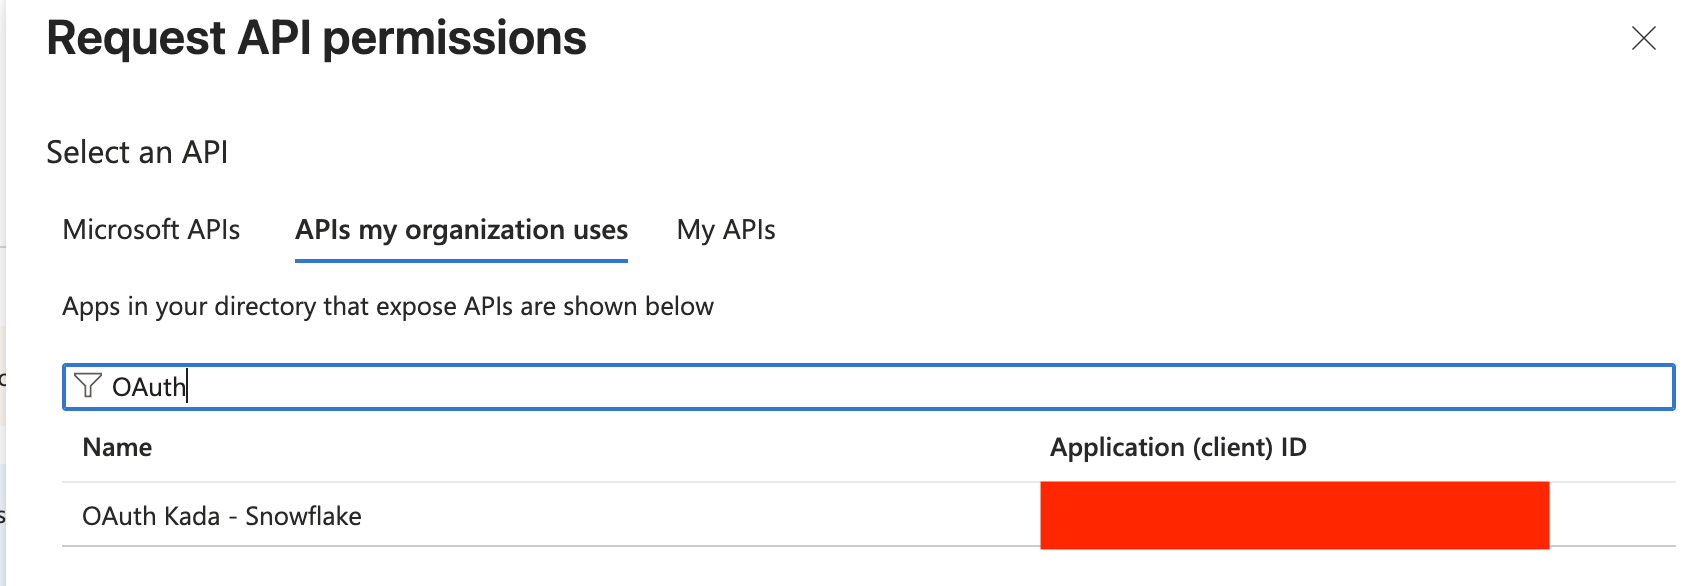
-
Tick the check box below permissions and the scope permission (App role created in Step 1)

-
Select Grant Admin Consent and then Yes
3. Request and decode the OAuth Access Token
Use this step to manually request a token from Entra. When using a 3rd party application as the client, this is typically not needed and a step the client application will perform transparently.
3.1. Request the OAuth Access Token
-
Prepare the CURL command to request the Access Token using the CC grant i.e. credentials of the client.
curl -X POST -H "Content-Type: application/x-www-form-urlencoded;charset=UTF-8" \ --data-urlencode "client_id=<Client_ID>" \ --data-urlencode "client_secret=<Client_Secret>" \ --data-urlencode "grant_type=client_credentials" \ --data-urlencode "scope=<Scope>/.default" \ '<Token_Endpoint>' -
Execute the command in your terminal, a successful response would be like the below:
{
"token_type":"Bearer",
"expires_in":3599,
"ext_expires_in":3599,
"access_token":"xxxxxx"
}
3.2. Decode the OAuth Access Token
-
Copy the value of the access_token and decode it on an online decoder of your choice (e.g. jwt.ms)
-
Make sure the following attributes from the decoded token match the configuration in Entra.
-
aud = Application ID URI configured in Step 1
-
roles = App role configured in Step 1
4. Create an External OAuth Security Integration in Snowflake
You can now configure the Snowflake account to trust and accept the OAuth Access token generated in Step 3.
AZURE_AD_ISSUER: https://sts.windows.net/<Entra_Tenant_ID>/
AUDIENCE: api value from Step 1.3
AZURE_AD_JWS_KEY_ENDPOINT: https://login.microsoftonline.com/<Entra_Tenant_ID>/discovery/v2.0/keys
create security integration EXTERNAL_OAUTH_AZURE
    type = external_oauth
    enabled = true
    external_oauth_type = azure
    external_oauth_issuer = '<AZURE_AD_ISSUER>'
    external_oauth_jws_keys_url = '<AZURE_AD_JWS_KEY_ENDPOINT>'
    external_oauth_audience_list = ('<AUDIENCE>')
    external_oauth_token_user_mapping_claim = 'sub'
    external_oauth_snowflake_user_mapping_attribute = 'login_name';
Note: EXTERNAL_OAUTH_ISSUER must be unique per security integration. If you already have a Power BI SSO integration, creating a second one with the same issuer (e.g. for an OAuth client app) will fail with: "An integration with the given issuer already exists for this account."
In this case, combine both Power BI and OAuth client app config into a single security integration. If your issuers are different, this doesn't apply.
CREATE OR REPLACE SECURITY INTEGRATION EXTERNAL_OAUTH_AZURE
    TYPE = external_oauth
    ENABLED = true
    EXTERNAL_OAUTH_TYPE = azure
    EXTERNAL_OAUTH_ISSUER = 'https://sts.windows.net/xxxx/'
    EXTERNAL_OAUTH_JWS_KEYS_URL = (
        'https://login.microsoftonline.com/xxxx/discovery/v2.0/keys', --For OAuth Client App
        'https://login.windows.net/common/discovery/keys' -- For PowerBI
    )
    EXTERNAL_OAUTH_AUDIENCE_LIST = (
        'api://xxxx',  --For OAuth Client App
        'https://analysis.windows.net/powerbi/connector/Snowflake' -- For PowerBI
    )
    EXTERNAL_OAUTH_TOKEN_USER_MAPPING_CLAIM = ('upn','sub') --upn is for PowerBI, sub is for OAuth Client App
    EXTERNAL_OAUTH_SNOWFLAKE_USER_MAPPING_ATTRIBUTE = 'login_name';
5. Verify the Access Token against the Security Integration
Use the function SYSTEM$VERIFY_EXTERNAL_OAUTH_TOKEN to confirm whether your token will be accepted by your Snowflake account or not.
SELECT SYSTEM$VERIFY_EXTERNAL_OAUTH_TOKEN('<Bearer Access Token>');
A successful validation would look like the below:
Token Validation finished.
{
  "Validation Result":"Passed",
  "Issuer":"https://sts.windows.net/xxxx/",
  "Extracted User claim(s) from token":"<Extracted user>"
}
Finally, assign your Snowflake Kada user a new login name. The LOGIN_NAME should exactly match the Extracted User claim(s) from the token in the above.
ALTER USER KADA_USER SET LOGIN_NAME = '<Extracted user>';
You should now be set up for the Kada Collector to use Entra OAuth to login as KADA_USER.